First-party Cookies: What they are and how to set them up
Posted on 11/17/2023
Reviewed by Arnt Eriksen updated at 11/28/2023
Introduction
Have you been asking yourself "What are first party cookies?" lately? This article will answer this question, explain the difference between first and third party cookies, and tell you if you should worry about first party cookies going away.
There are two varieties of cookies - first party and third party - and the major distinction between them is in the way they are generated and then utilized, which is frequently dependent on the context.
Third party cookies are created by domains other than the one being visited directly, hence the name third party. Third party server's code used for cross-site tracking, retargeting, and ad-serving.
Third party cookies have no direct relationship with you. They are usually advertisement cookies and other tracking cookies that load onto your browser. Despite that it's quite easy to block third party cookies, several major browser creators have announced they will no longer support third-party cookies.
First party cookies are stored by the website that the user is directly visiting.
First-party cookies are small blocks of data created by a web server while the user visits the website.
They are used for collecting analytics data to track users, keeping language settings, and for other tasks that improve user experience.
In some cases, companies and brands may share first party data and this creates Second party cookies.
Second party cookies are cookies that are shared between companies via a data partnership. As an example, a travel company can share visitor data from hotel company.
Step 1: Create an account in Google Tag Manager (GTM)
1. First, you must create a Google Analytics account if you don't already have one.
After that, you can create an account in the easy-to-use JavaScript and HTML tag management system GTM (https://tagmanager.google.com/).
To do this, go to the website linked above and create an account.
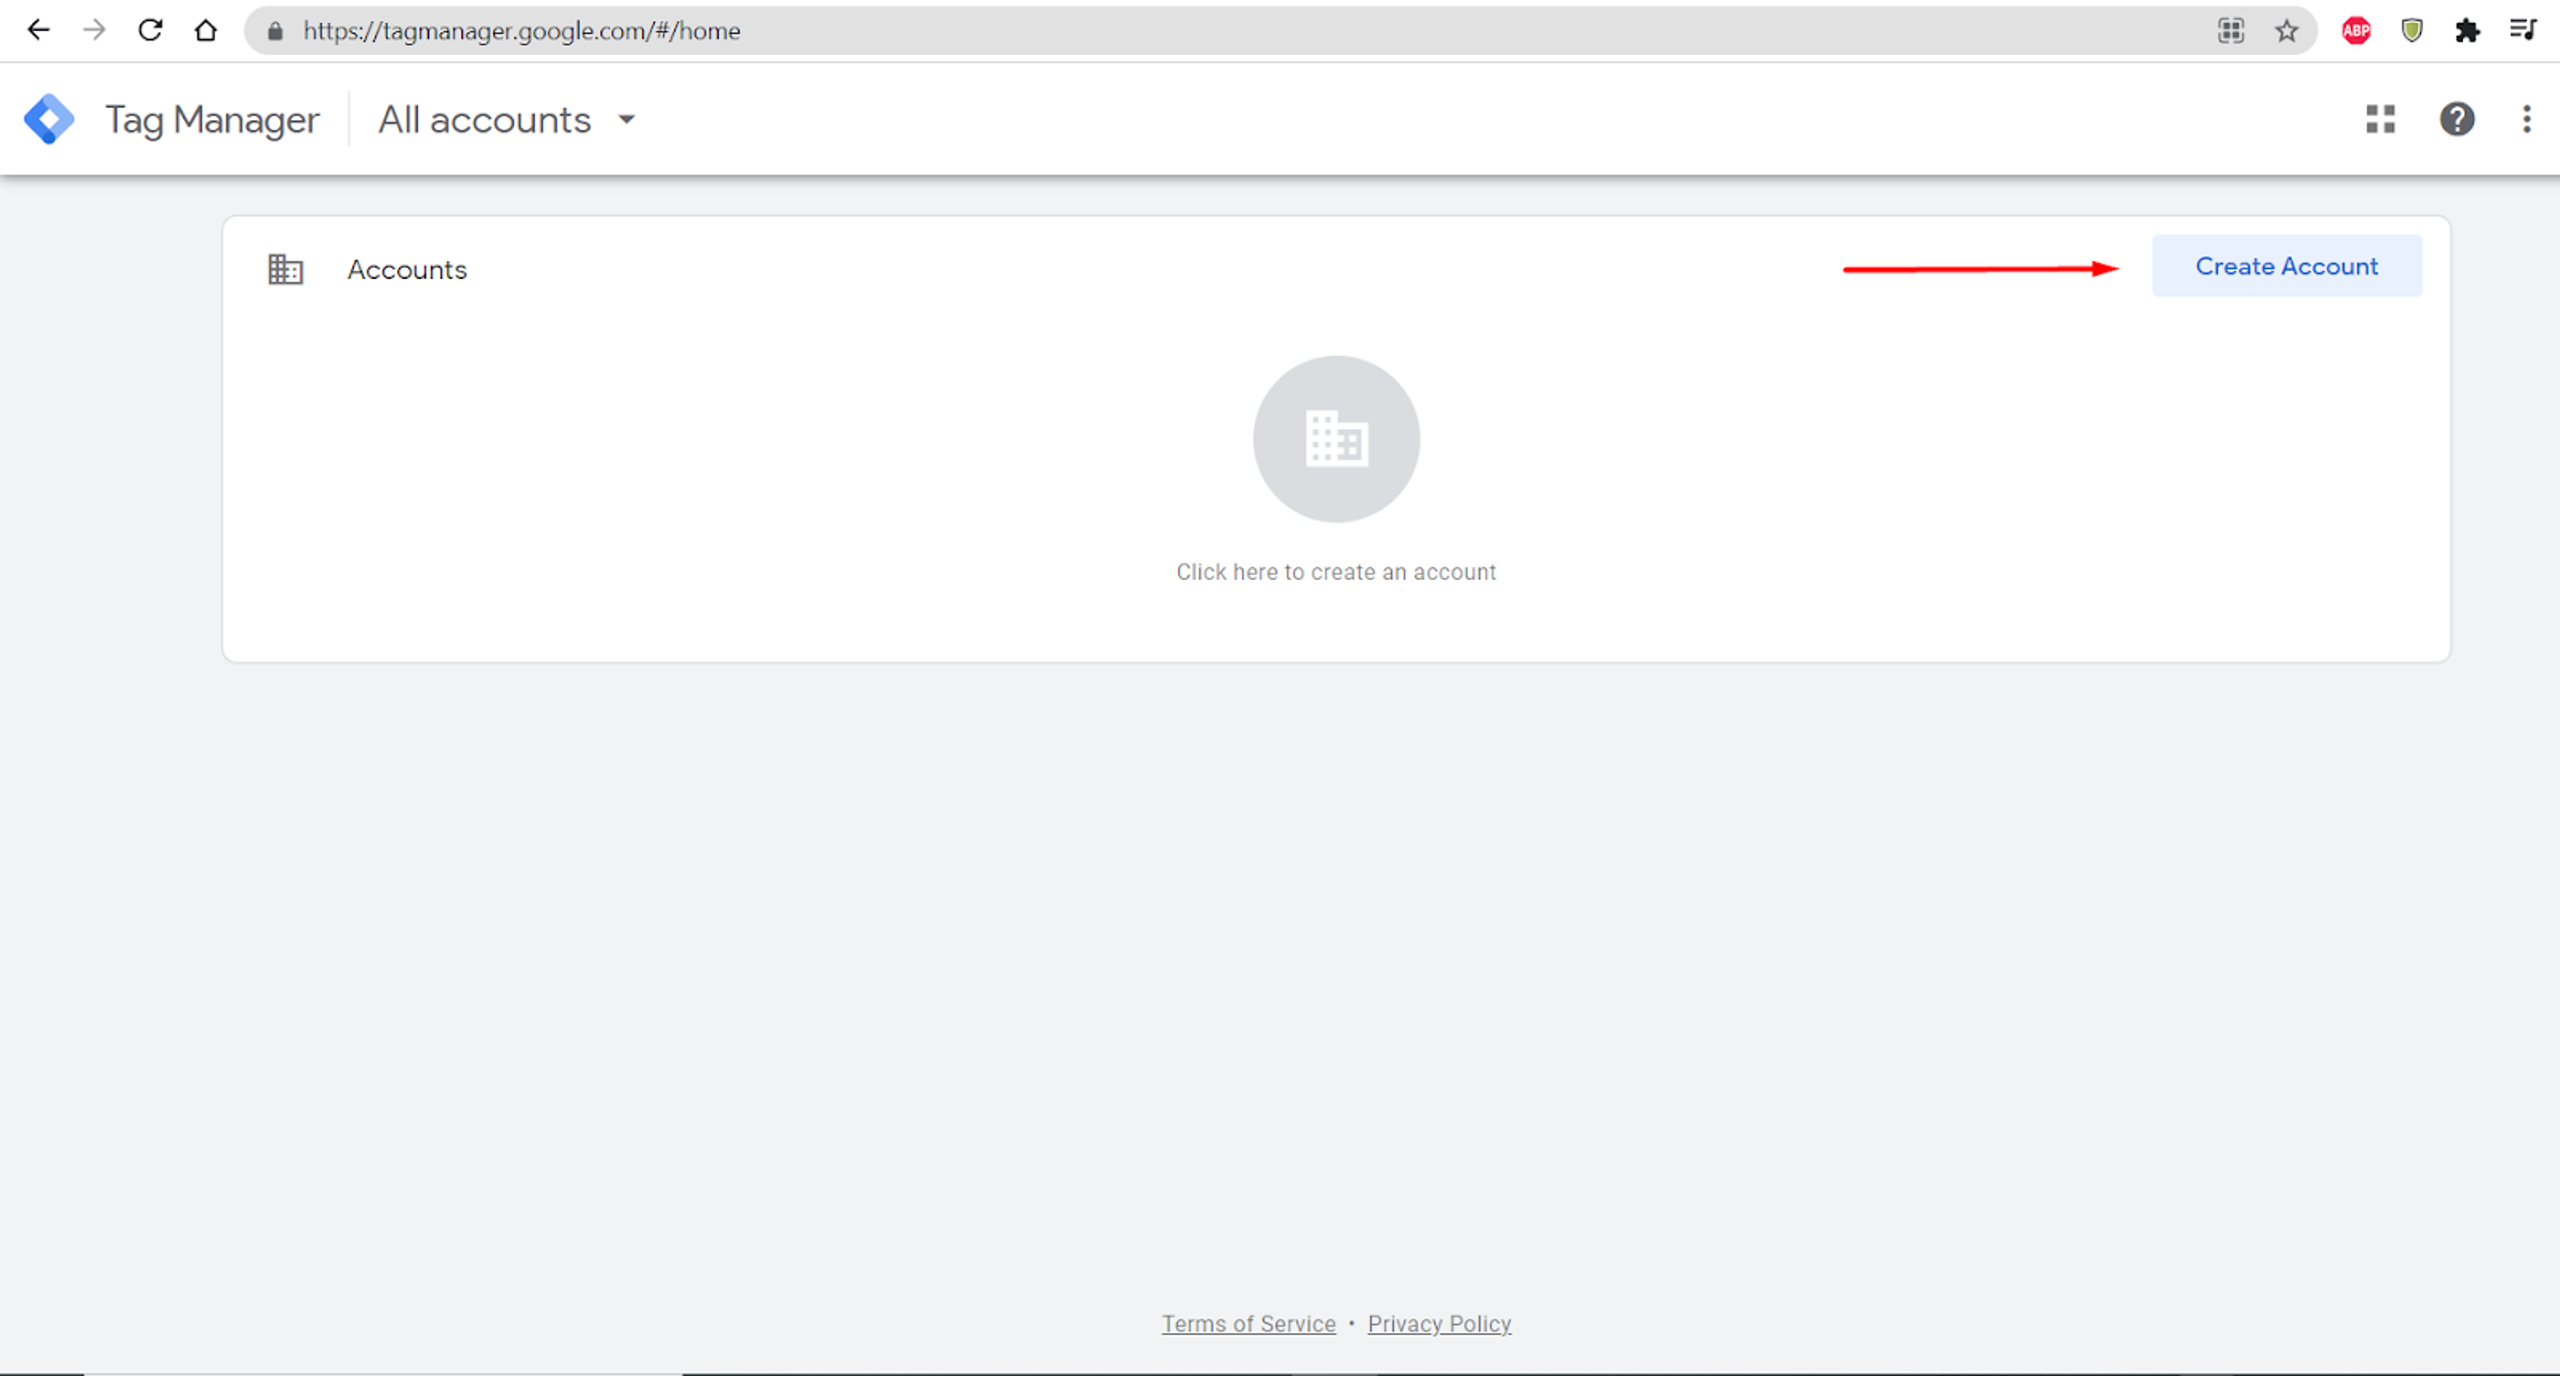
Here, you need to enter your company details:
- Company name;
- Location;
- Container name (we advise naming the container the same way your company is called)
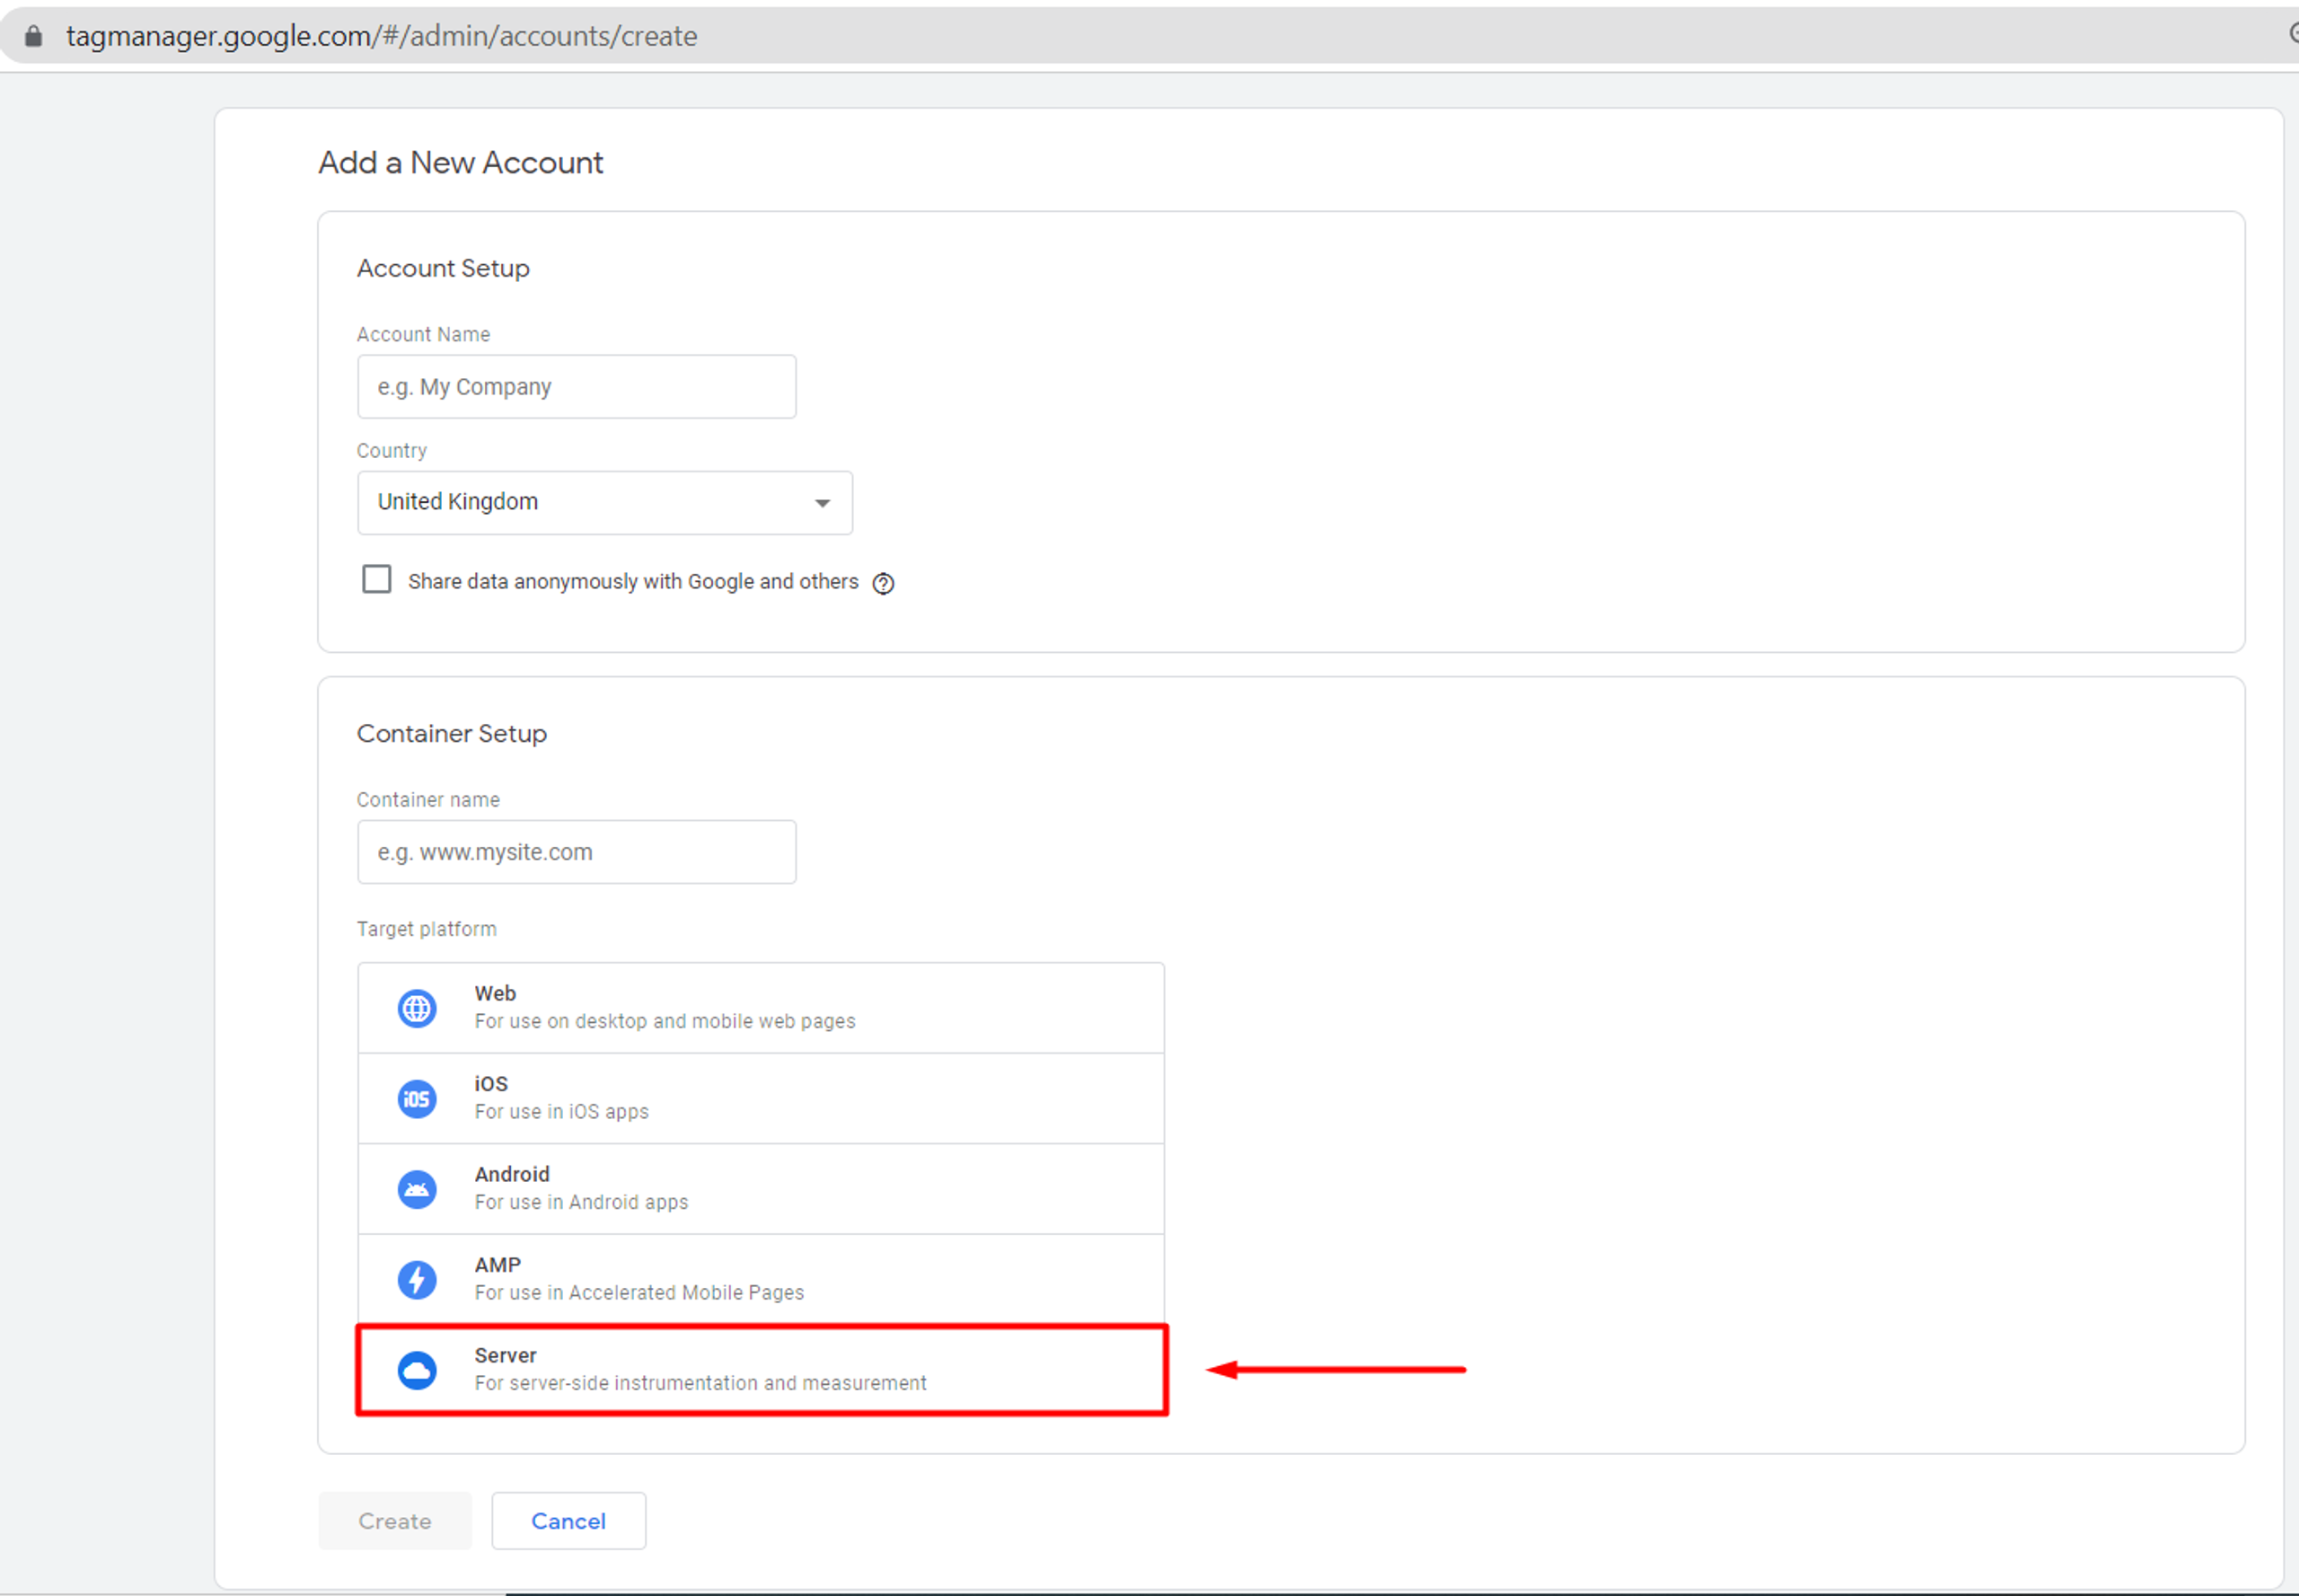
Once you have entered all the information, you have a choice of the target platform.
To set up 1st party cookies, only “Server” is suitable.
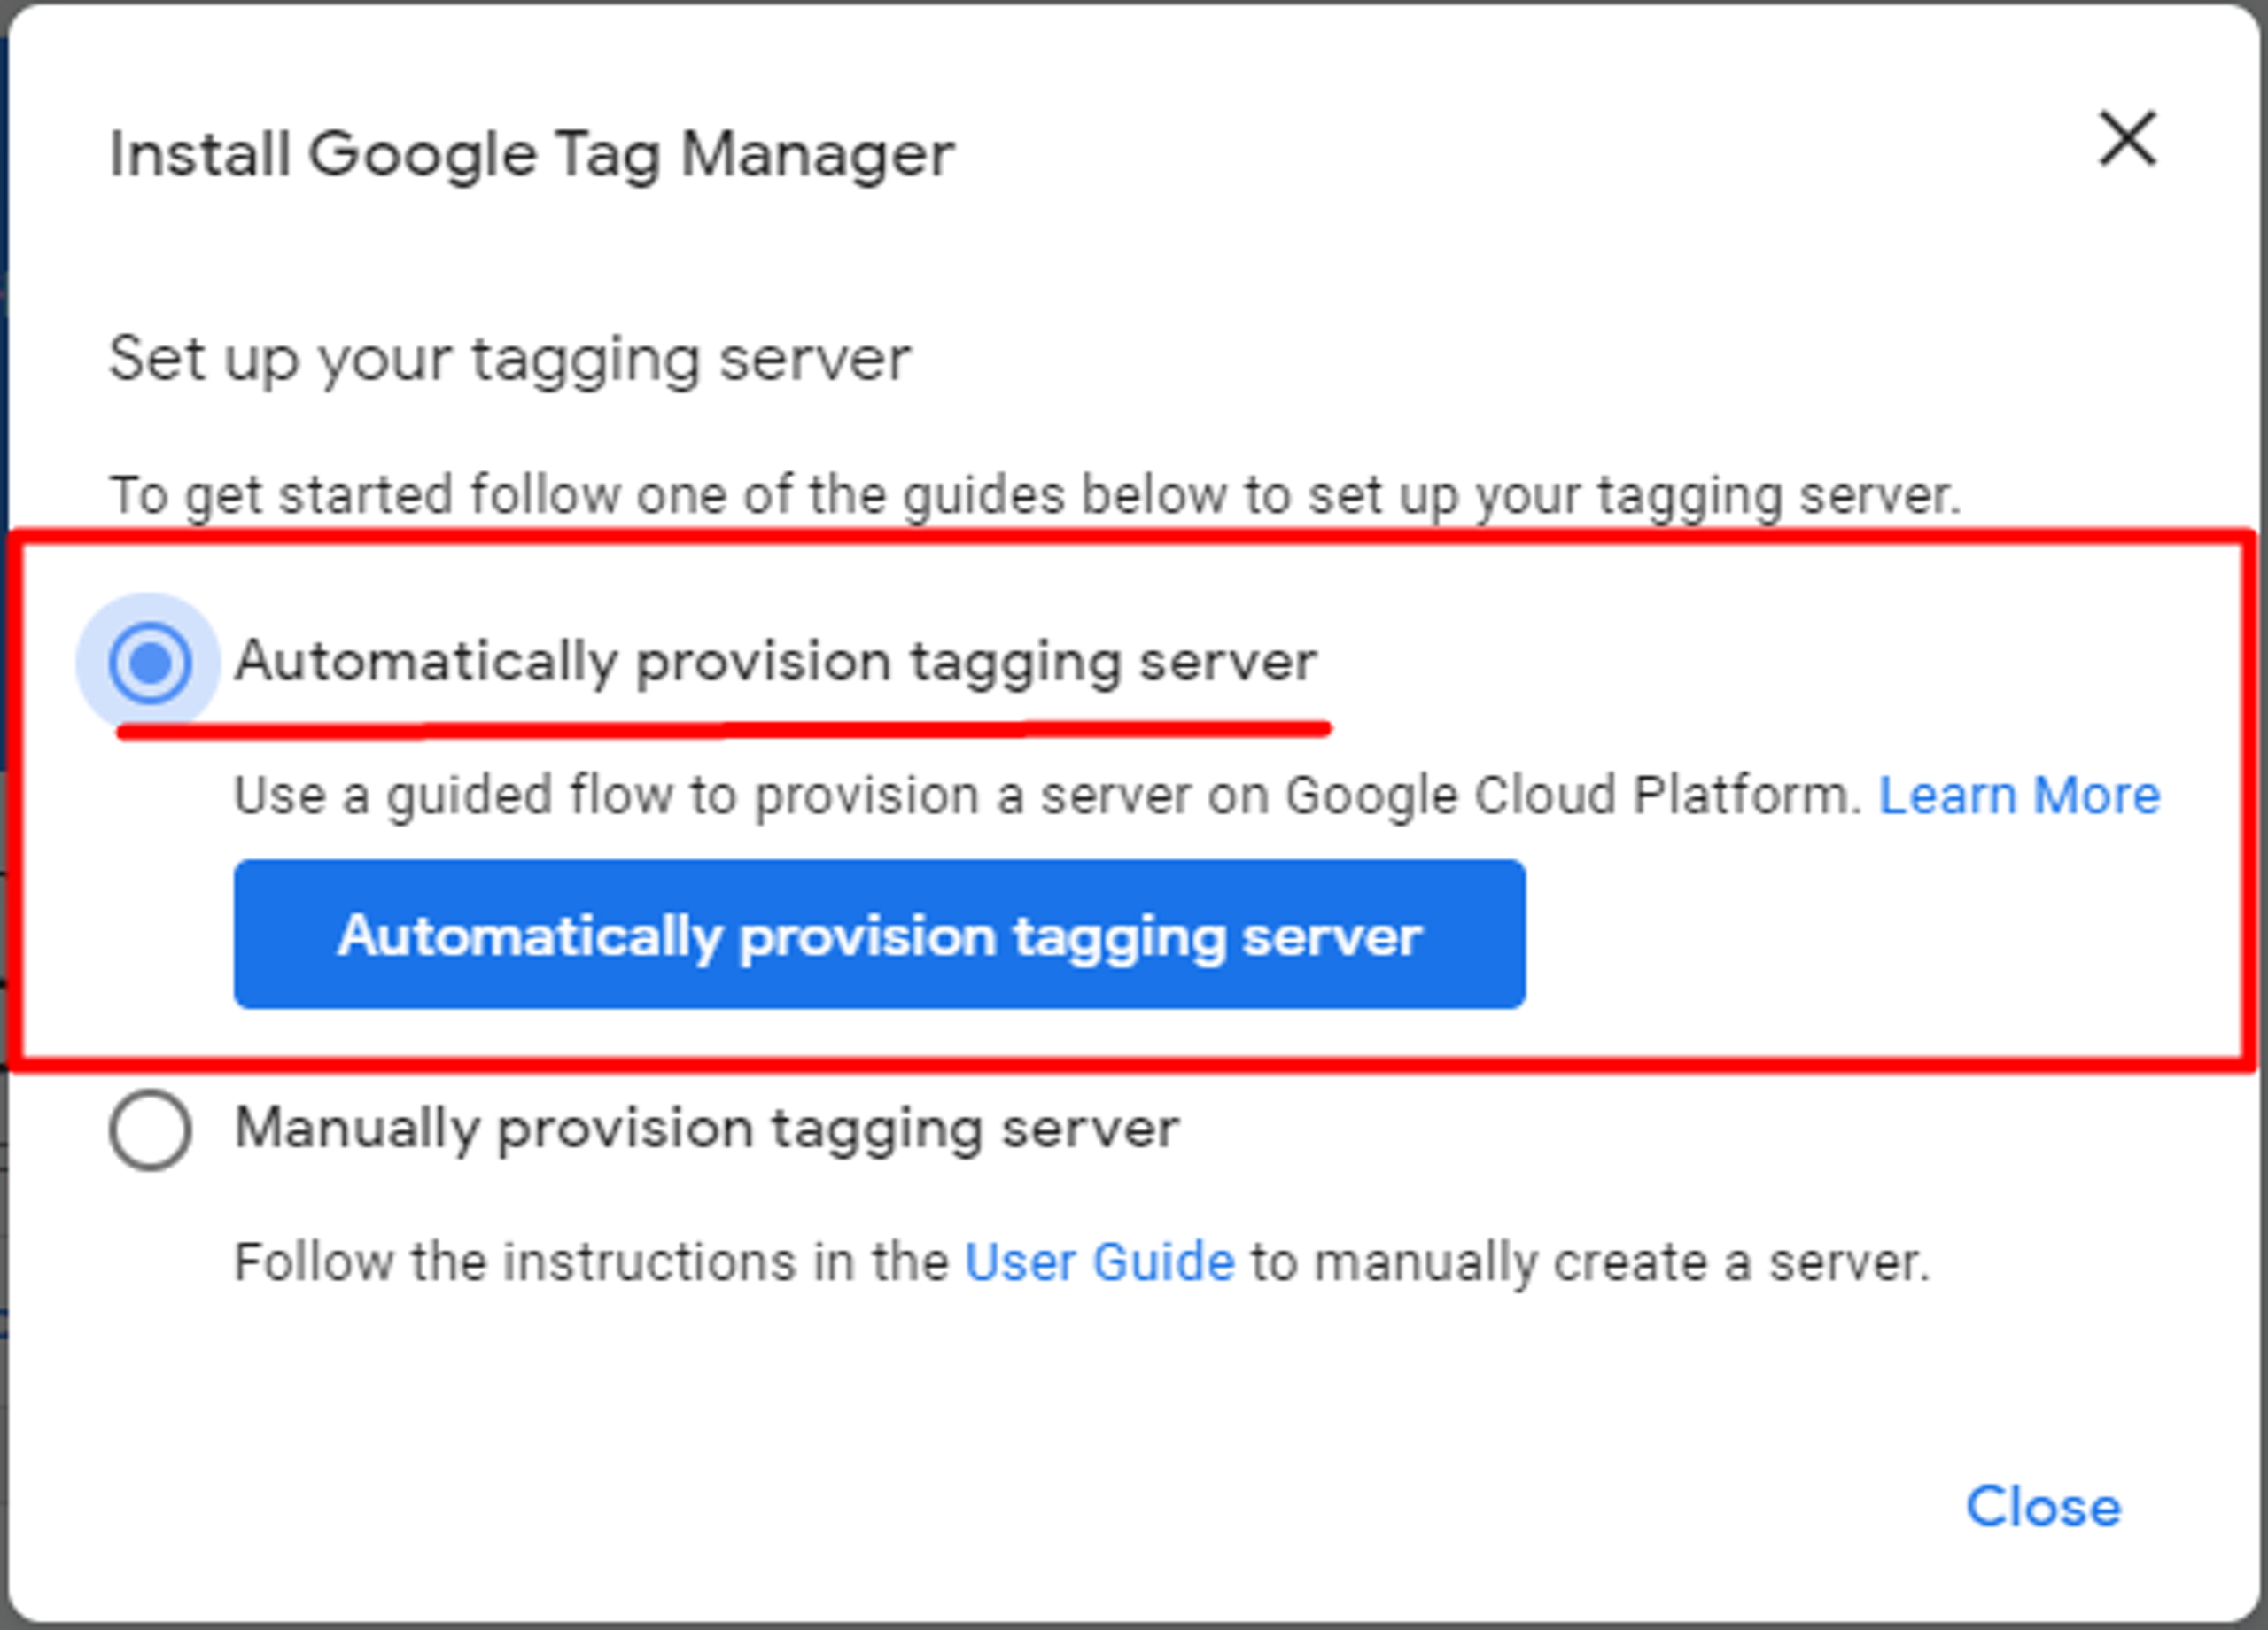
When you create an account, you need to host it somewhere and in this case (see screenshot above) it can be hosted on the Google Cloud Platform. Therefore, you should keep using the automatic provision tagging server.
After you choose the guide, you must click on the “Automatically provision tagging server” button.
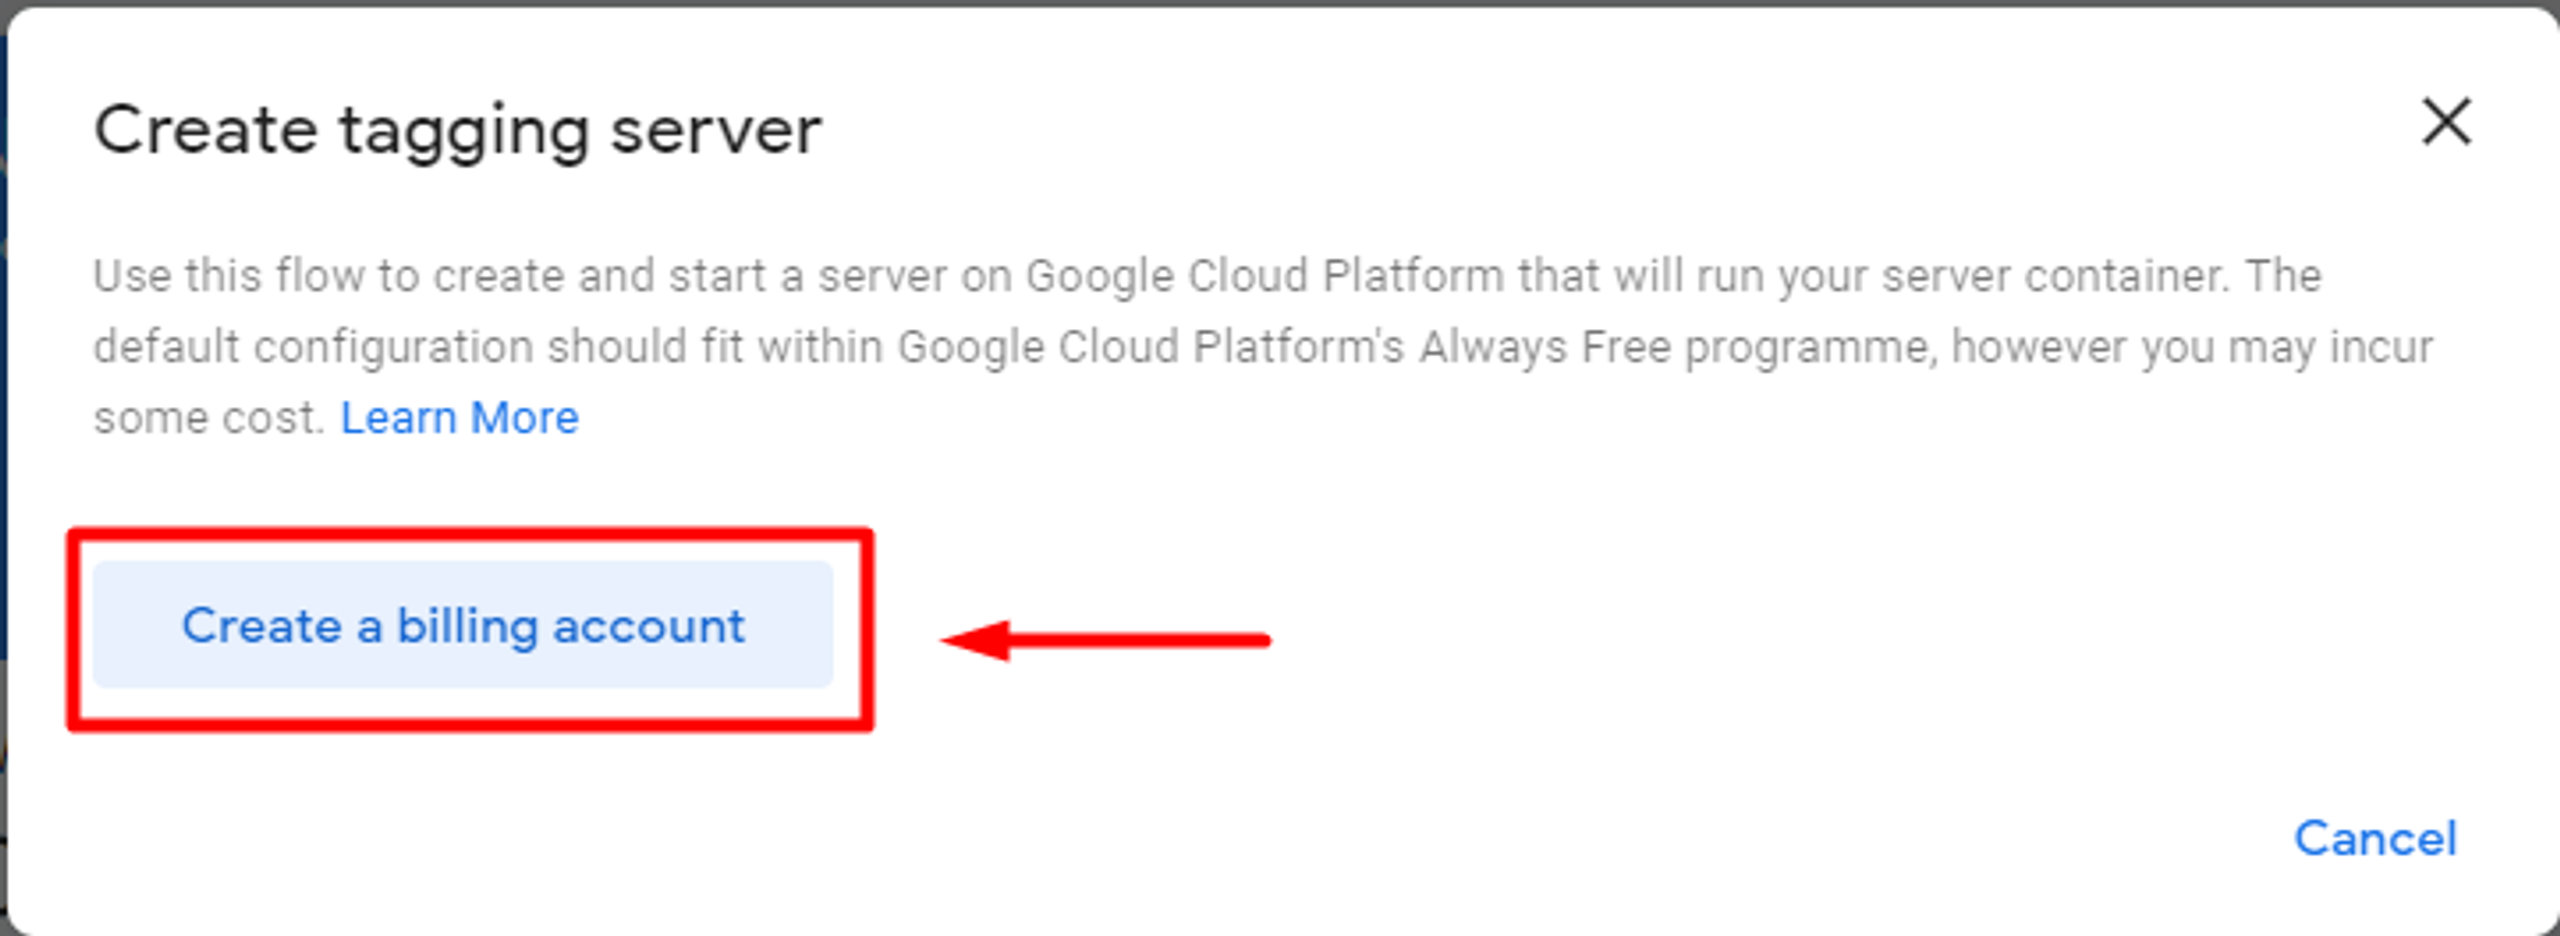
If you have never worked with the Google Cloud Platform before, you will not have any billing accounts, therefore you must create a new one.
Click on the “Create a billing account” button to create it.
You will then be asked to enter your billing information.
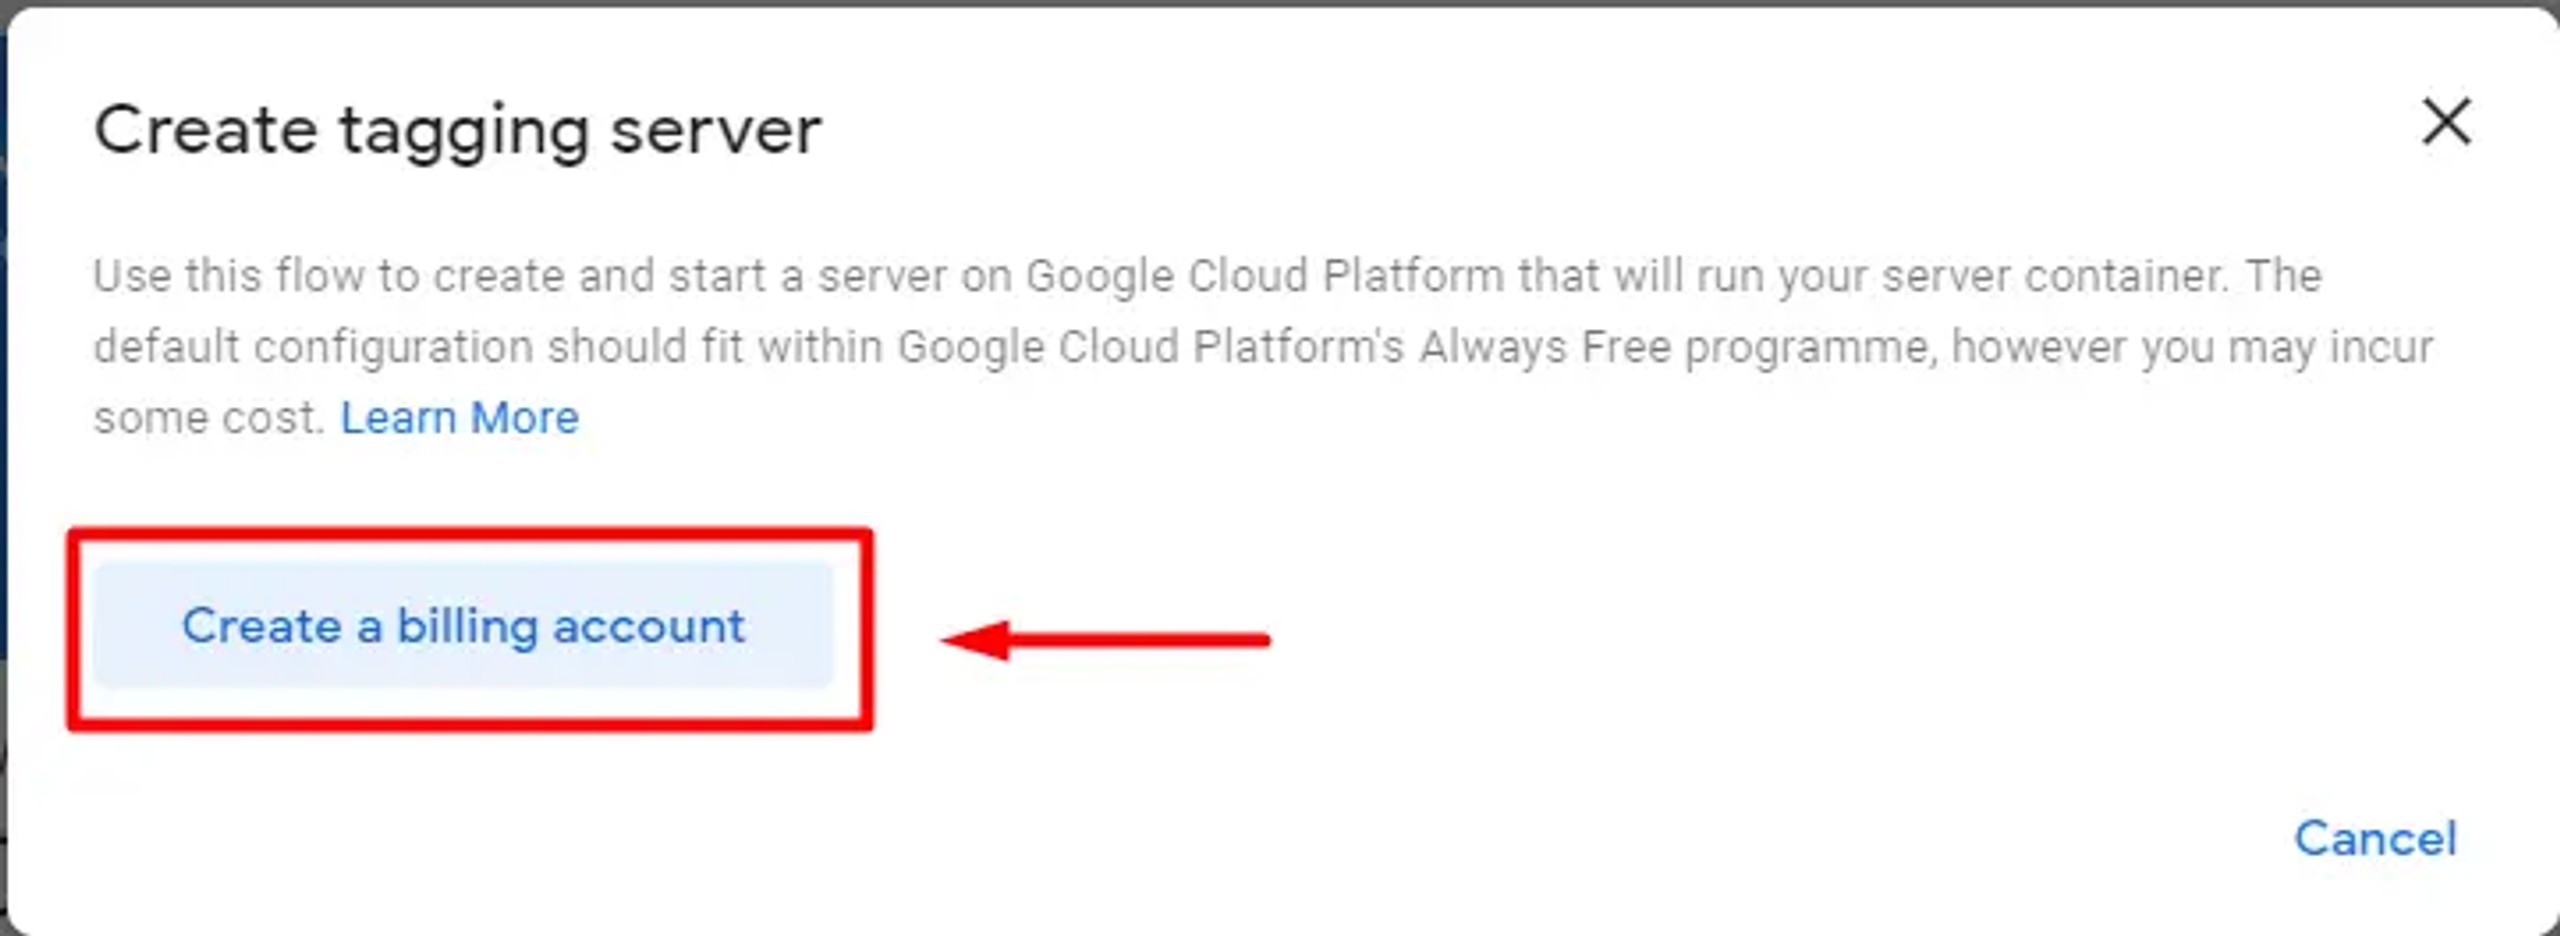
Once you complete your billing account registration, you will be asked to choose which billing account you want to use.
Step 2: Set up Client and create a tag
1. If you want to collect data in your GTM container and start working with it, first you need to gather it, which you can do with a so-called Client.
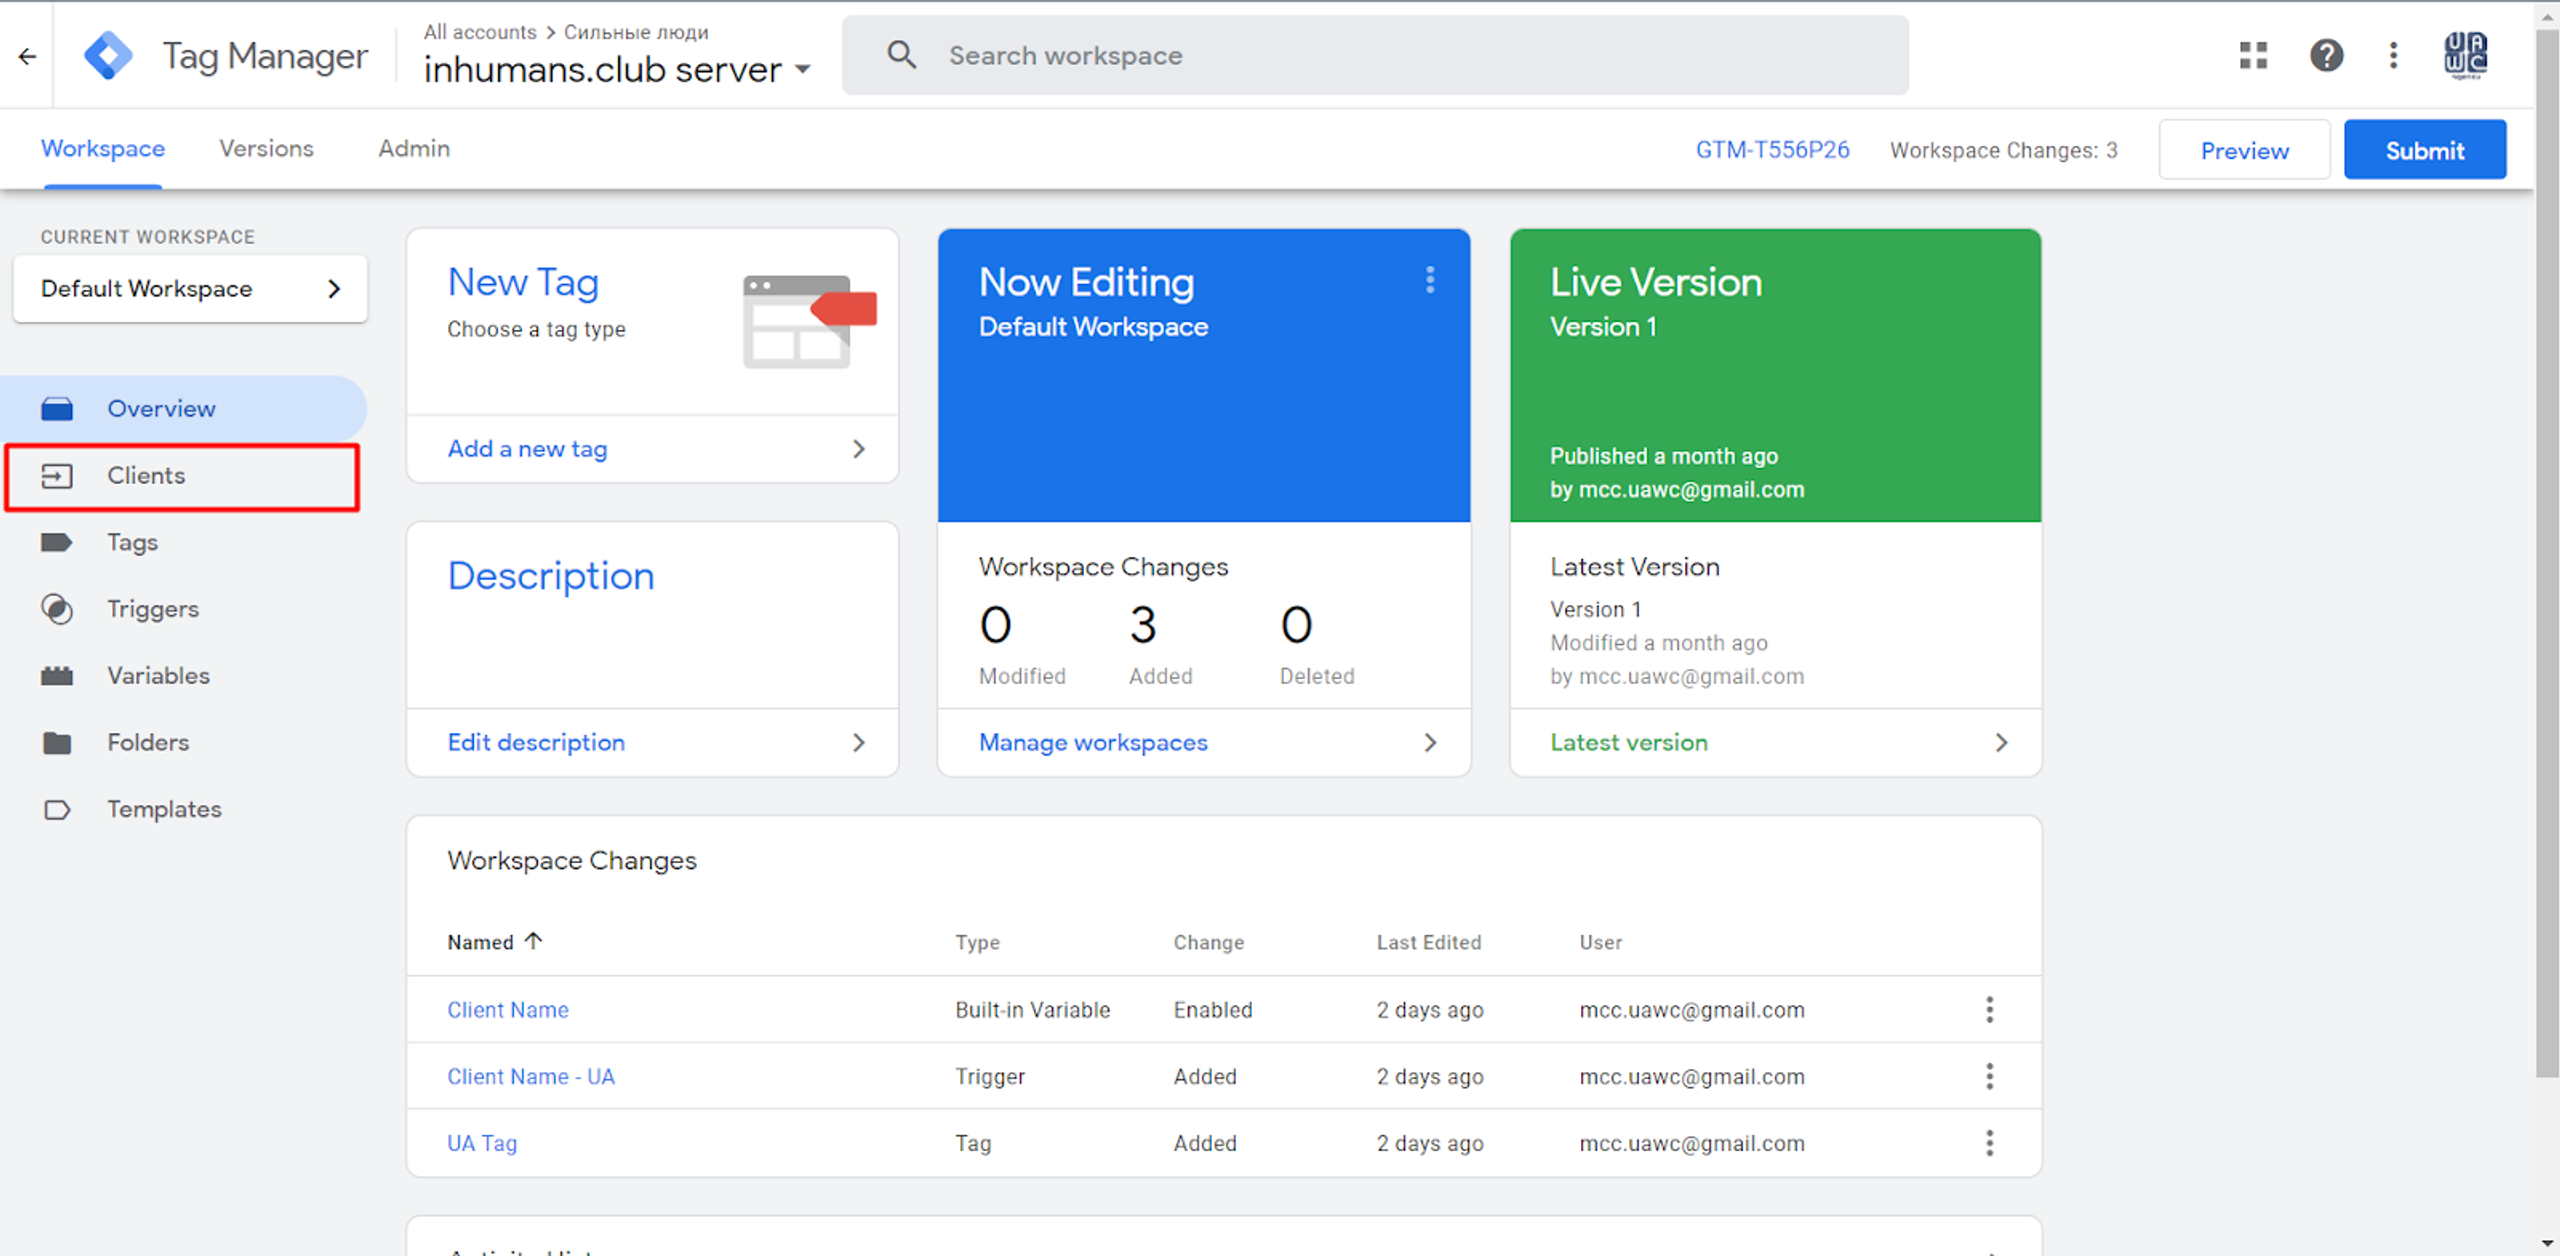
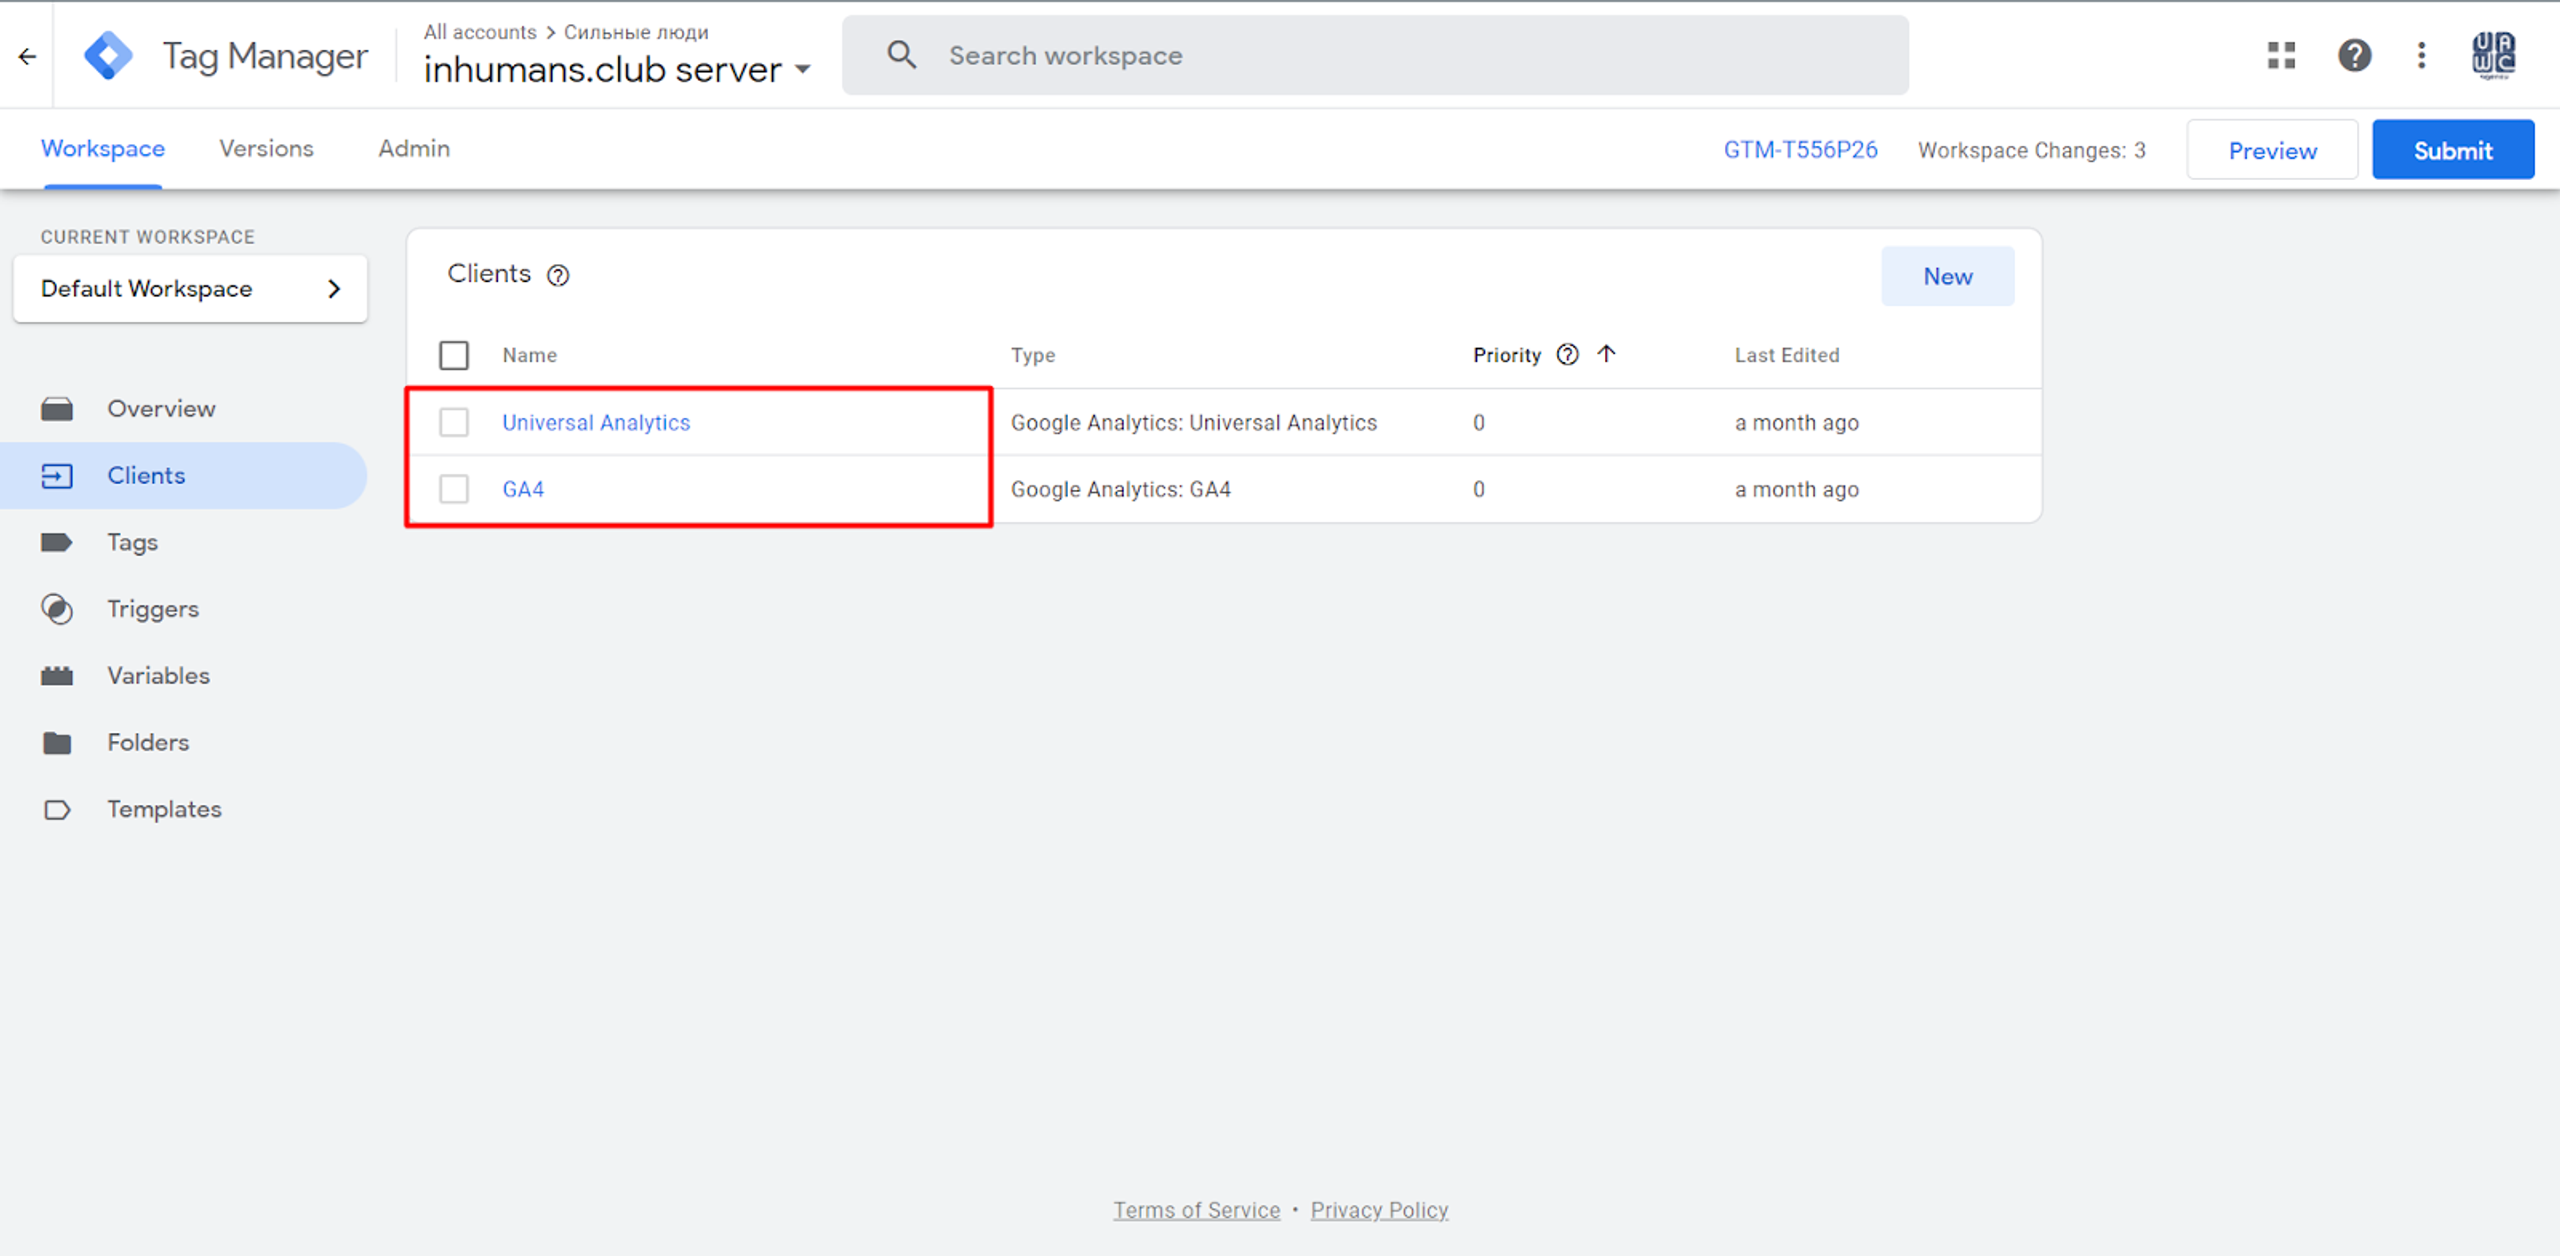
If you go to the Clients section in your GTM account, you will already see two pre-created Clients, so there is no need to create a new Client right here because you are already using it.
2. After that, you must create a Tag that will send the data that was received by the client, which will be sent further to the Google Analytics server.
But before this, you must create a new Variable that will be used in the Tag.
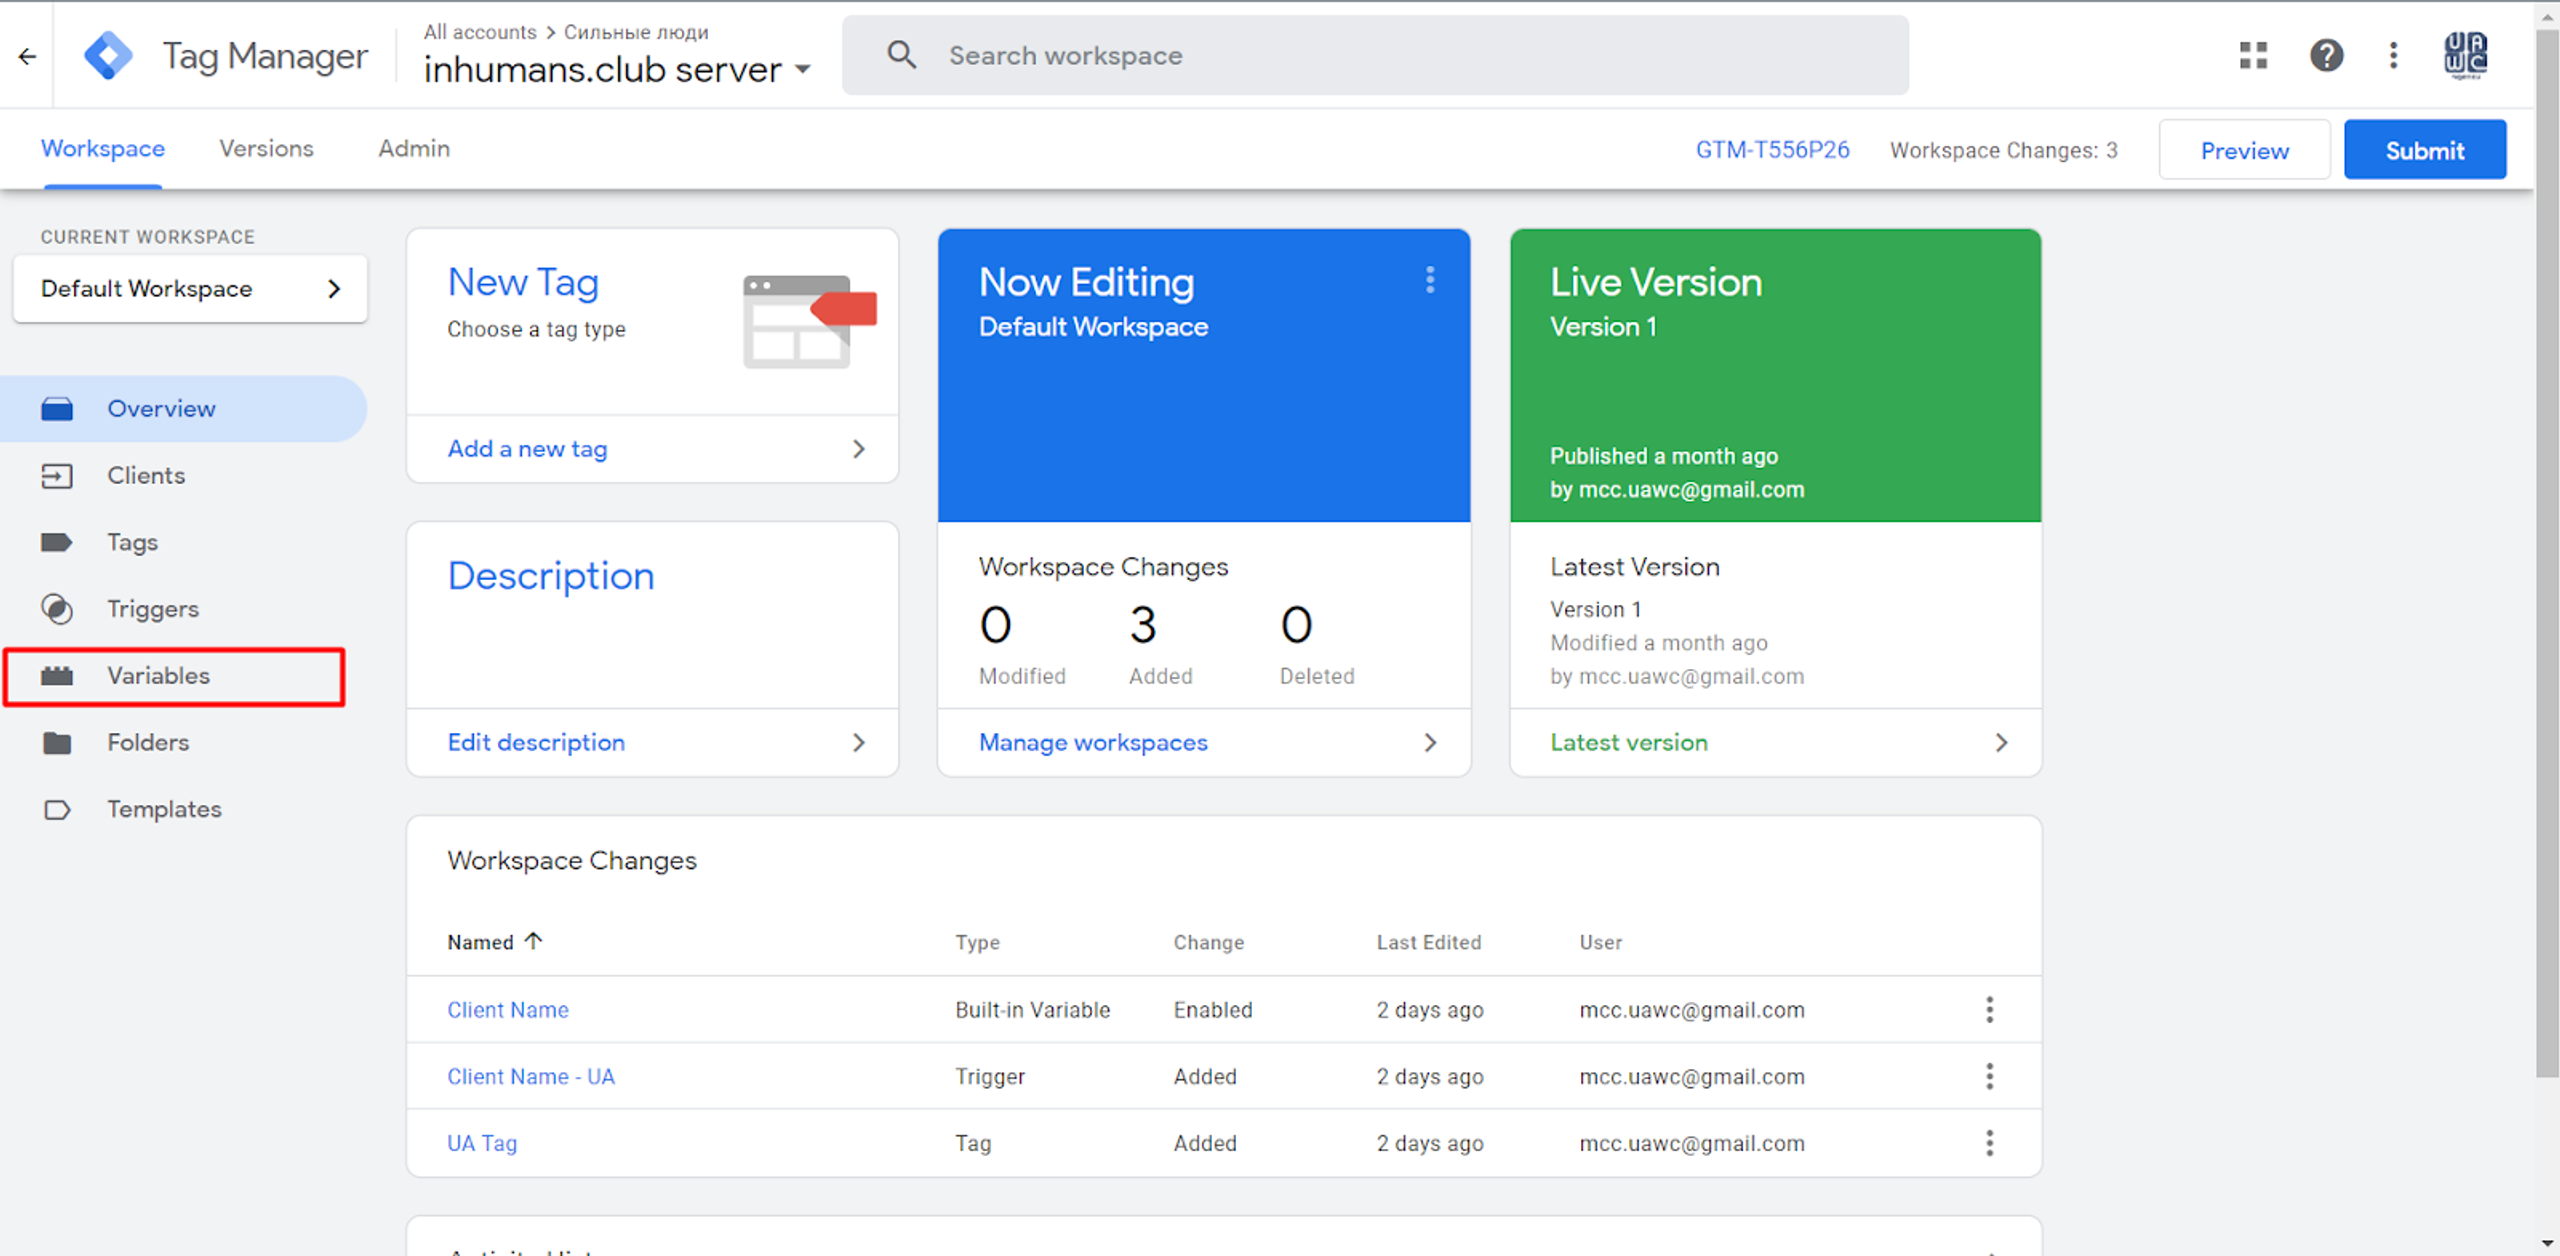
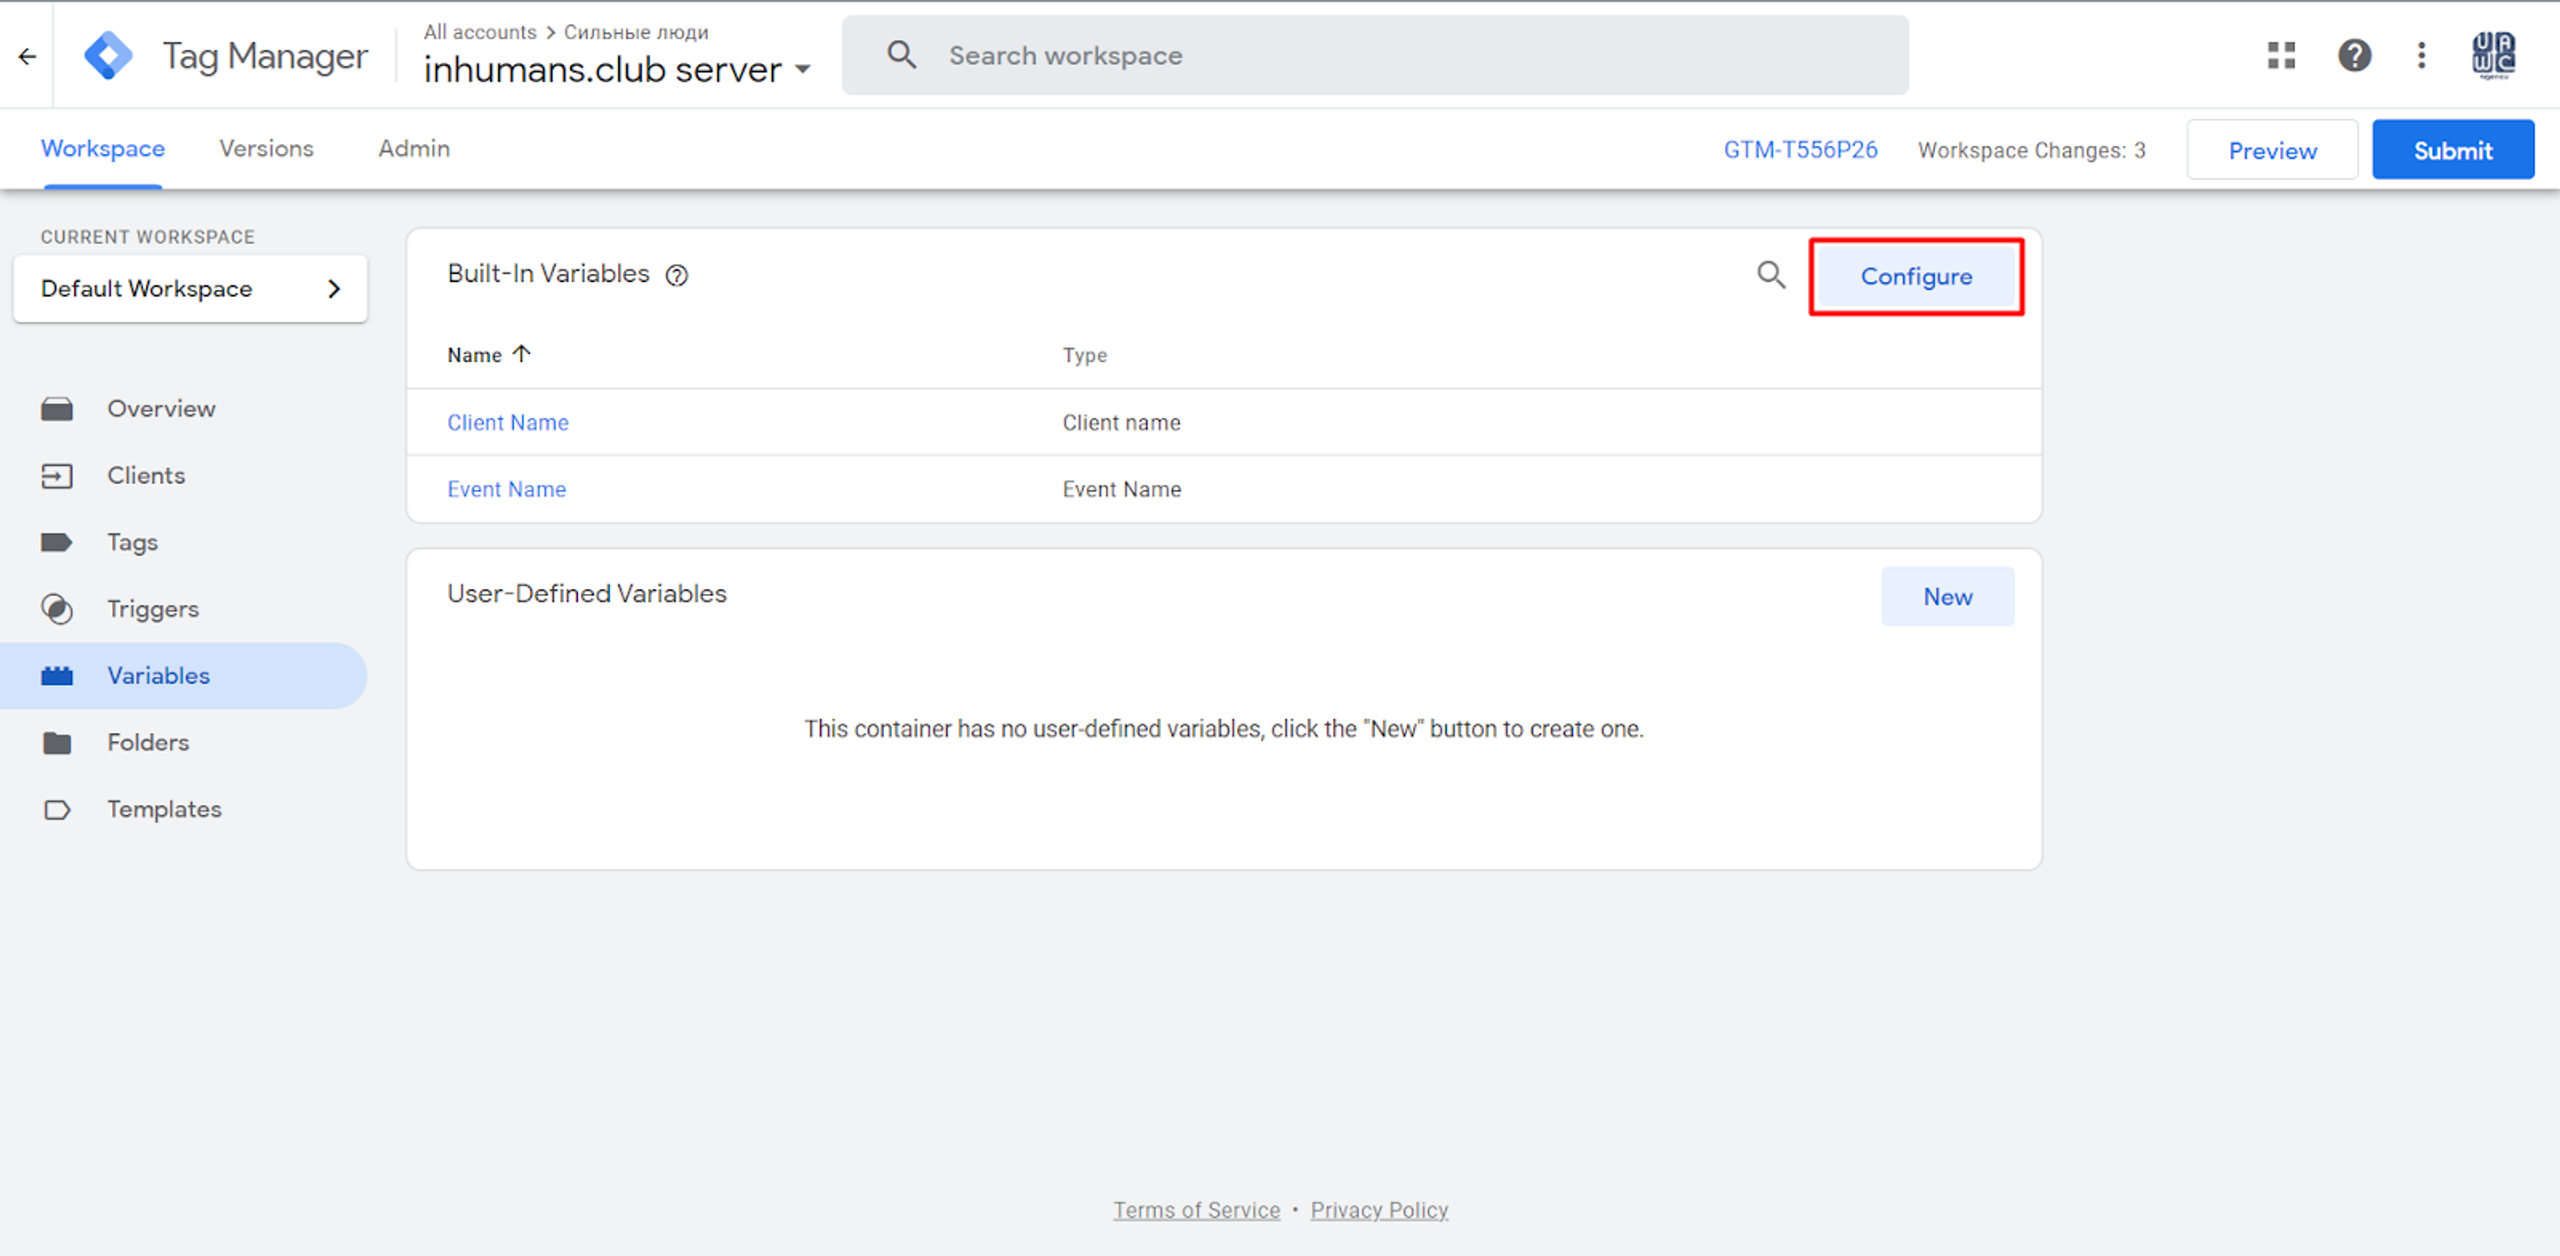
We choose a Variable called Client Name. That way, we can filter certain requests and work only with the requests that were handled by a certain client.
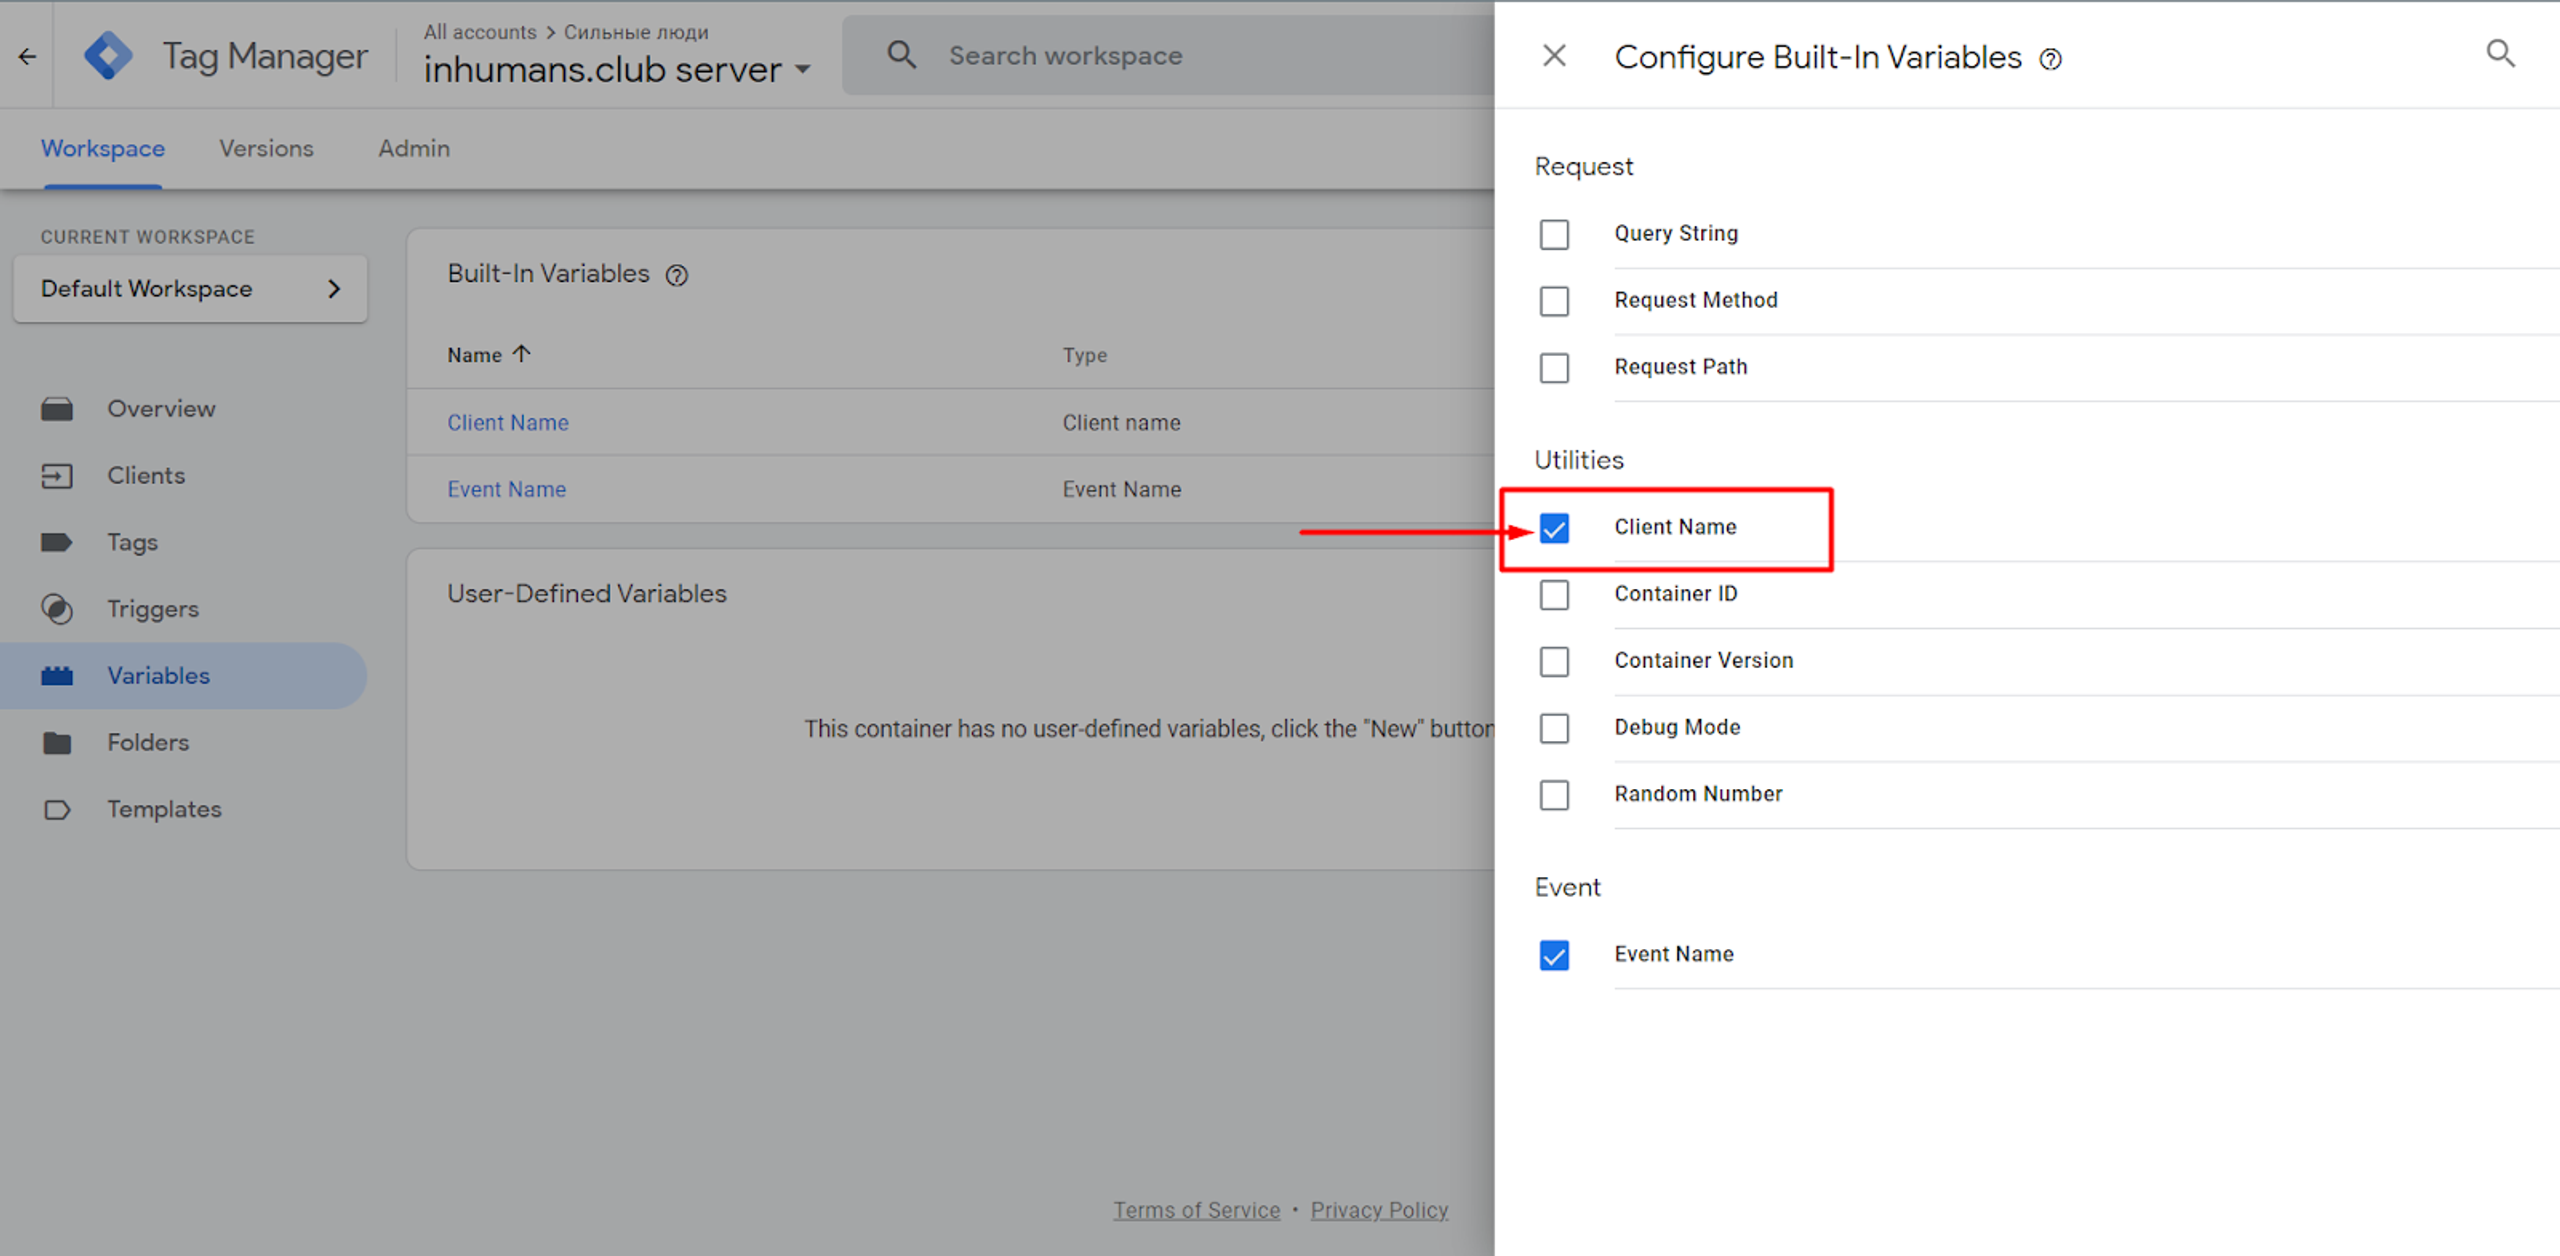
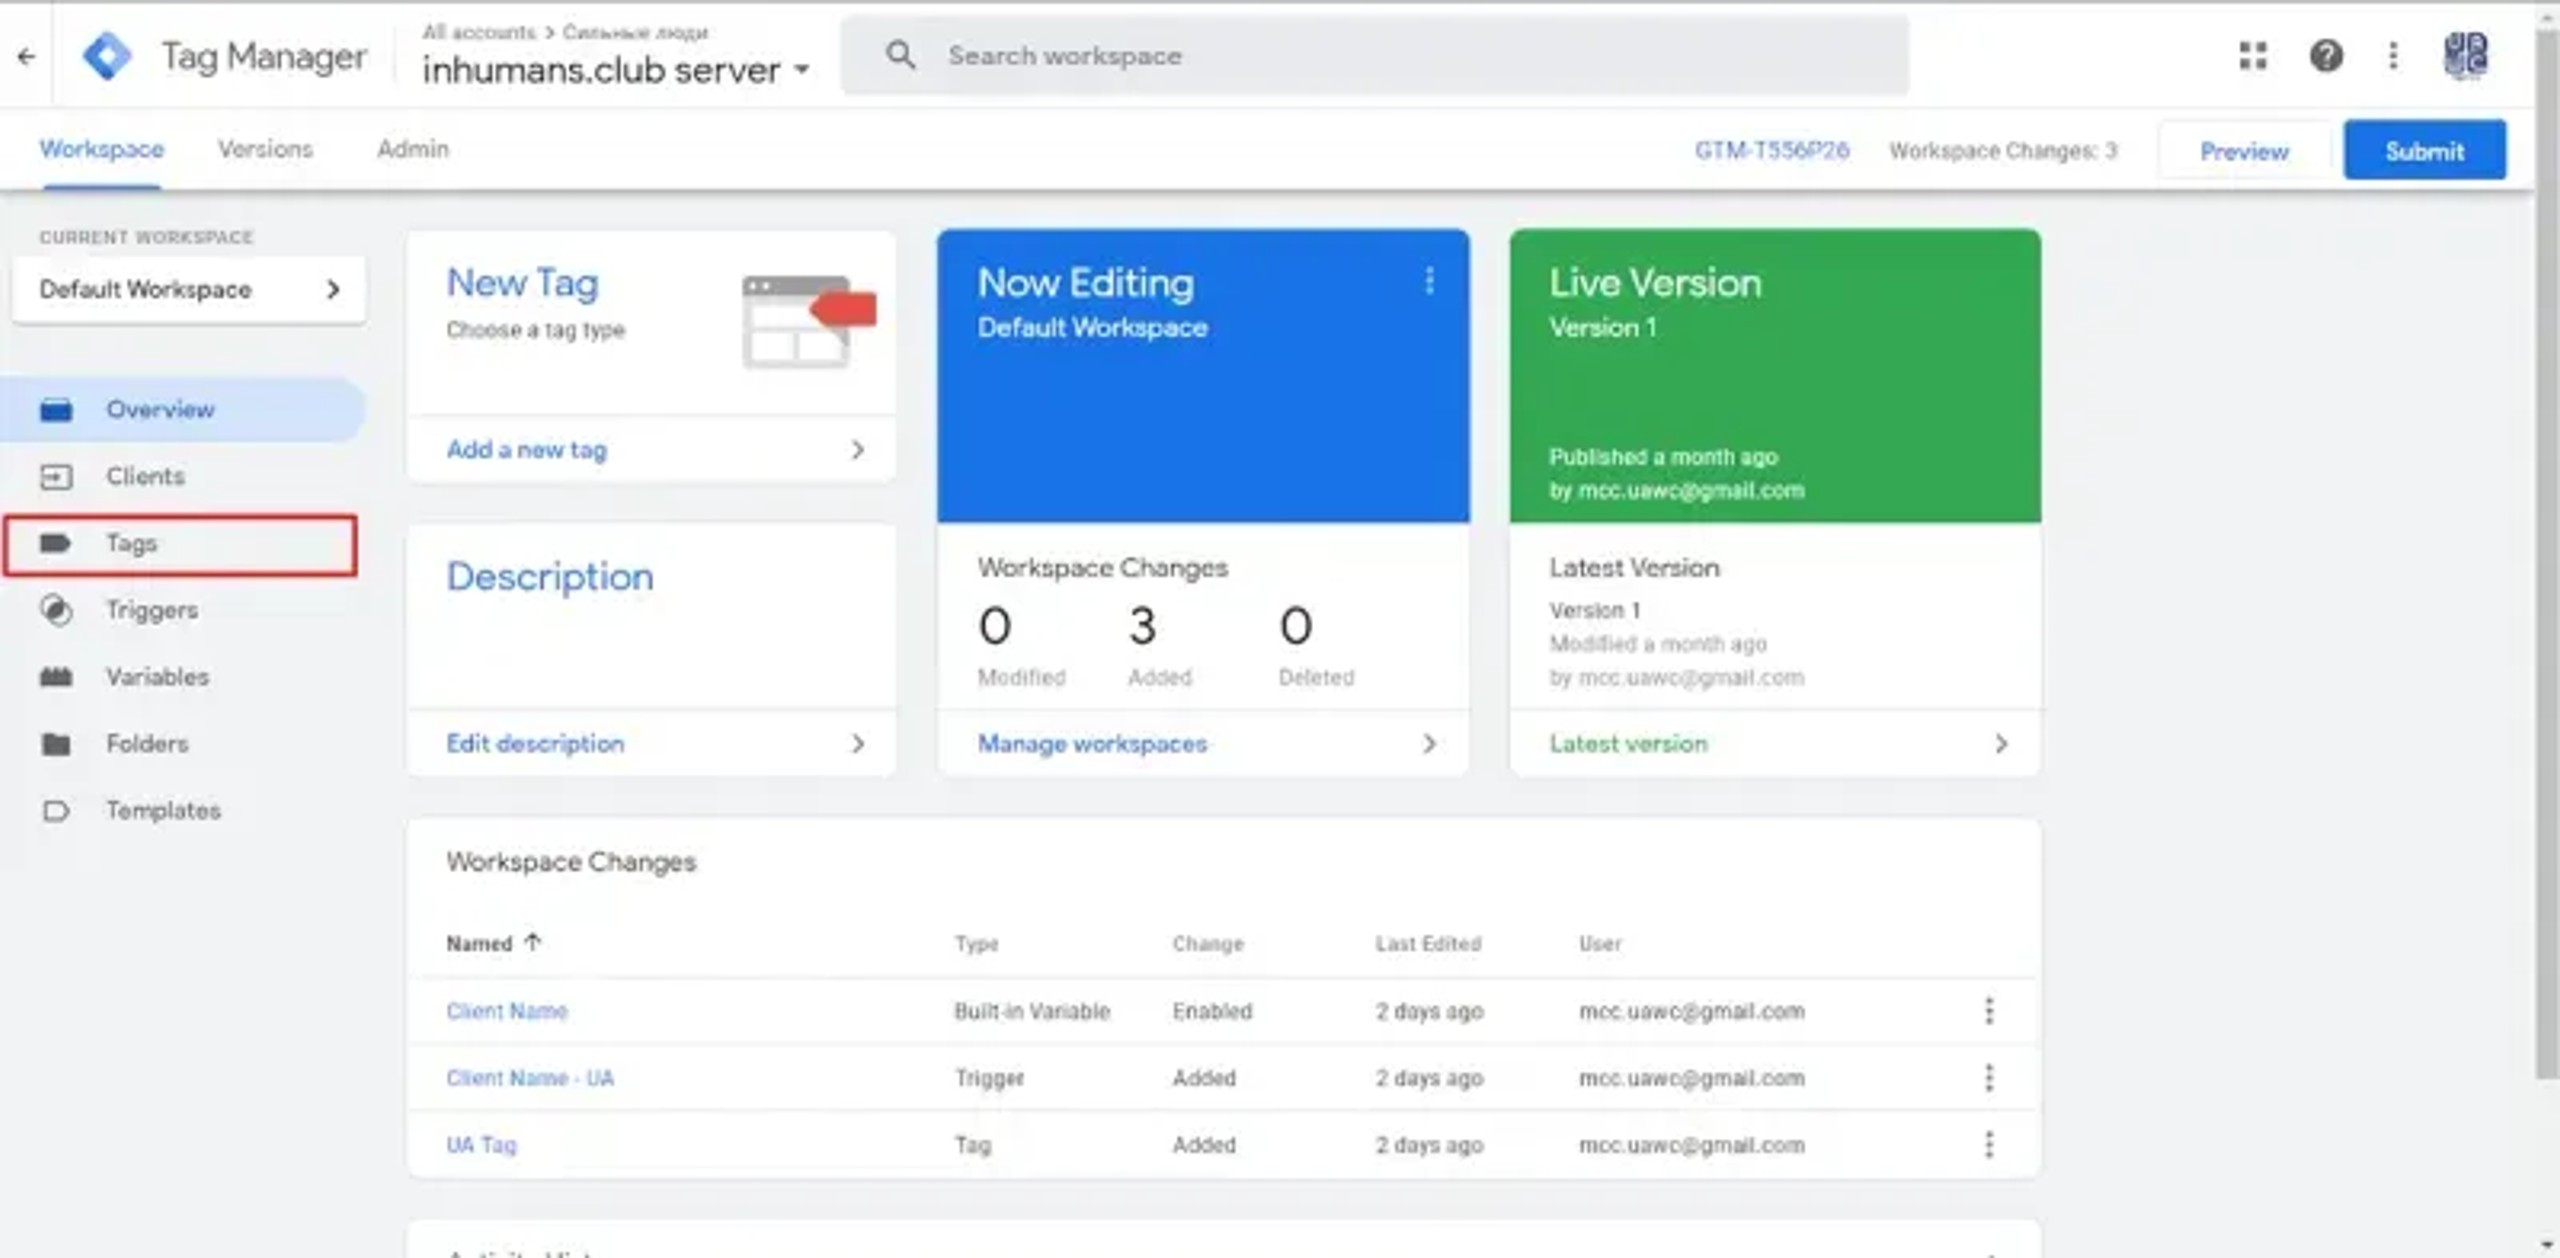
Then, click the Tag section and create the Tag.
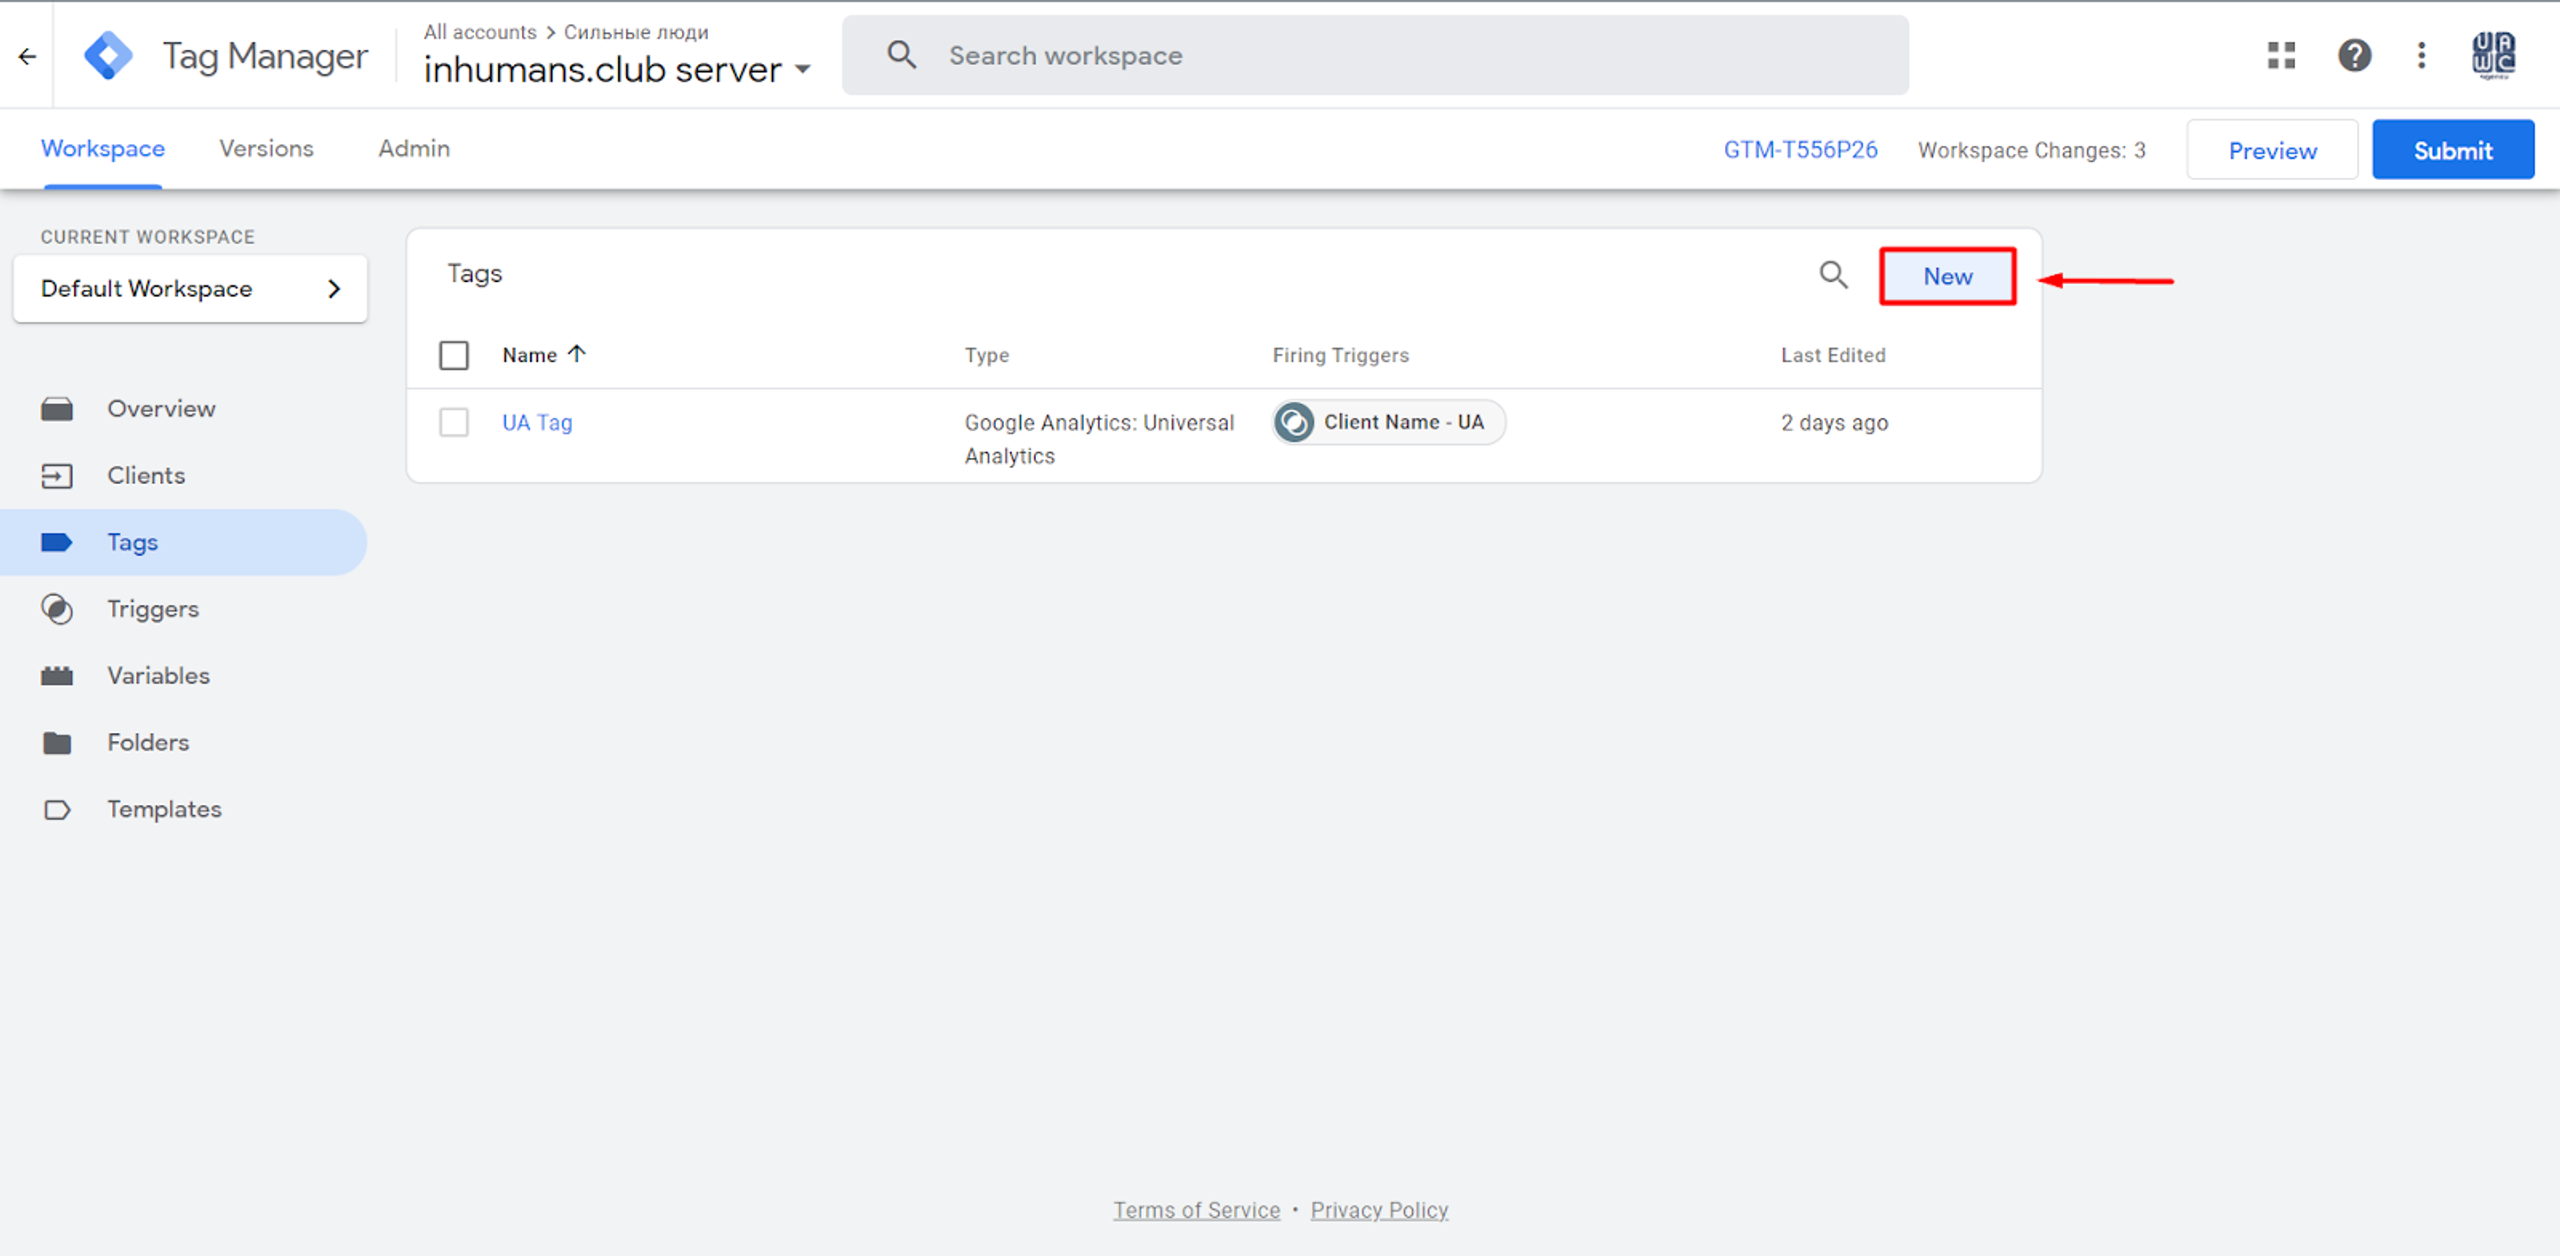
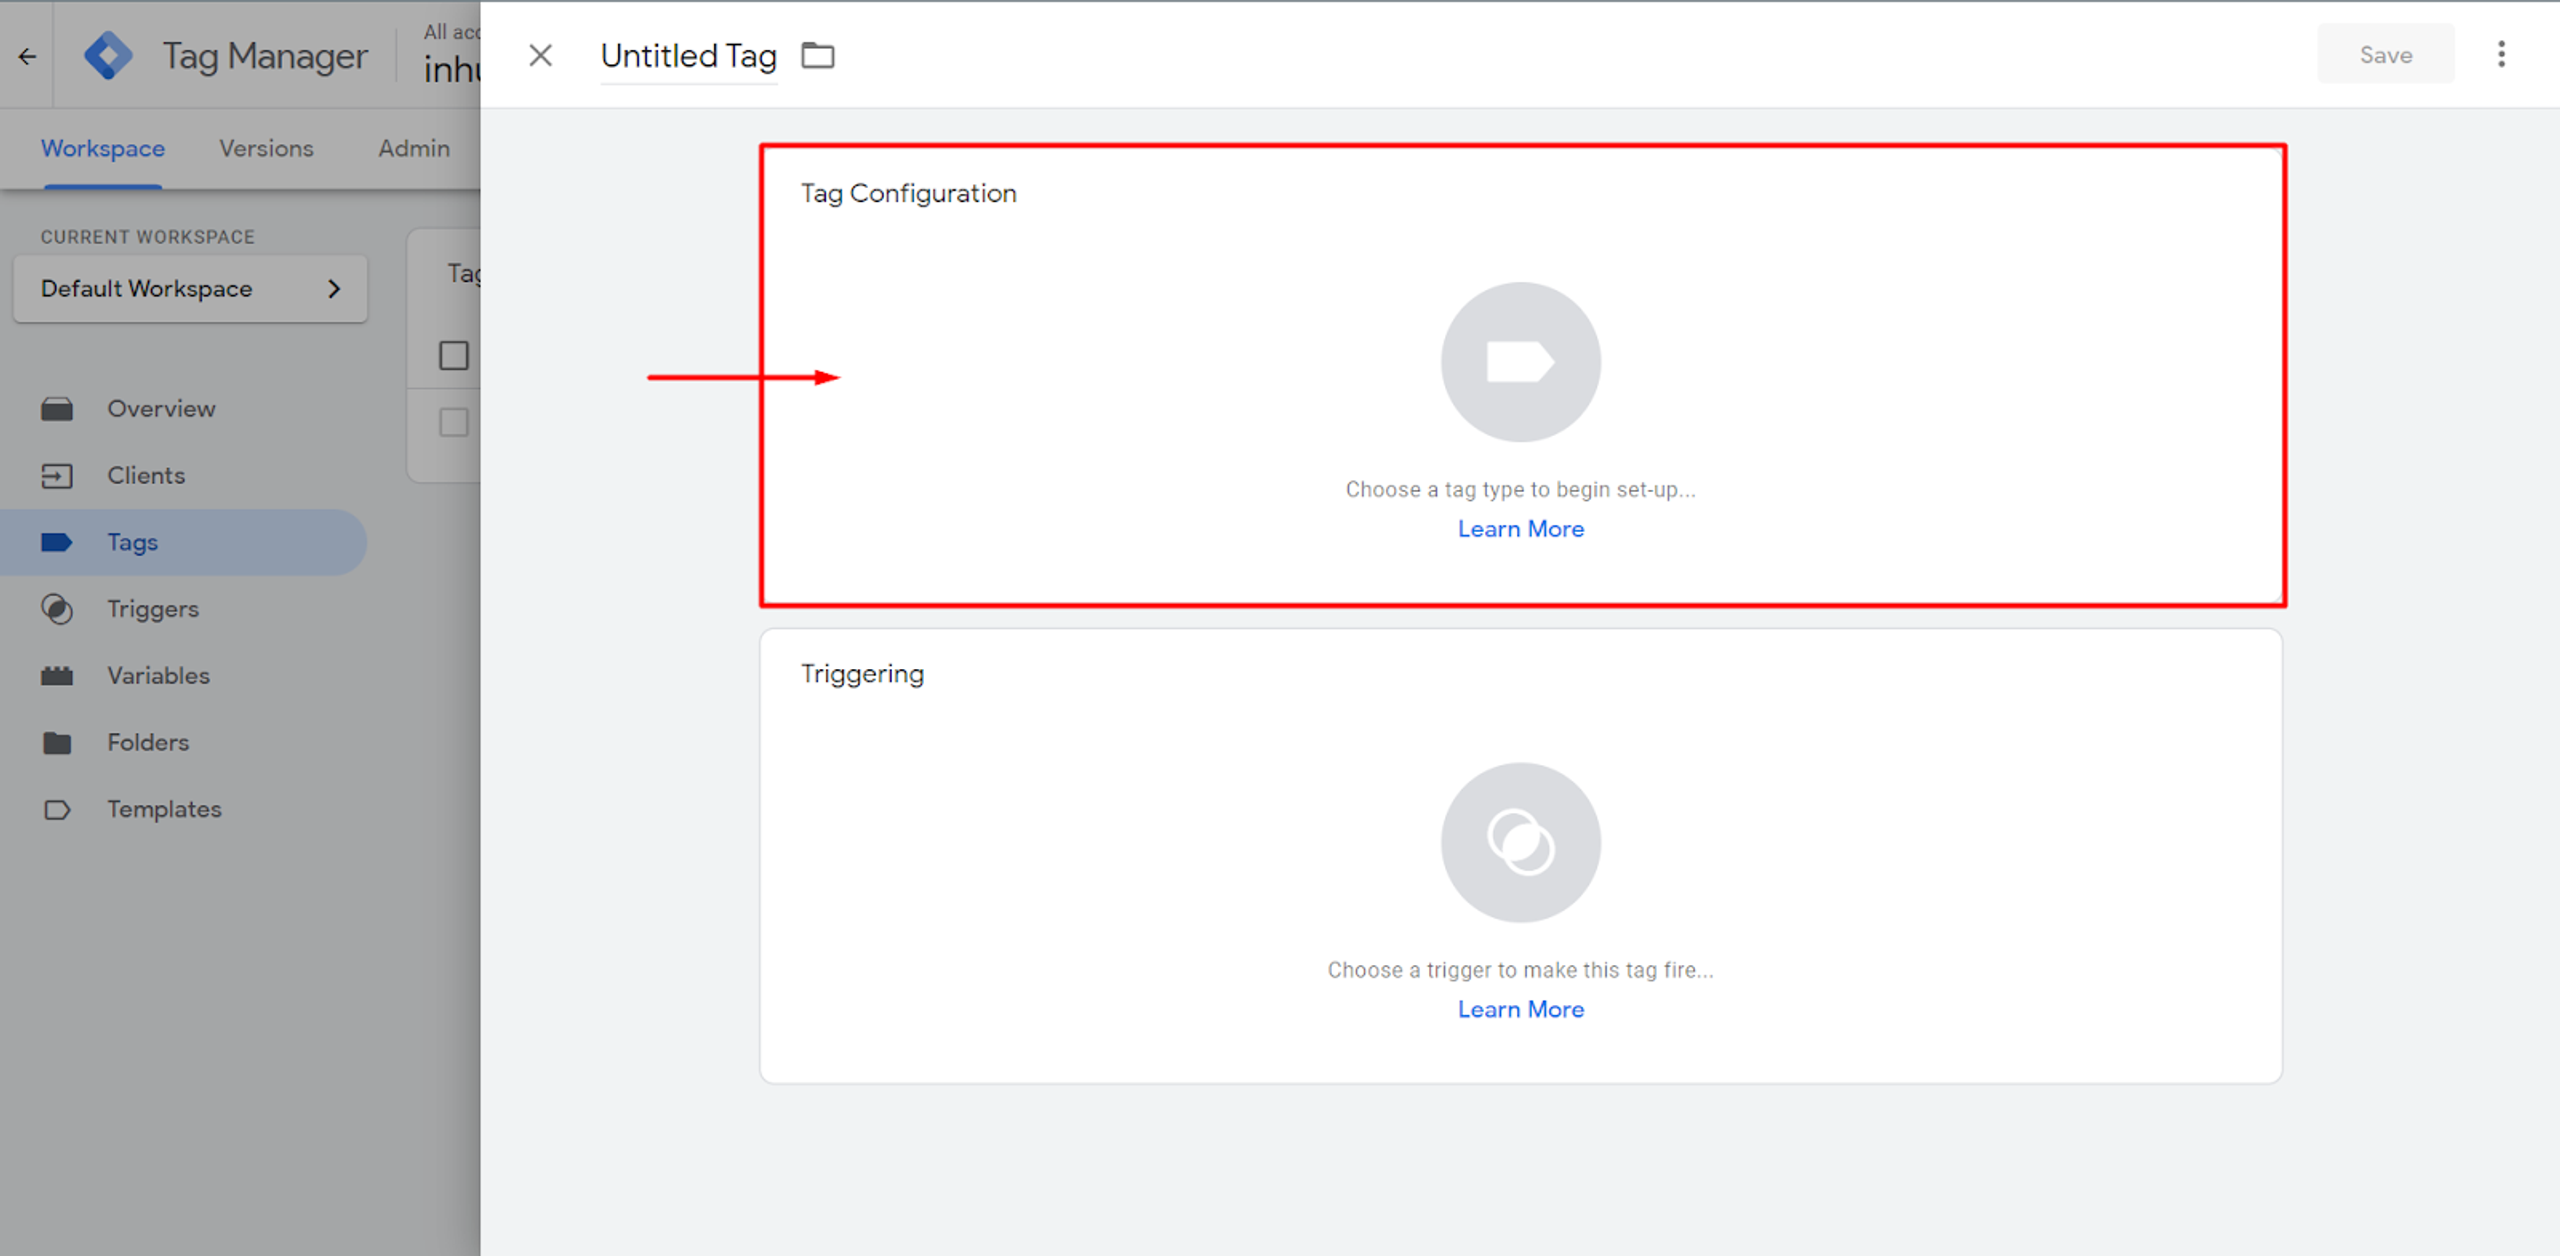
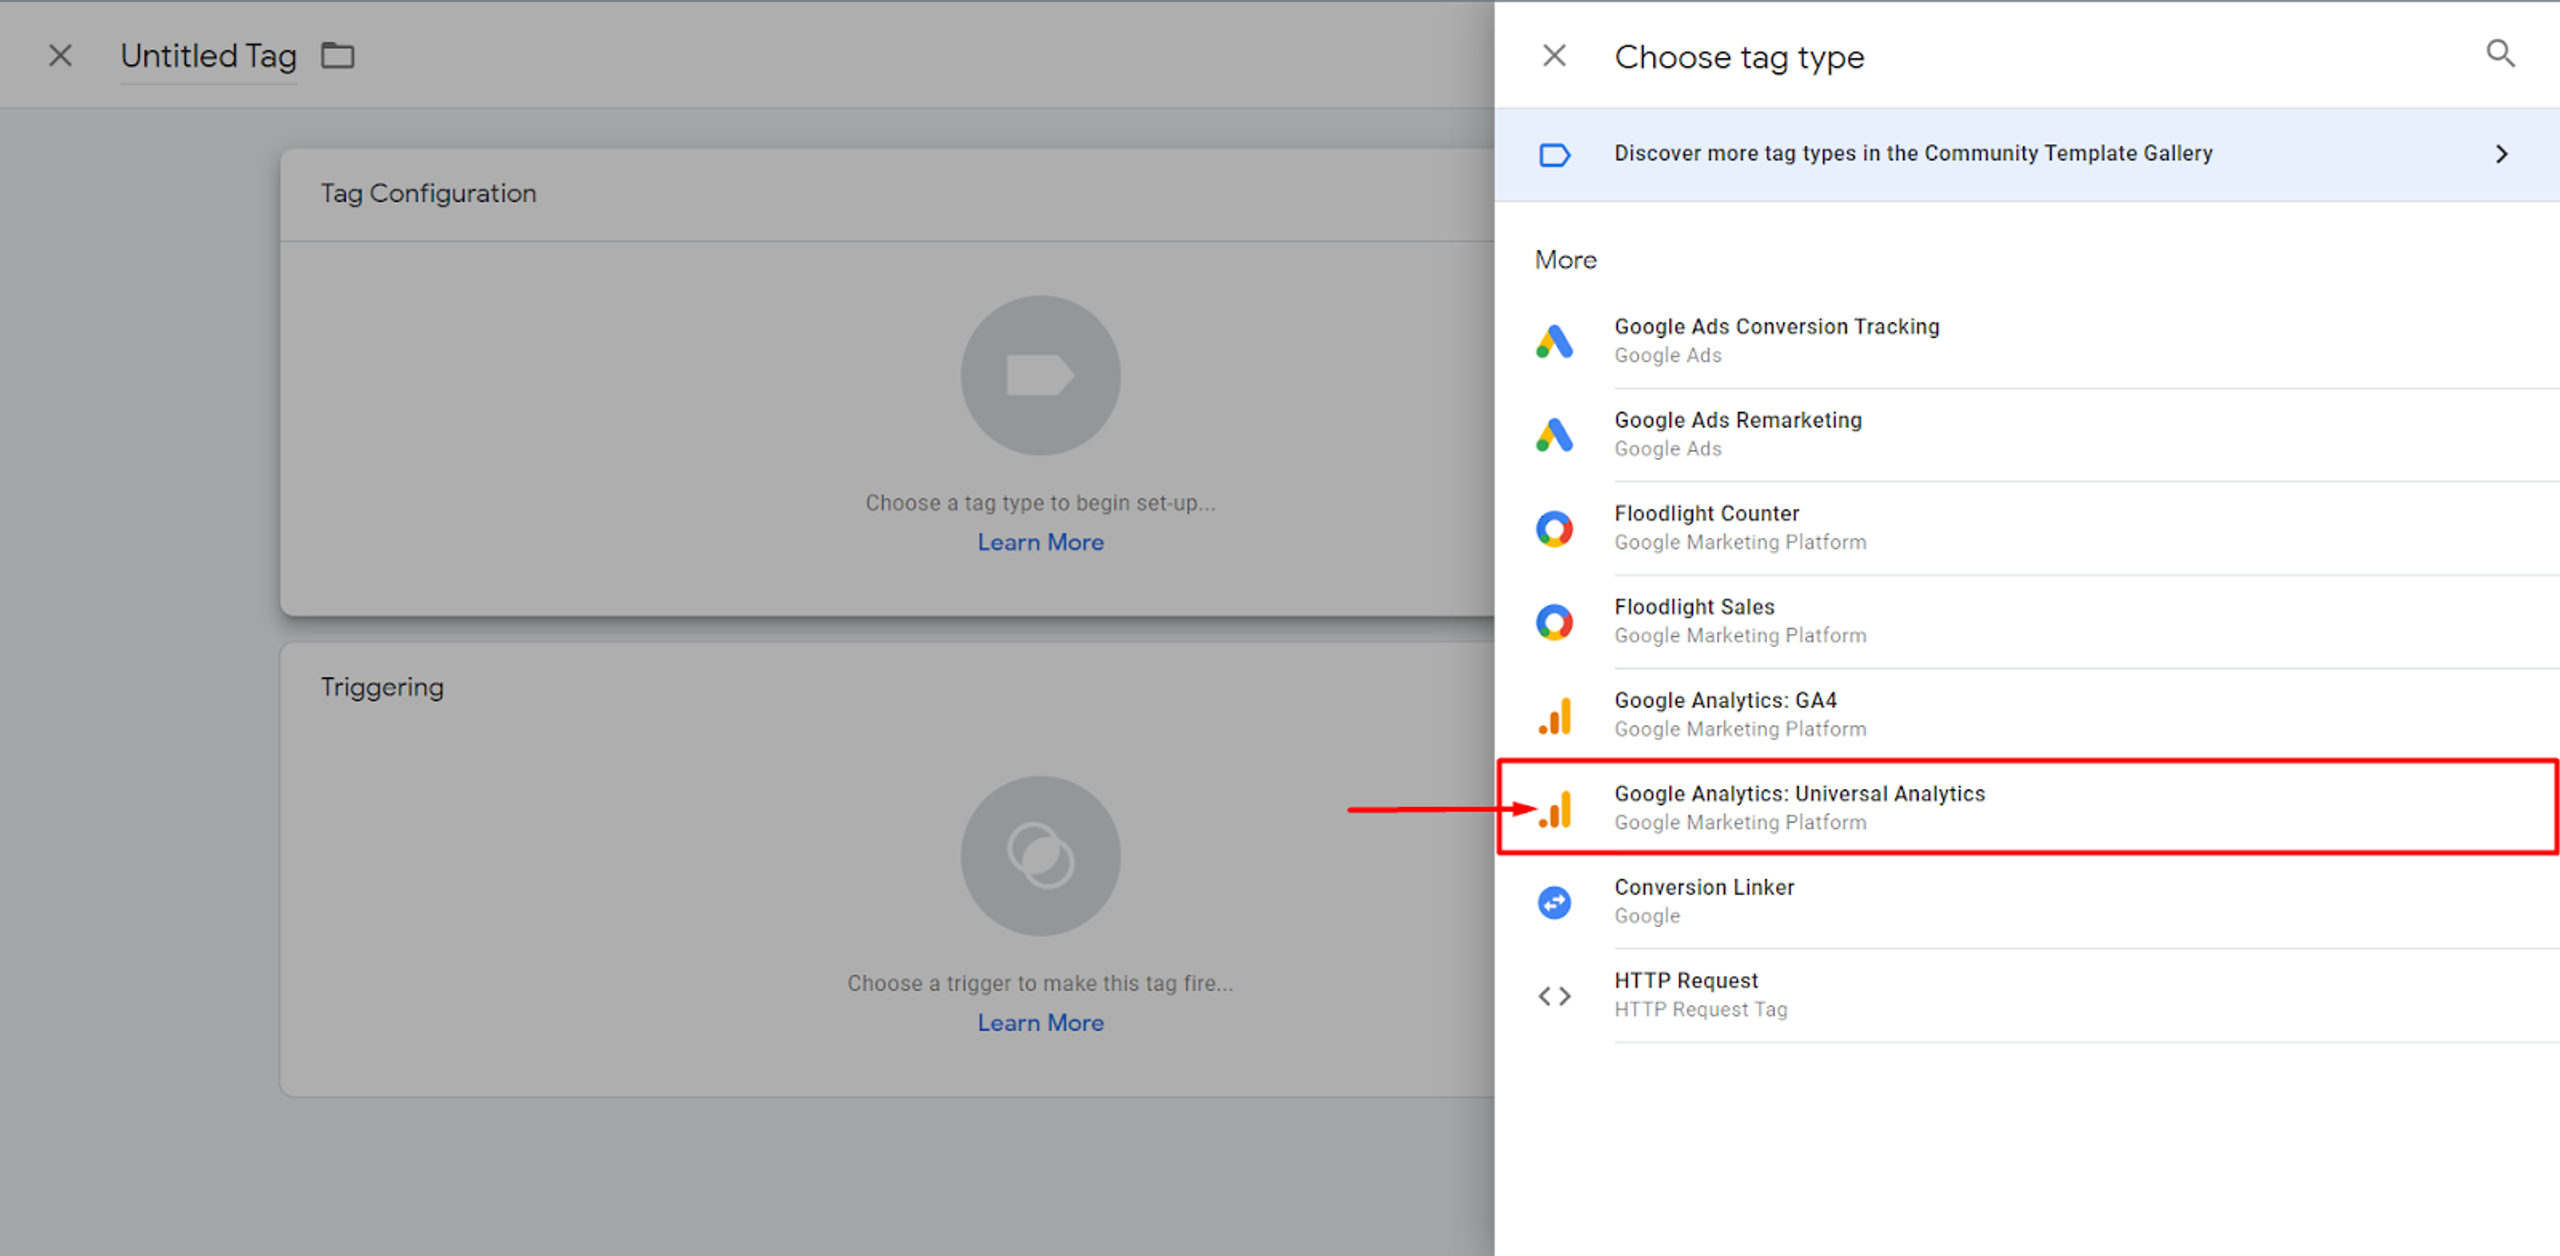
Here, you can choose where the data will be sent.
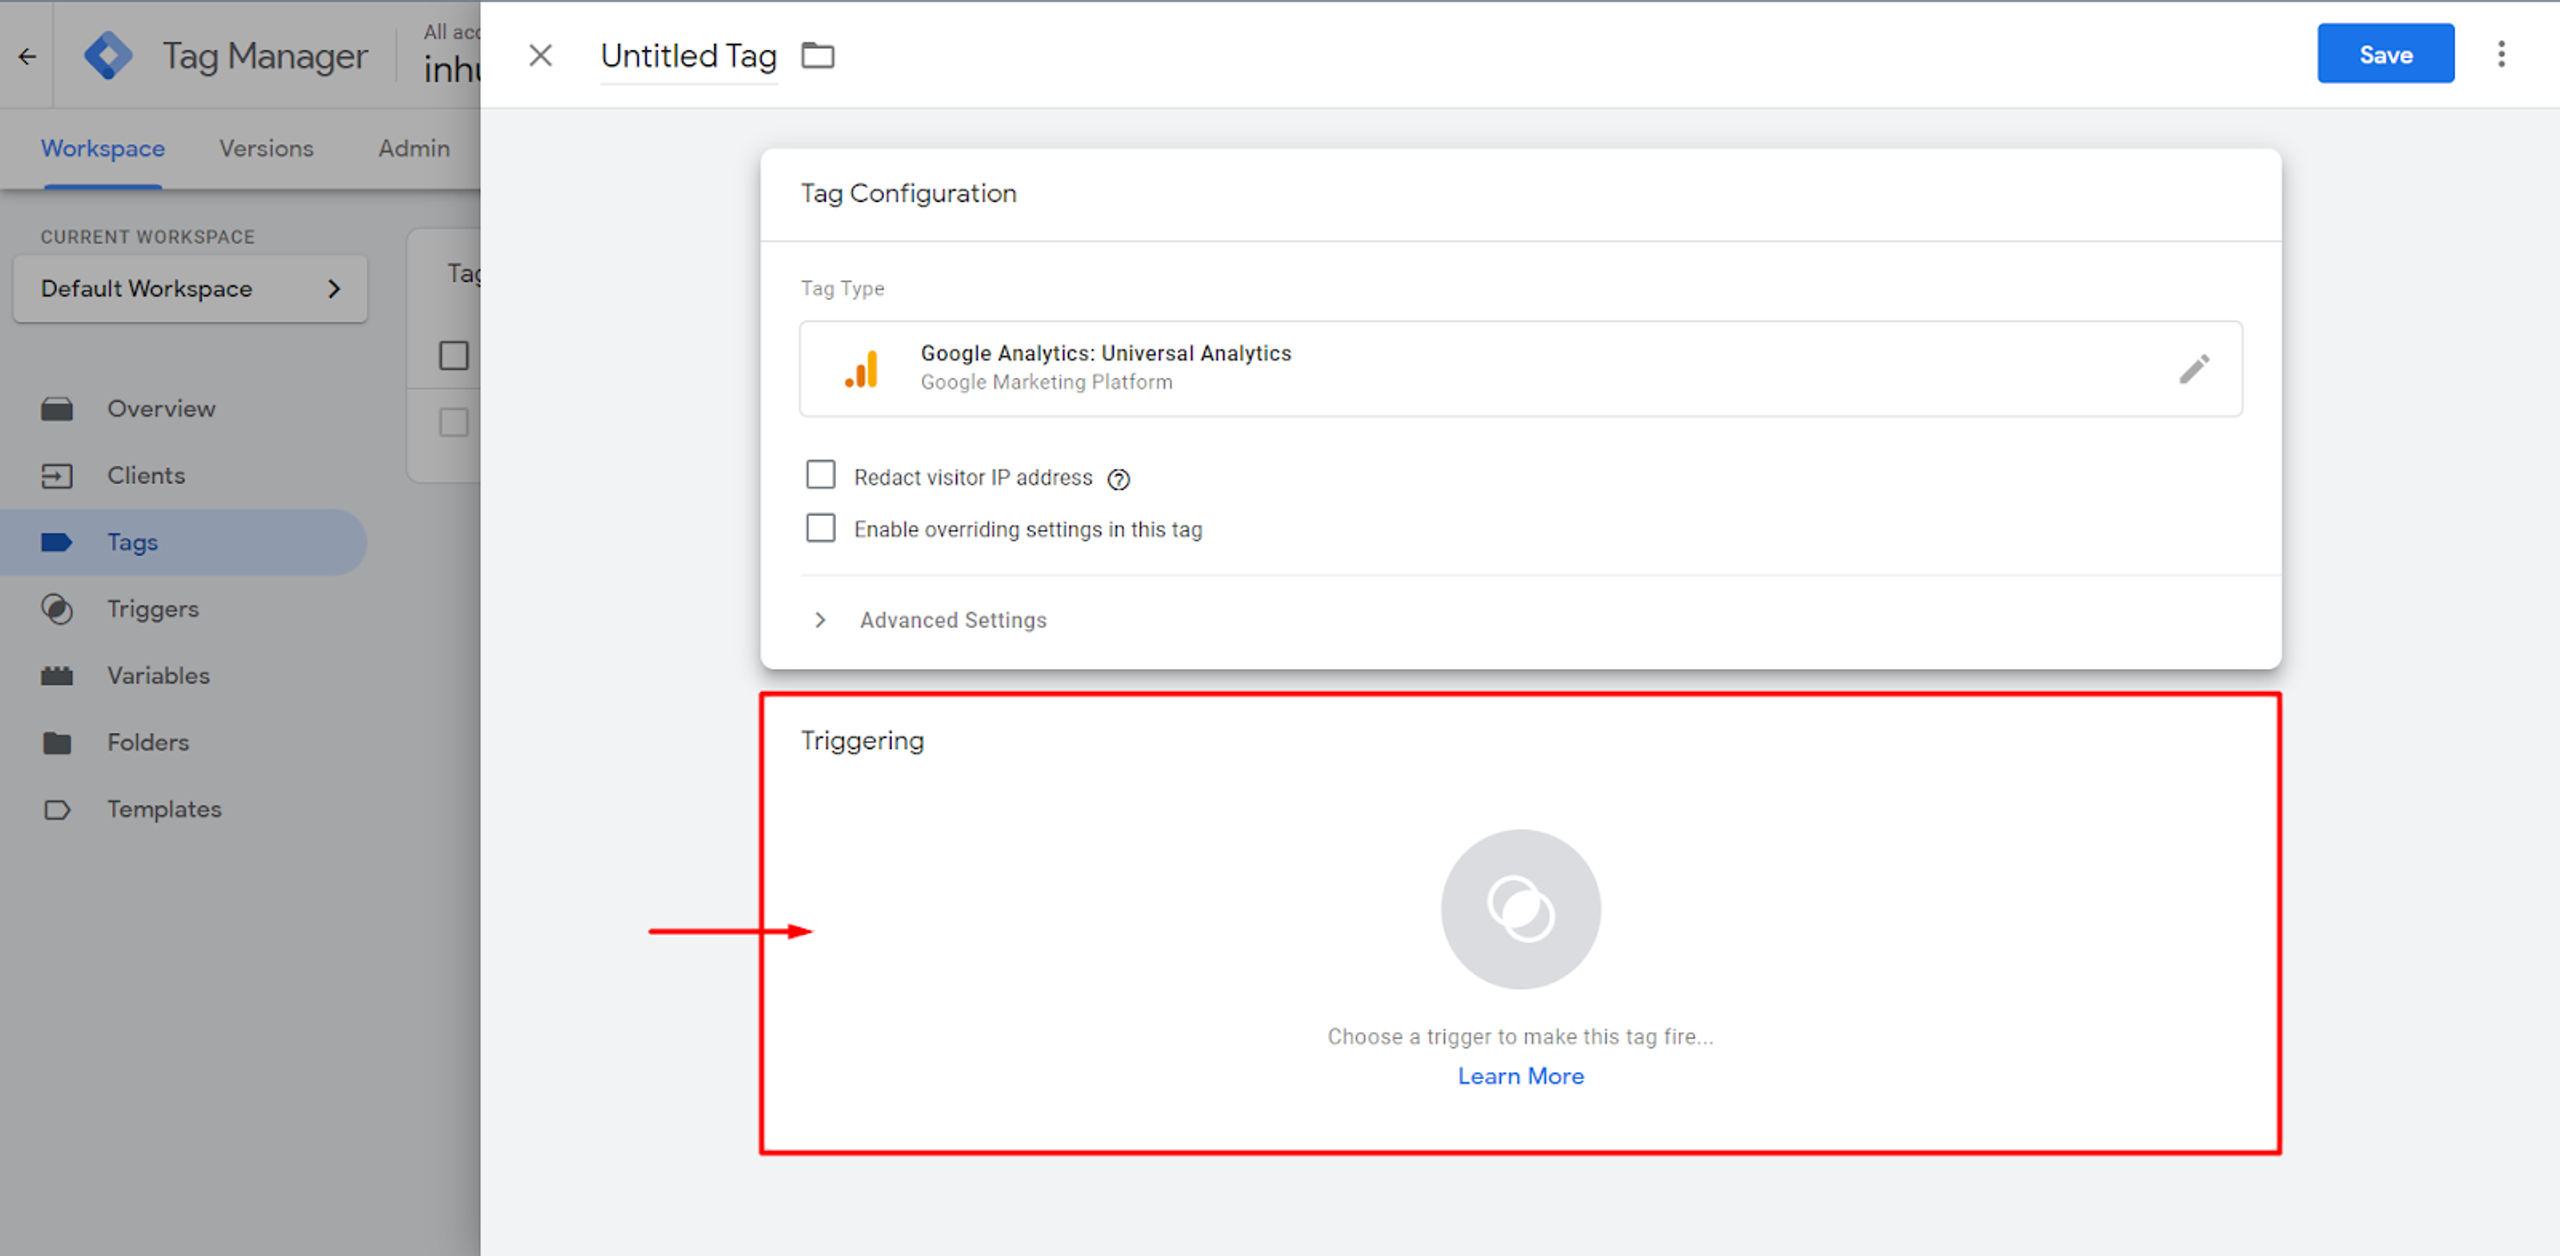
After that, a trigger must be configured, which basically is the condition when this Tag will fire.
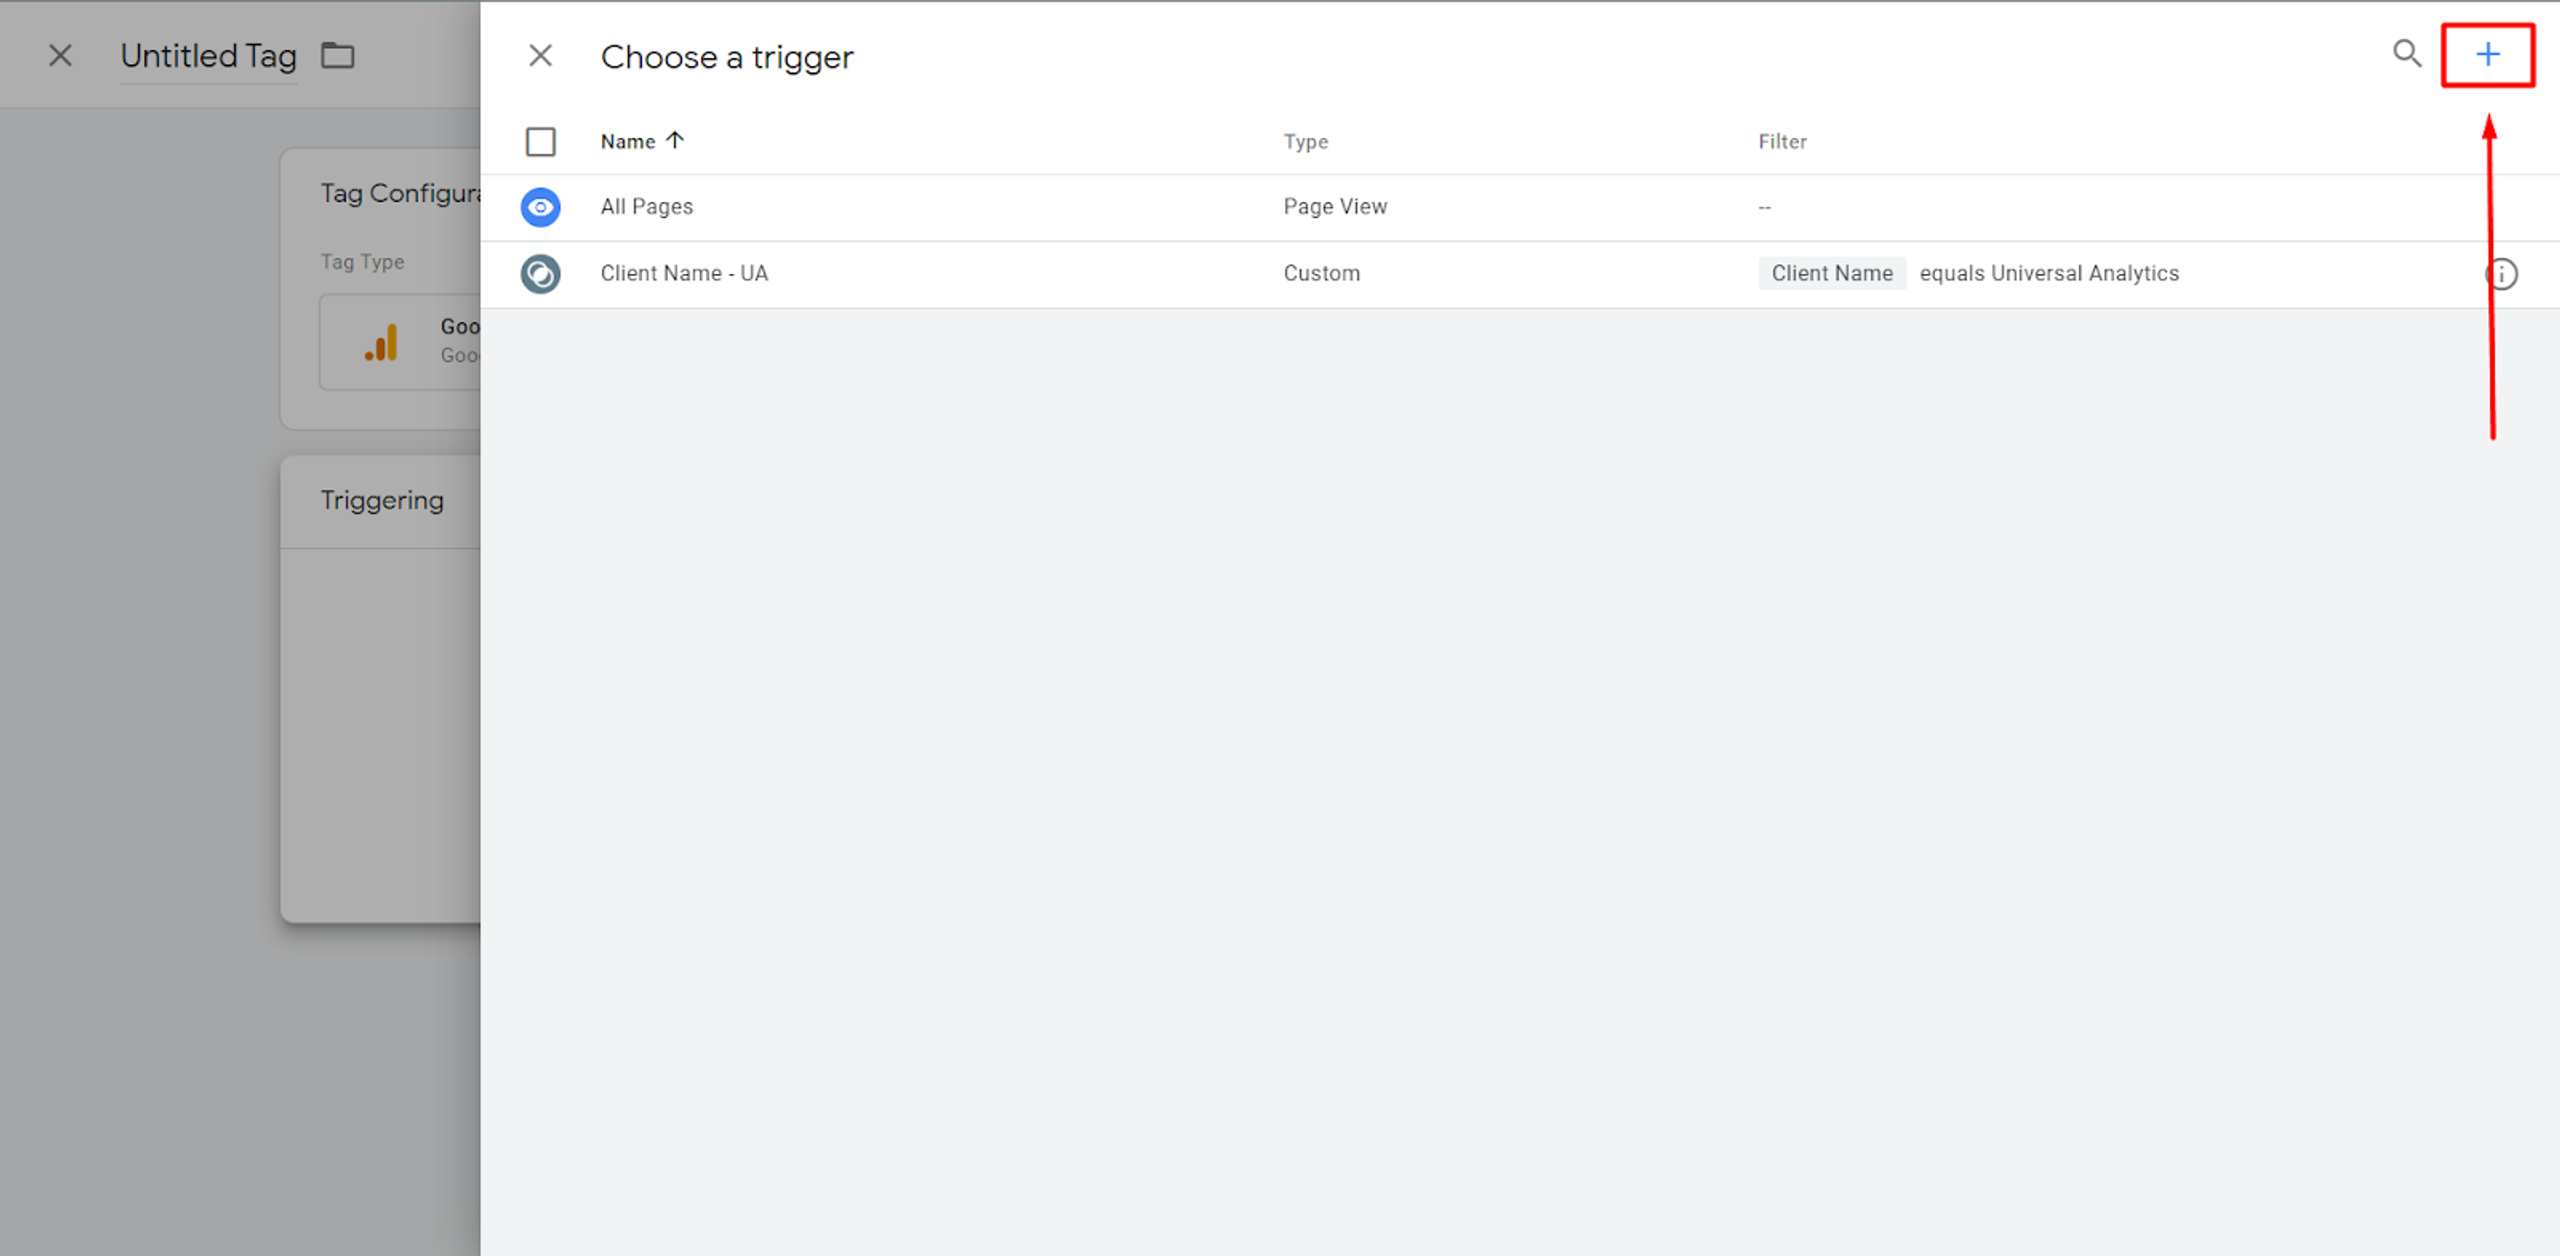
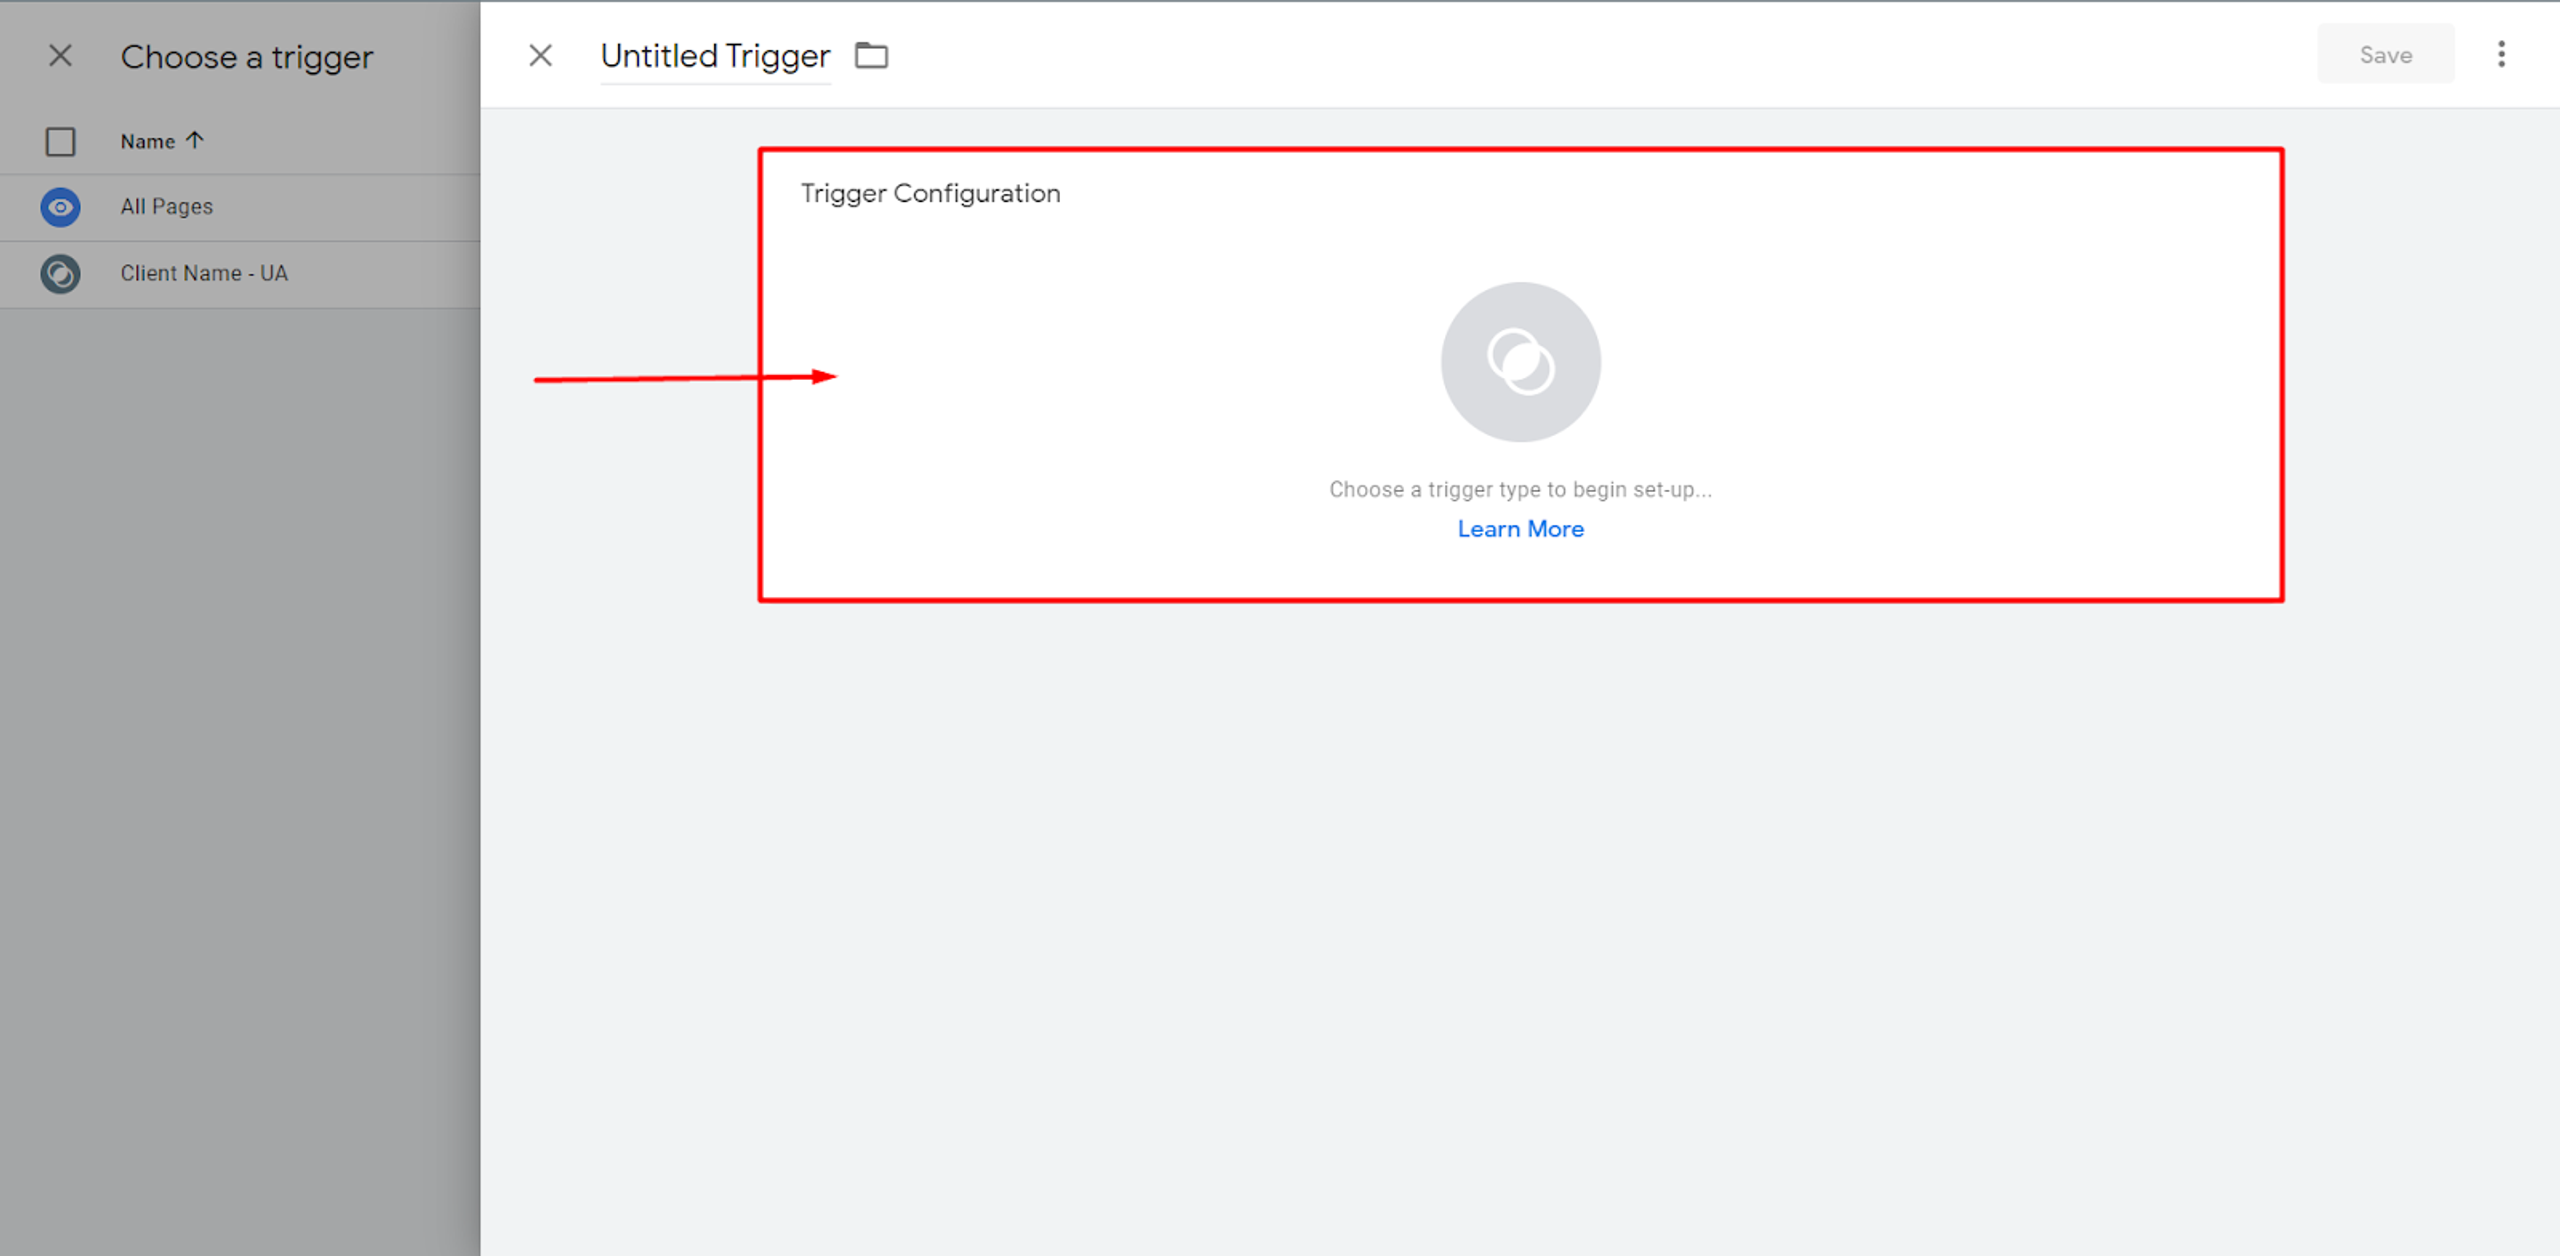
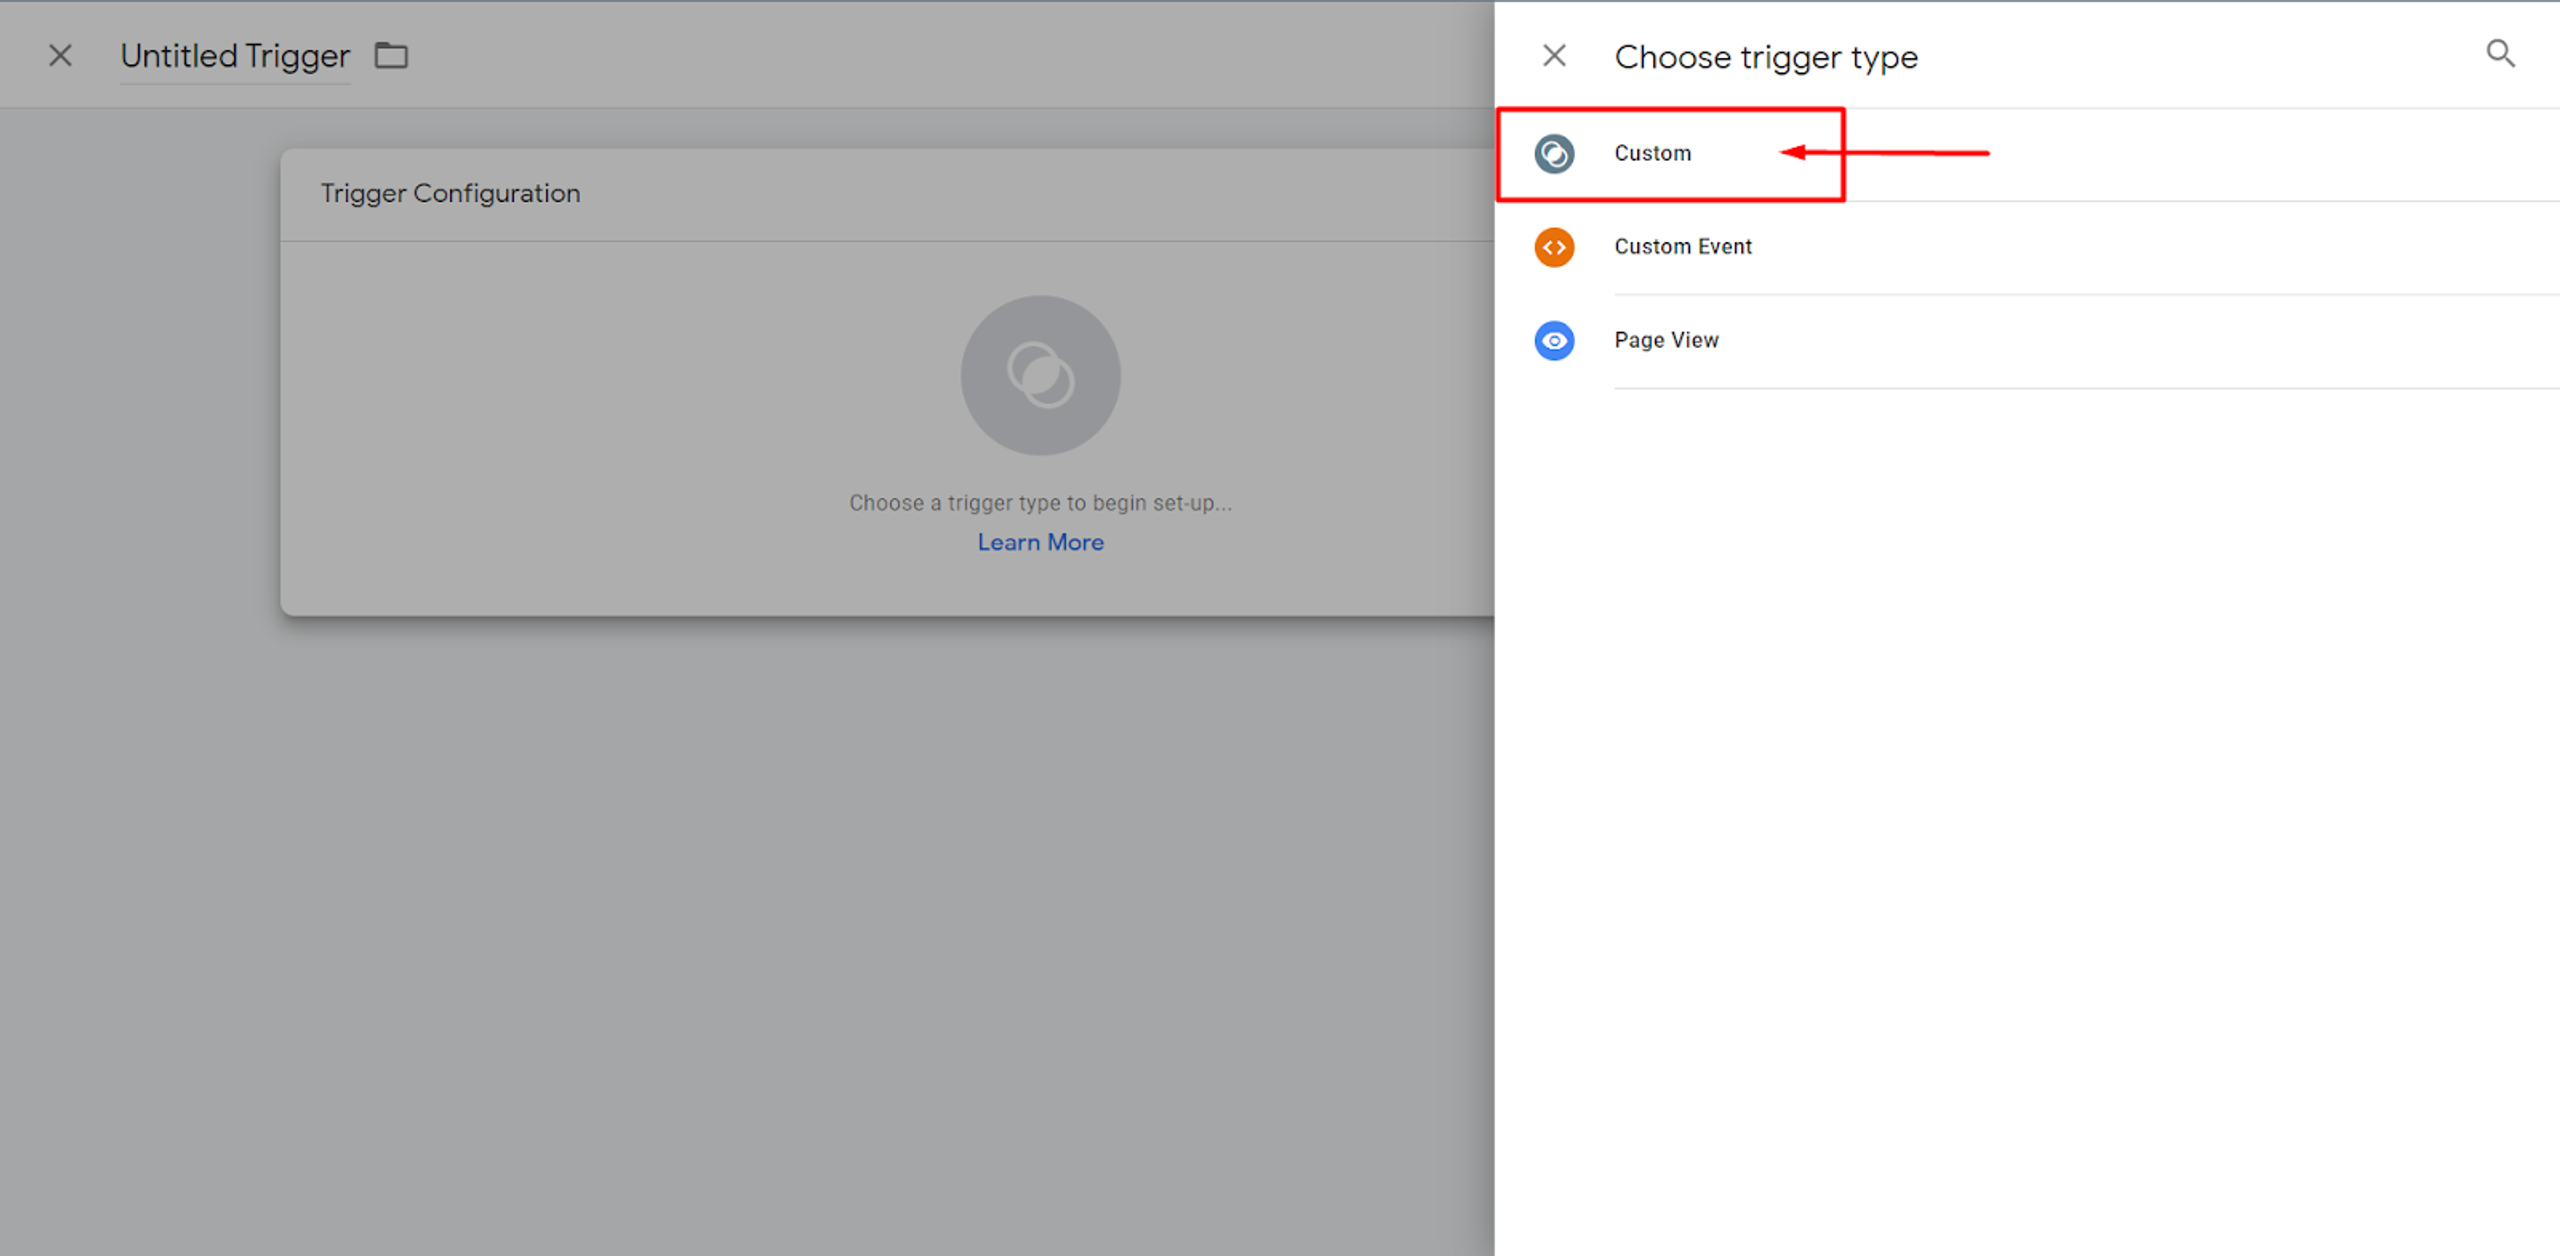
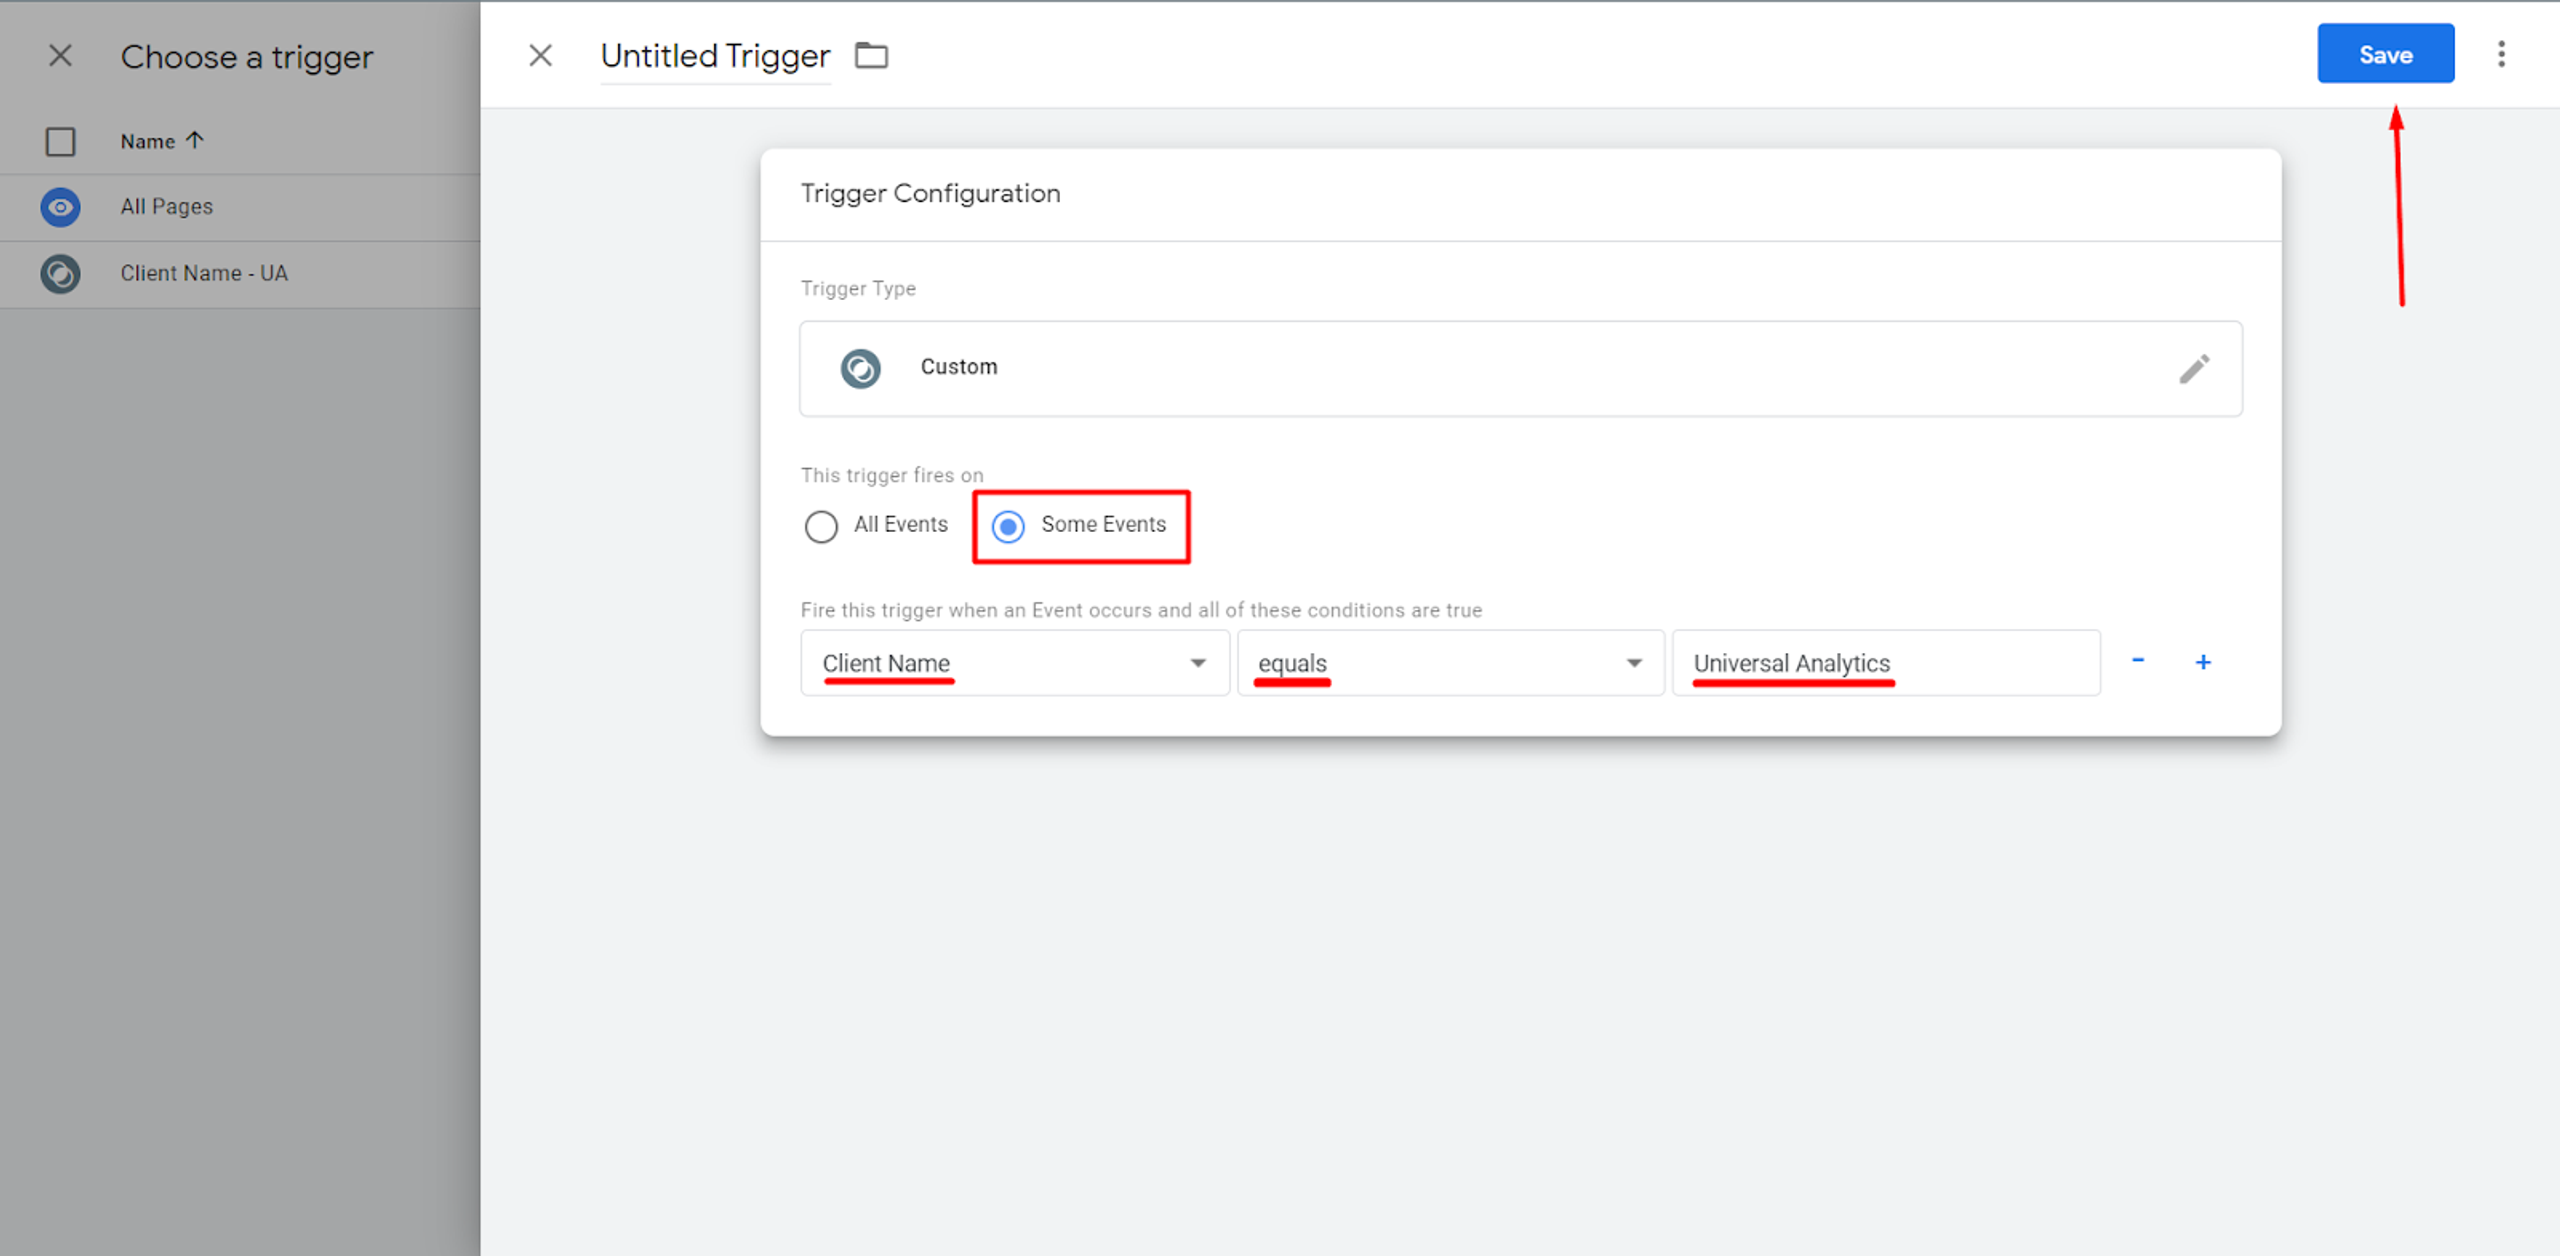
As to the Google Analytics 4 property, you similarly create a corresponding tag in your server container:
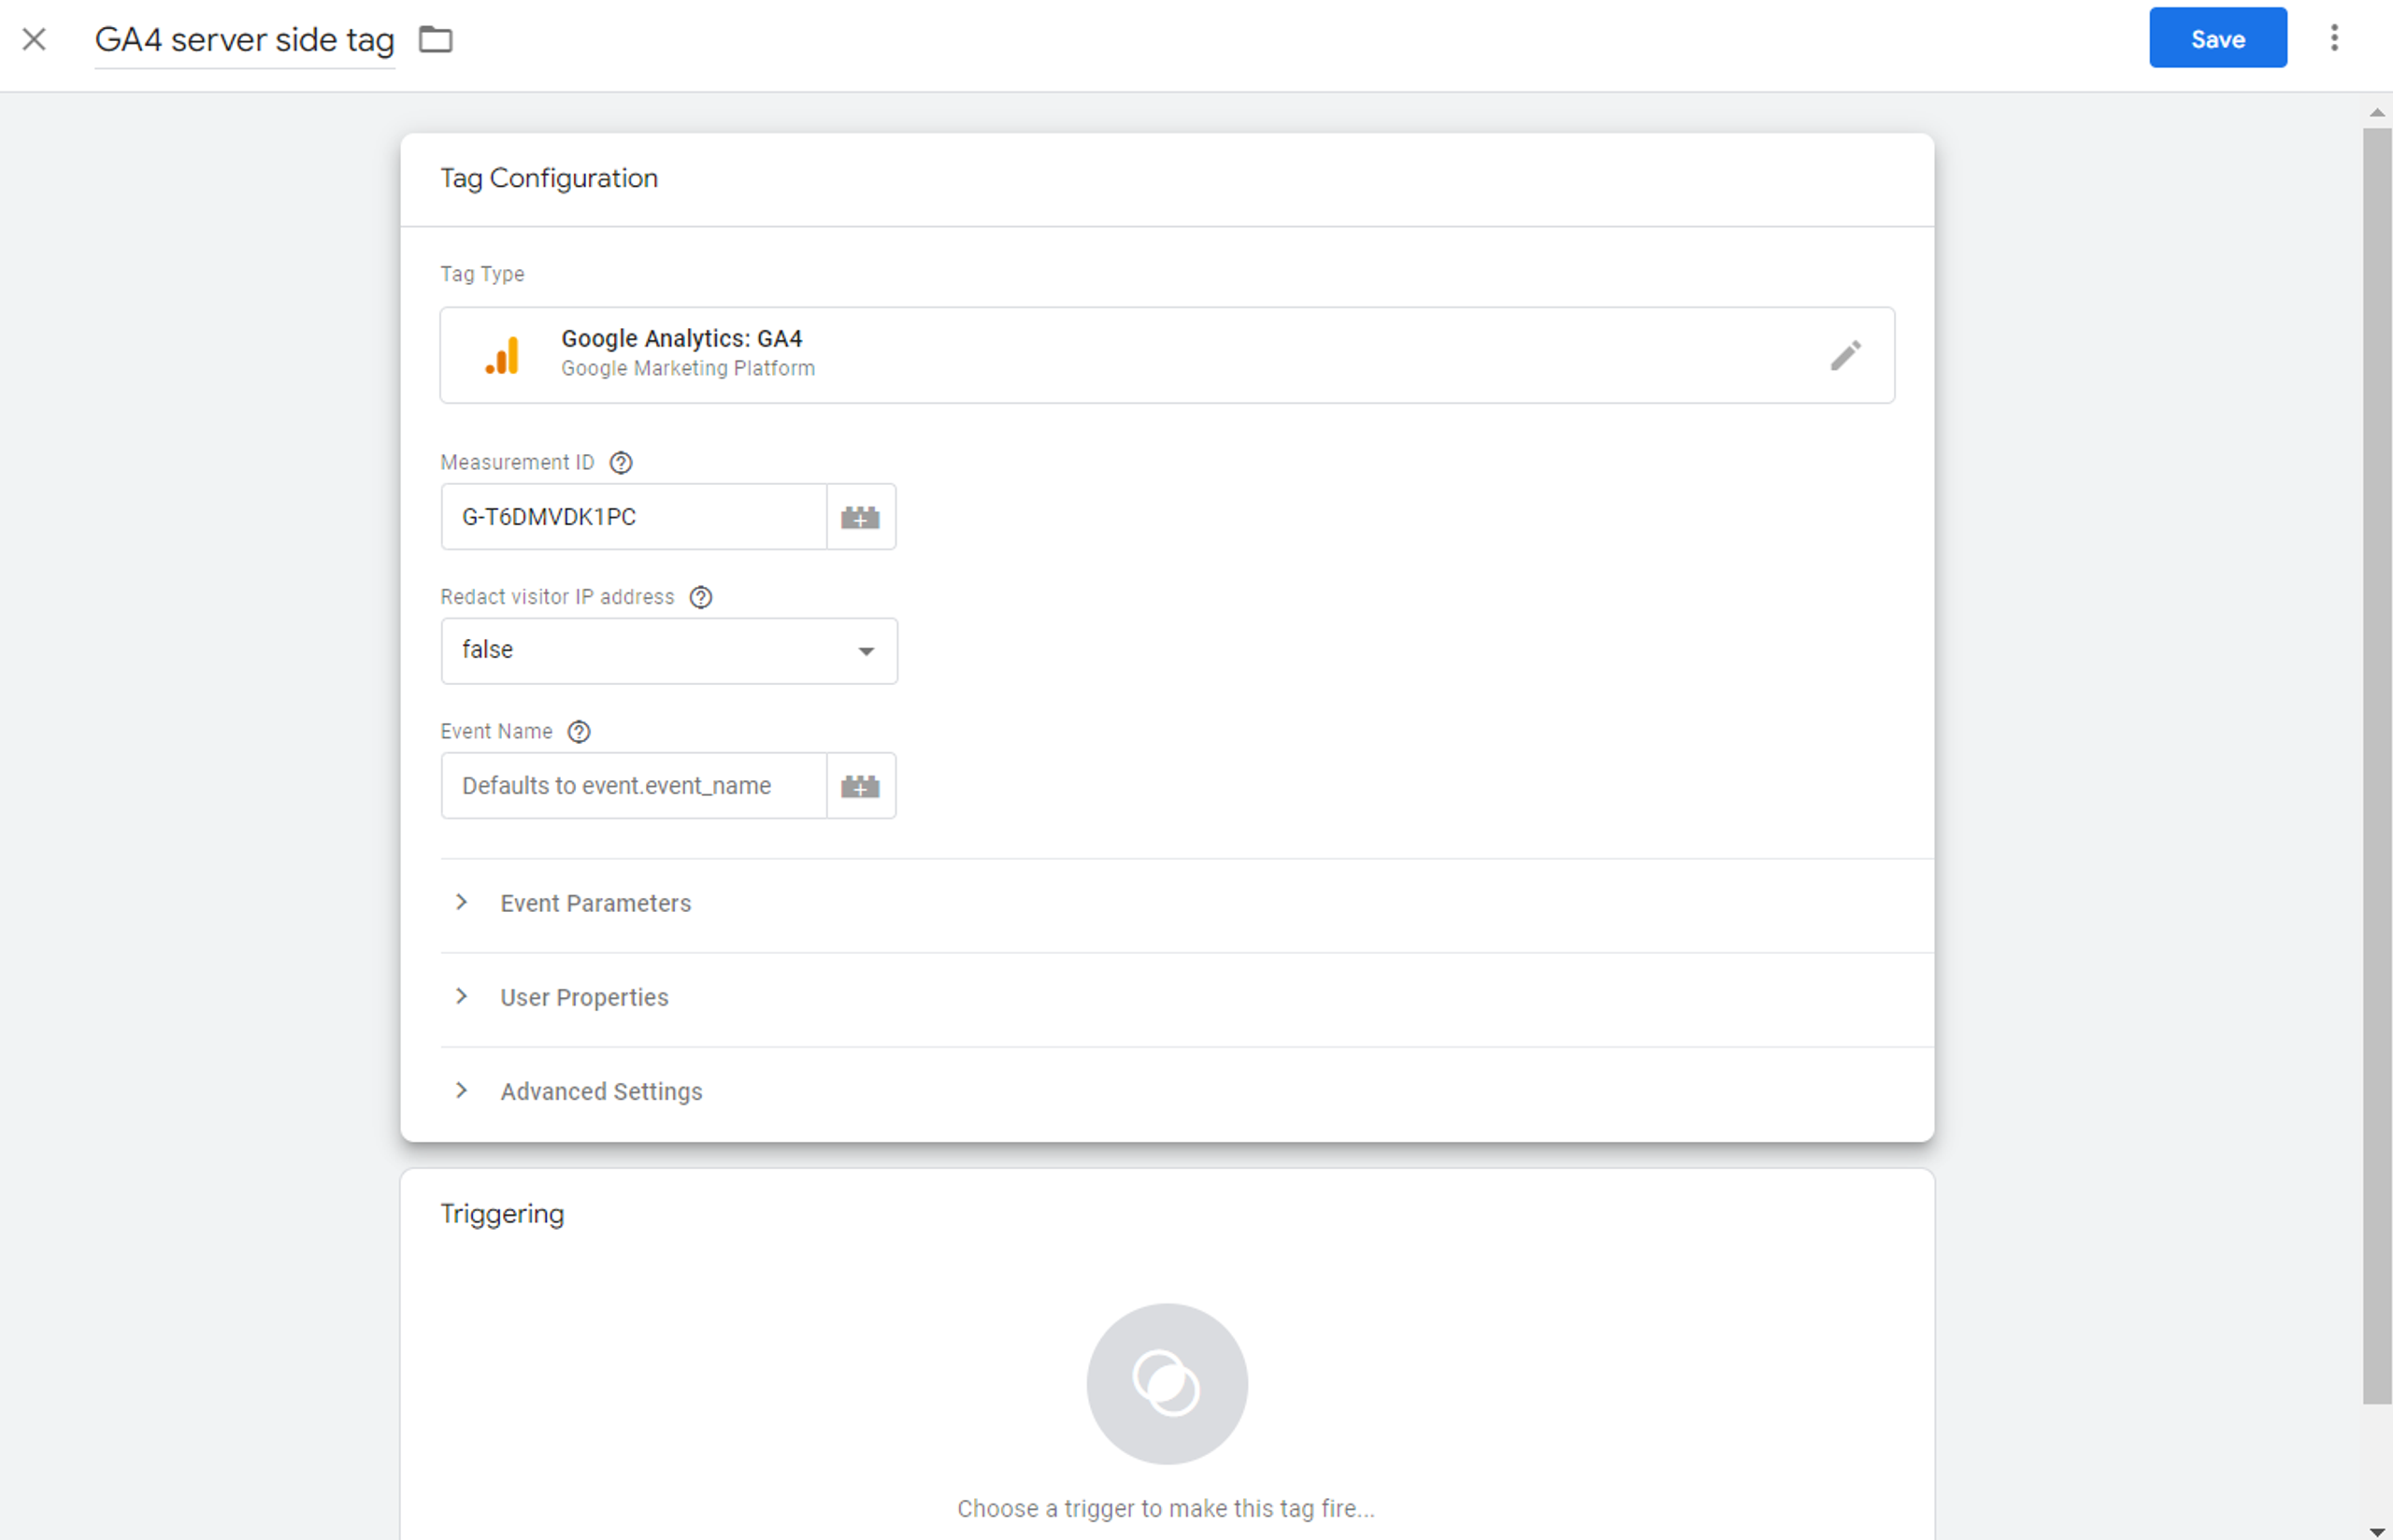
Leave the field Event Name blank so that value of event_name parameter will be sent automatically to Google. The measurement ID section should be filled with the correct Data Stream id from your GA4 property:

The trigger of this tag will also be similar to that of Universal Analytics except for the firing conditions where Client Name will be GA4.
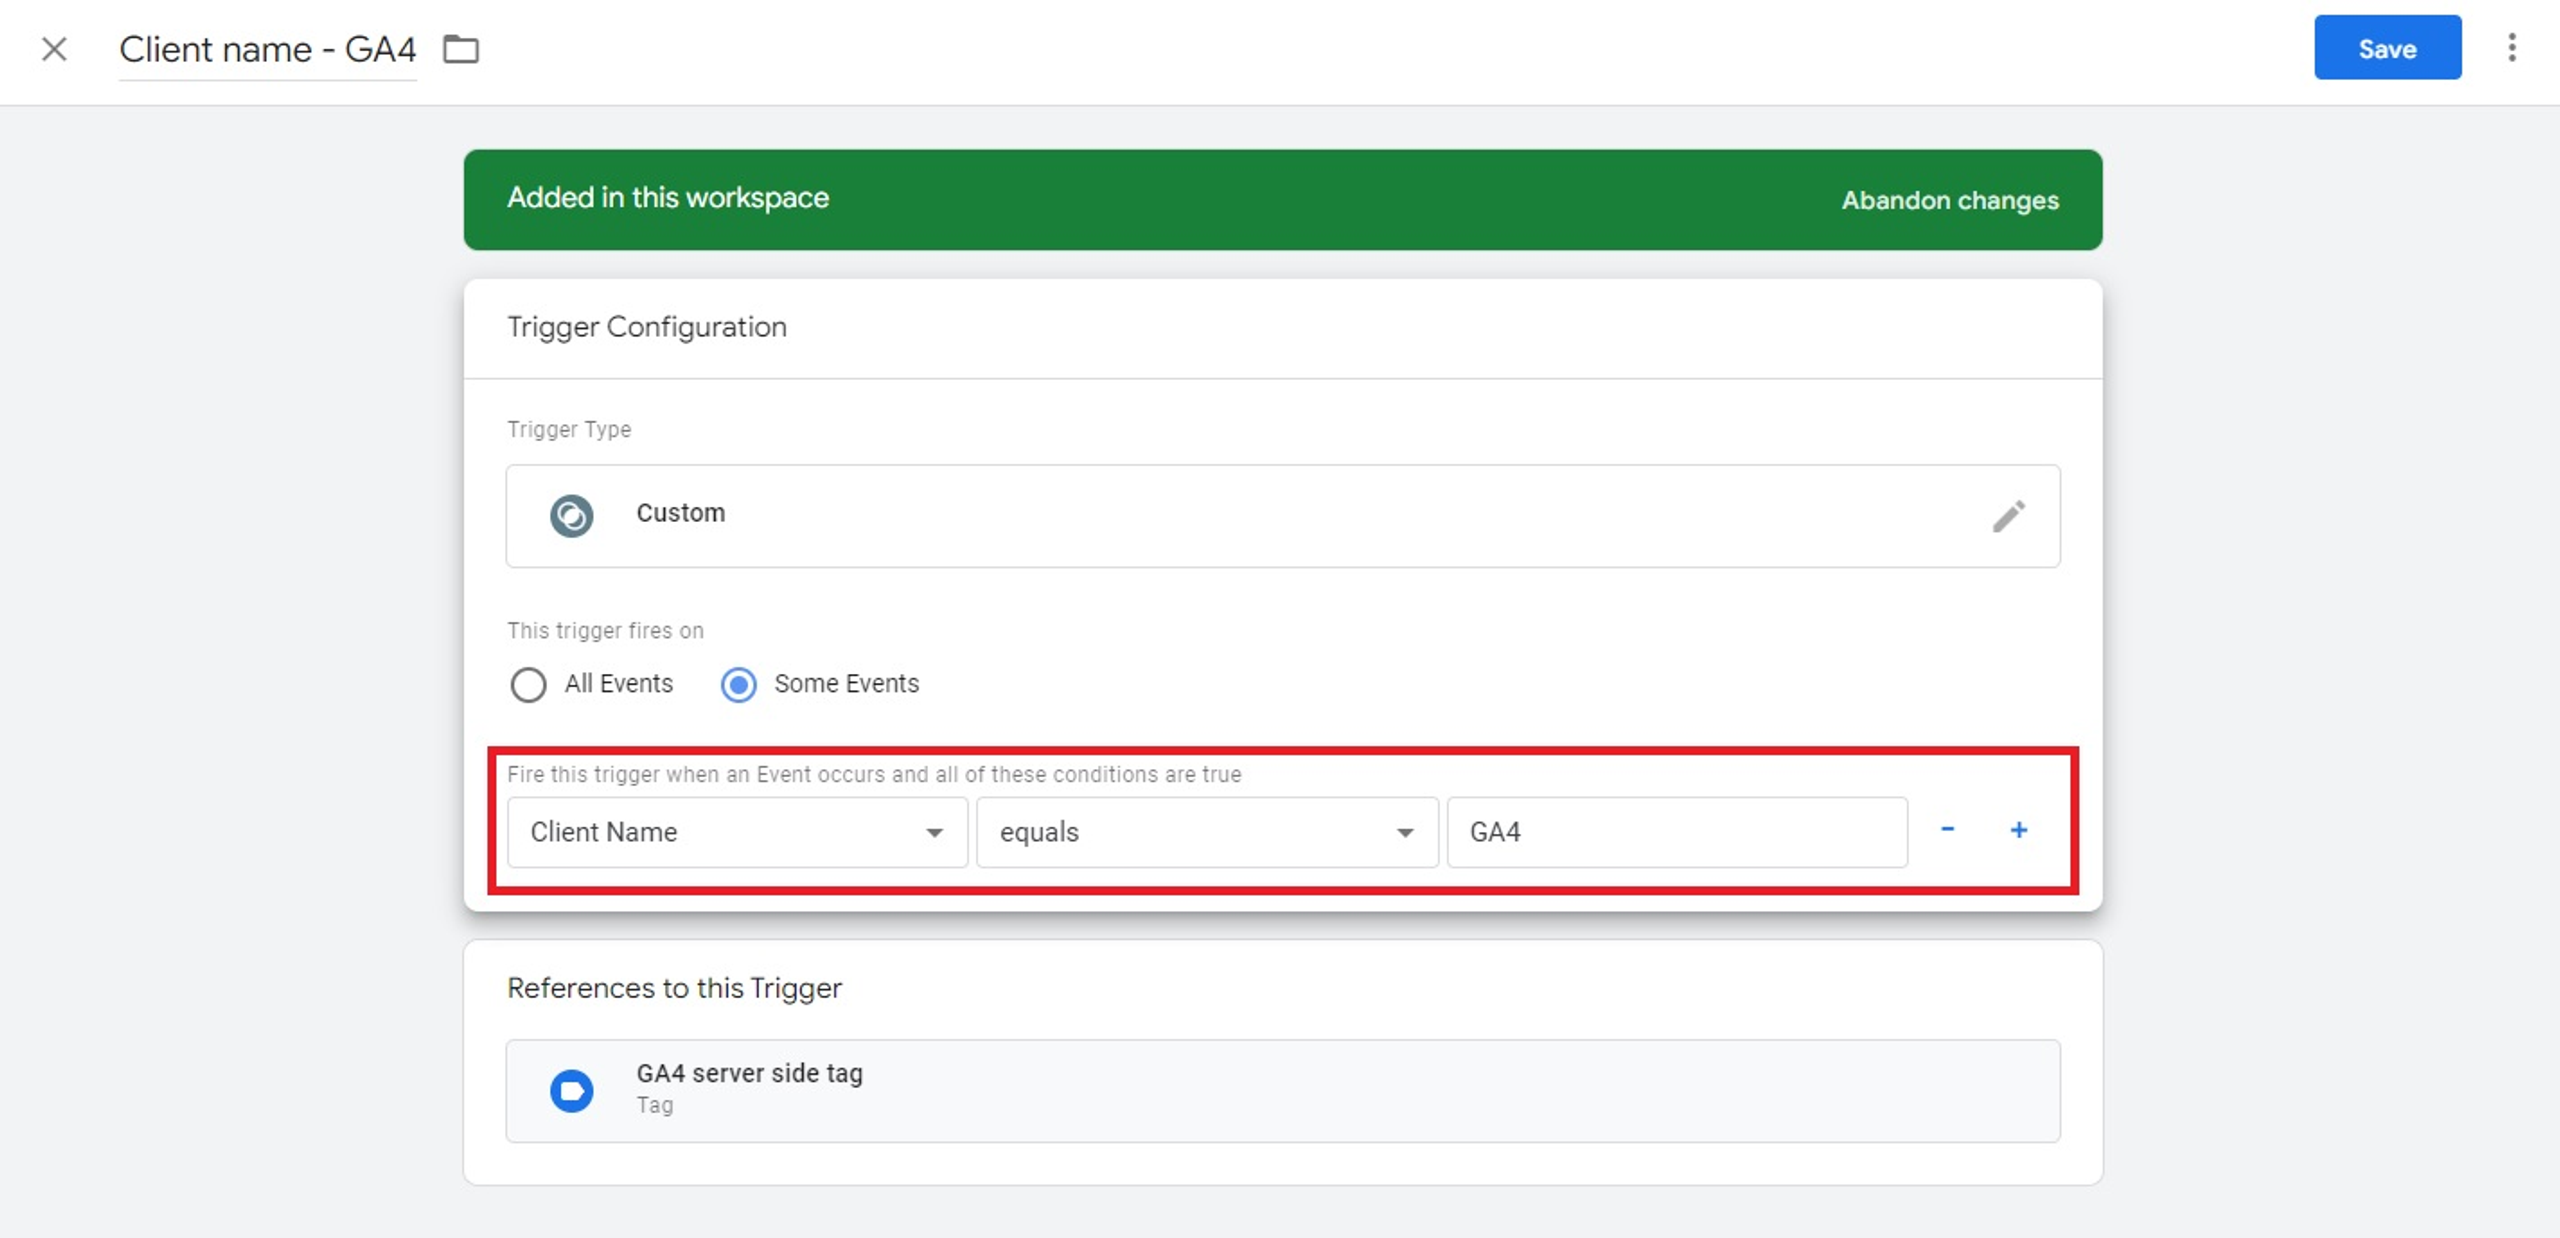
Click Save and both tags are ready to be used. Do not forget to publish your container after these changes.

Step 3: Connect Server container and Web container
Next, a Web GTM Container must be created.
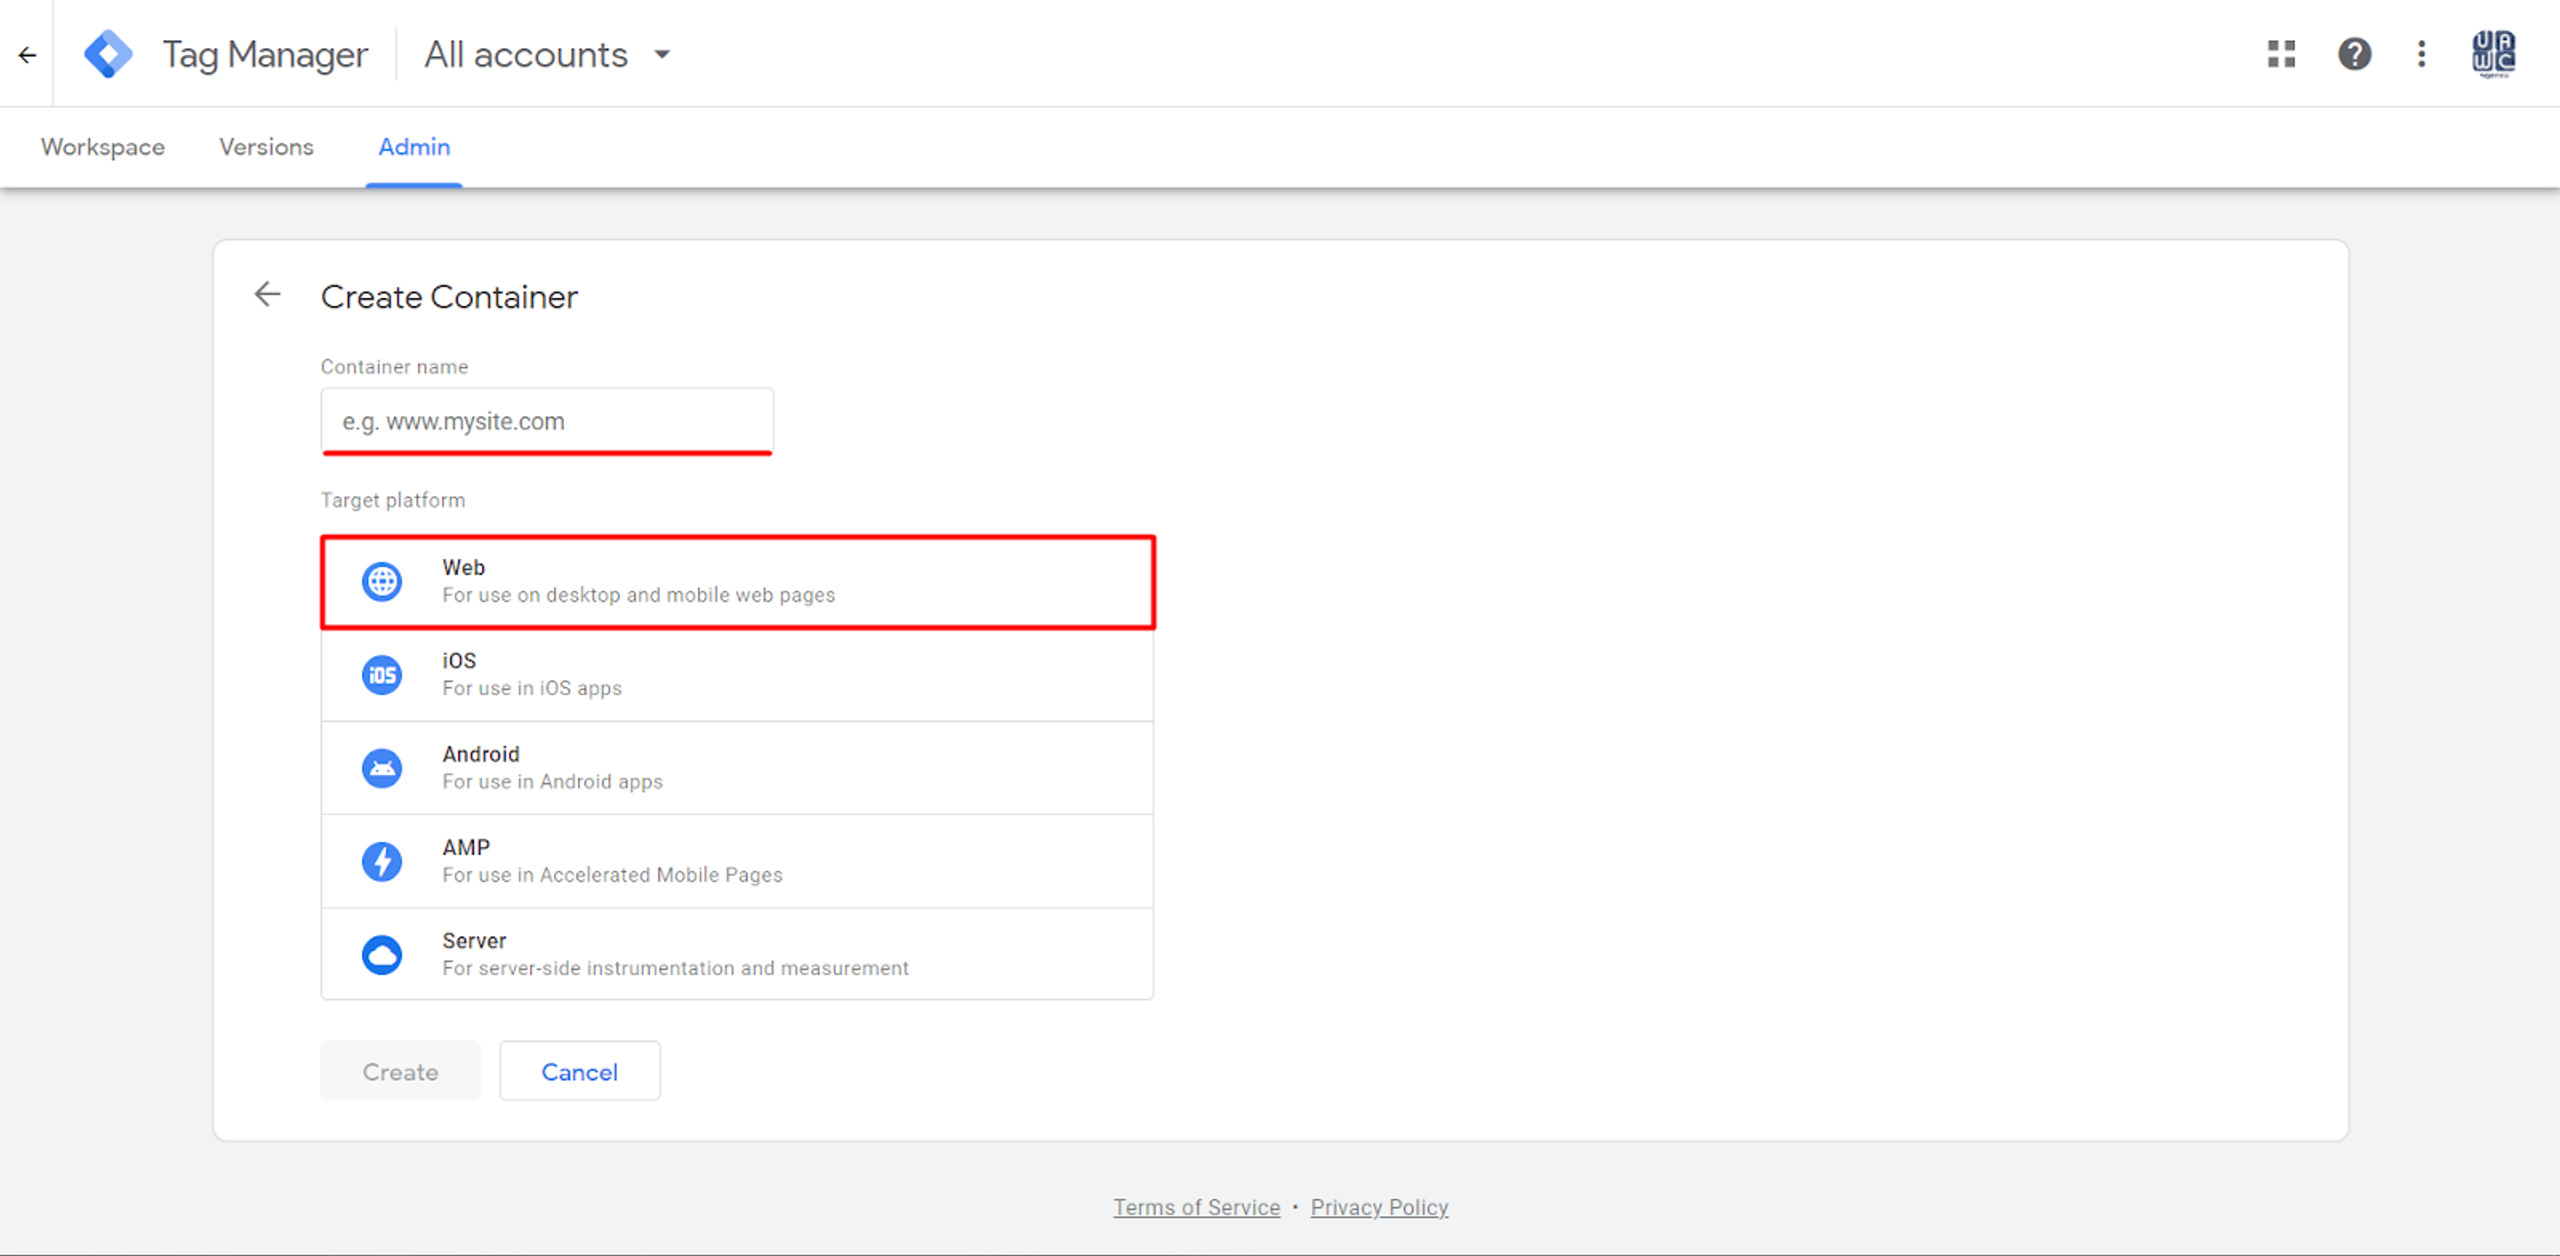
Here, (see the screenshot above) enter the Website domain and choose the “Web” section.
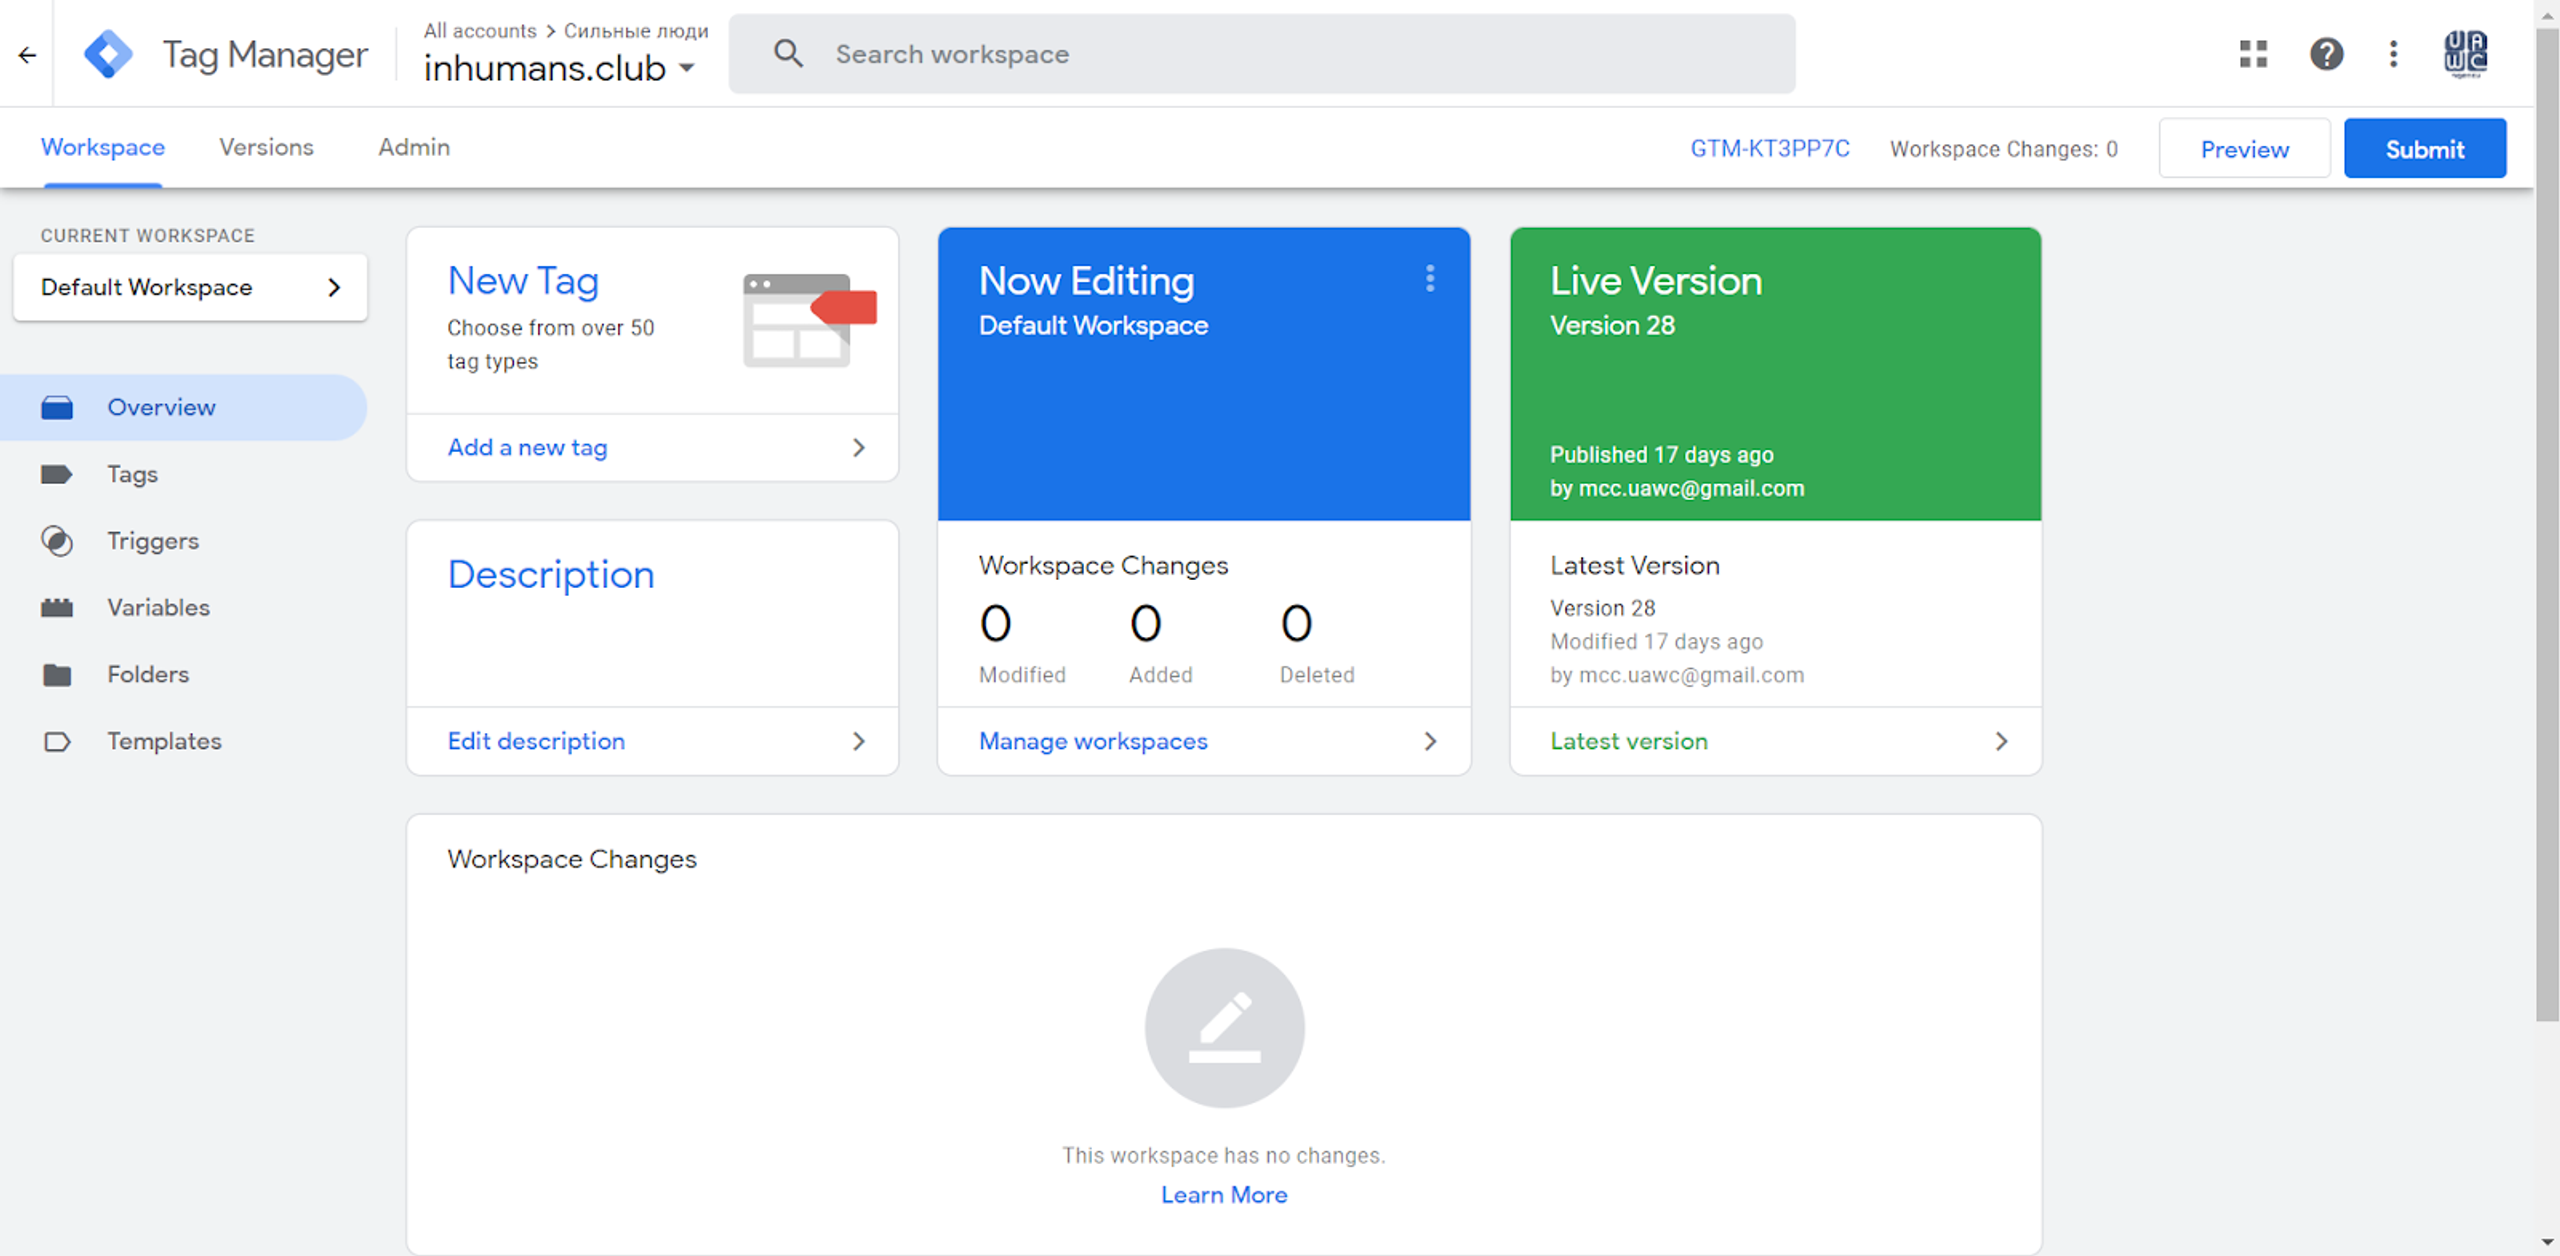
After a new Web Container is created a Tag should be created, which will be set up on the Website.
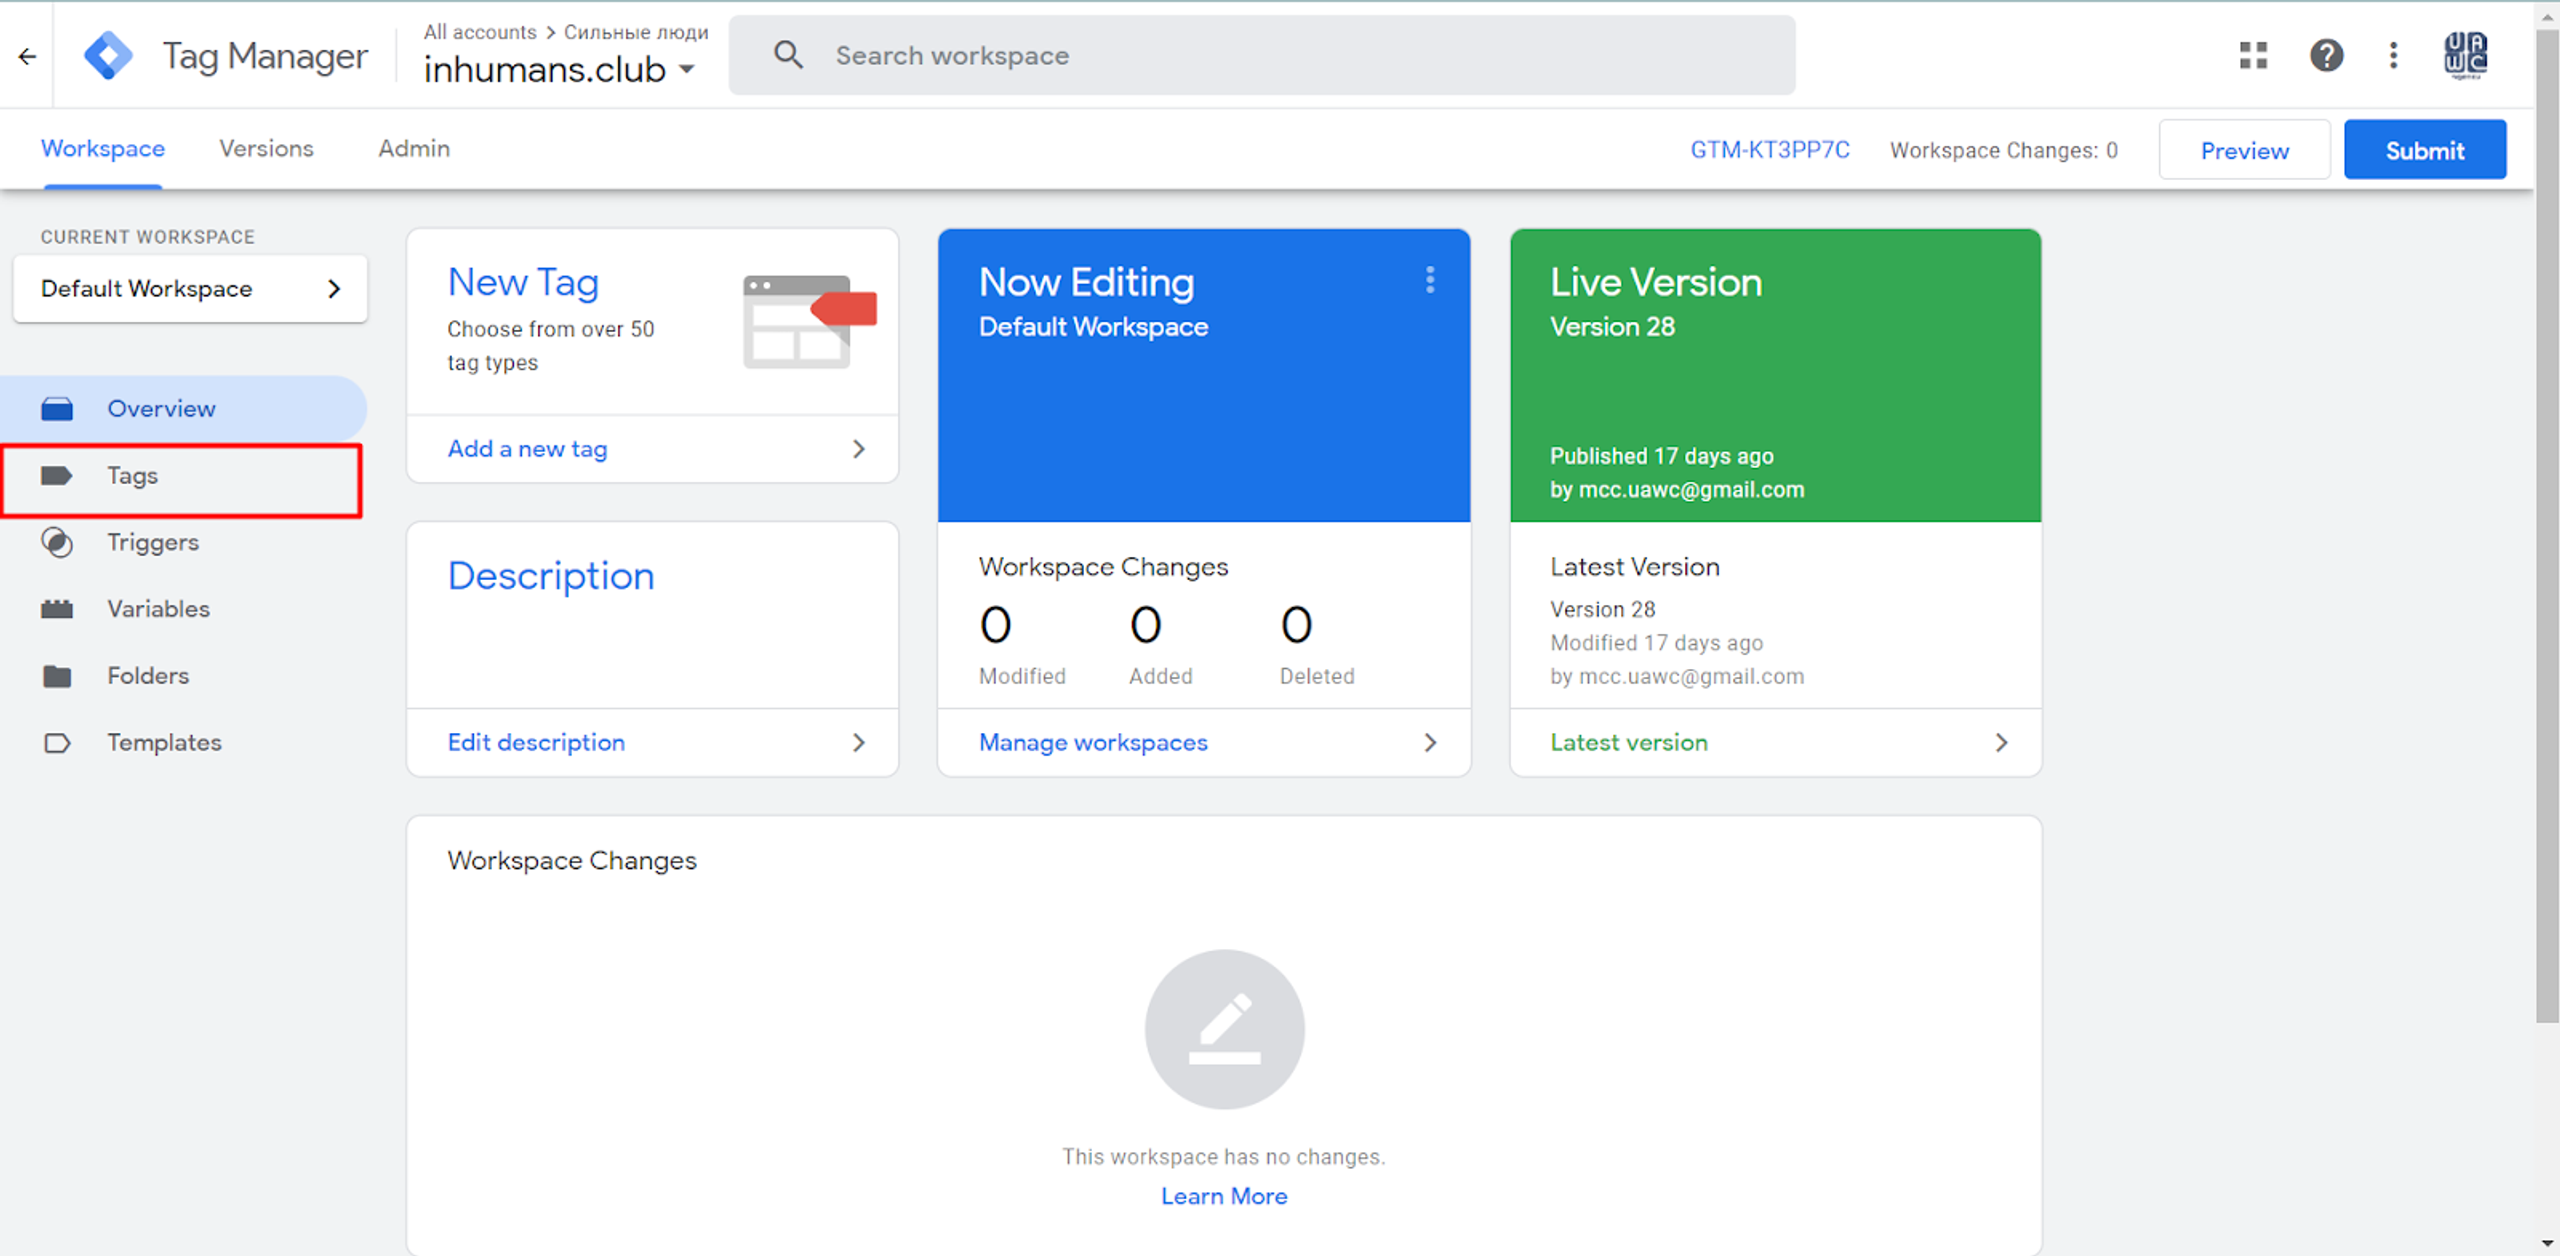
For example, I have created a “Page View” Tag which will “fire” when someone is looking at the Website.
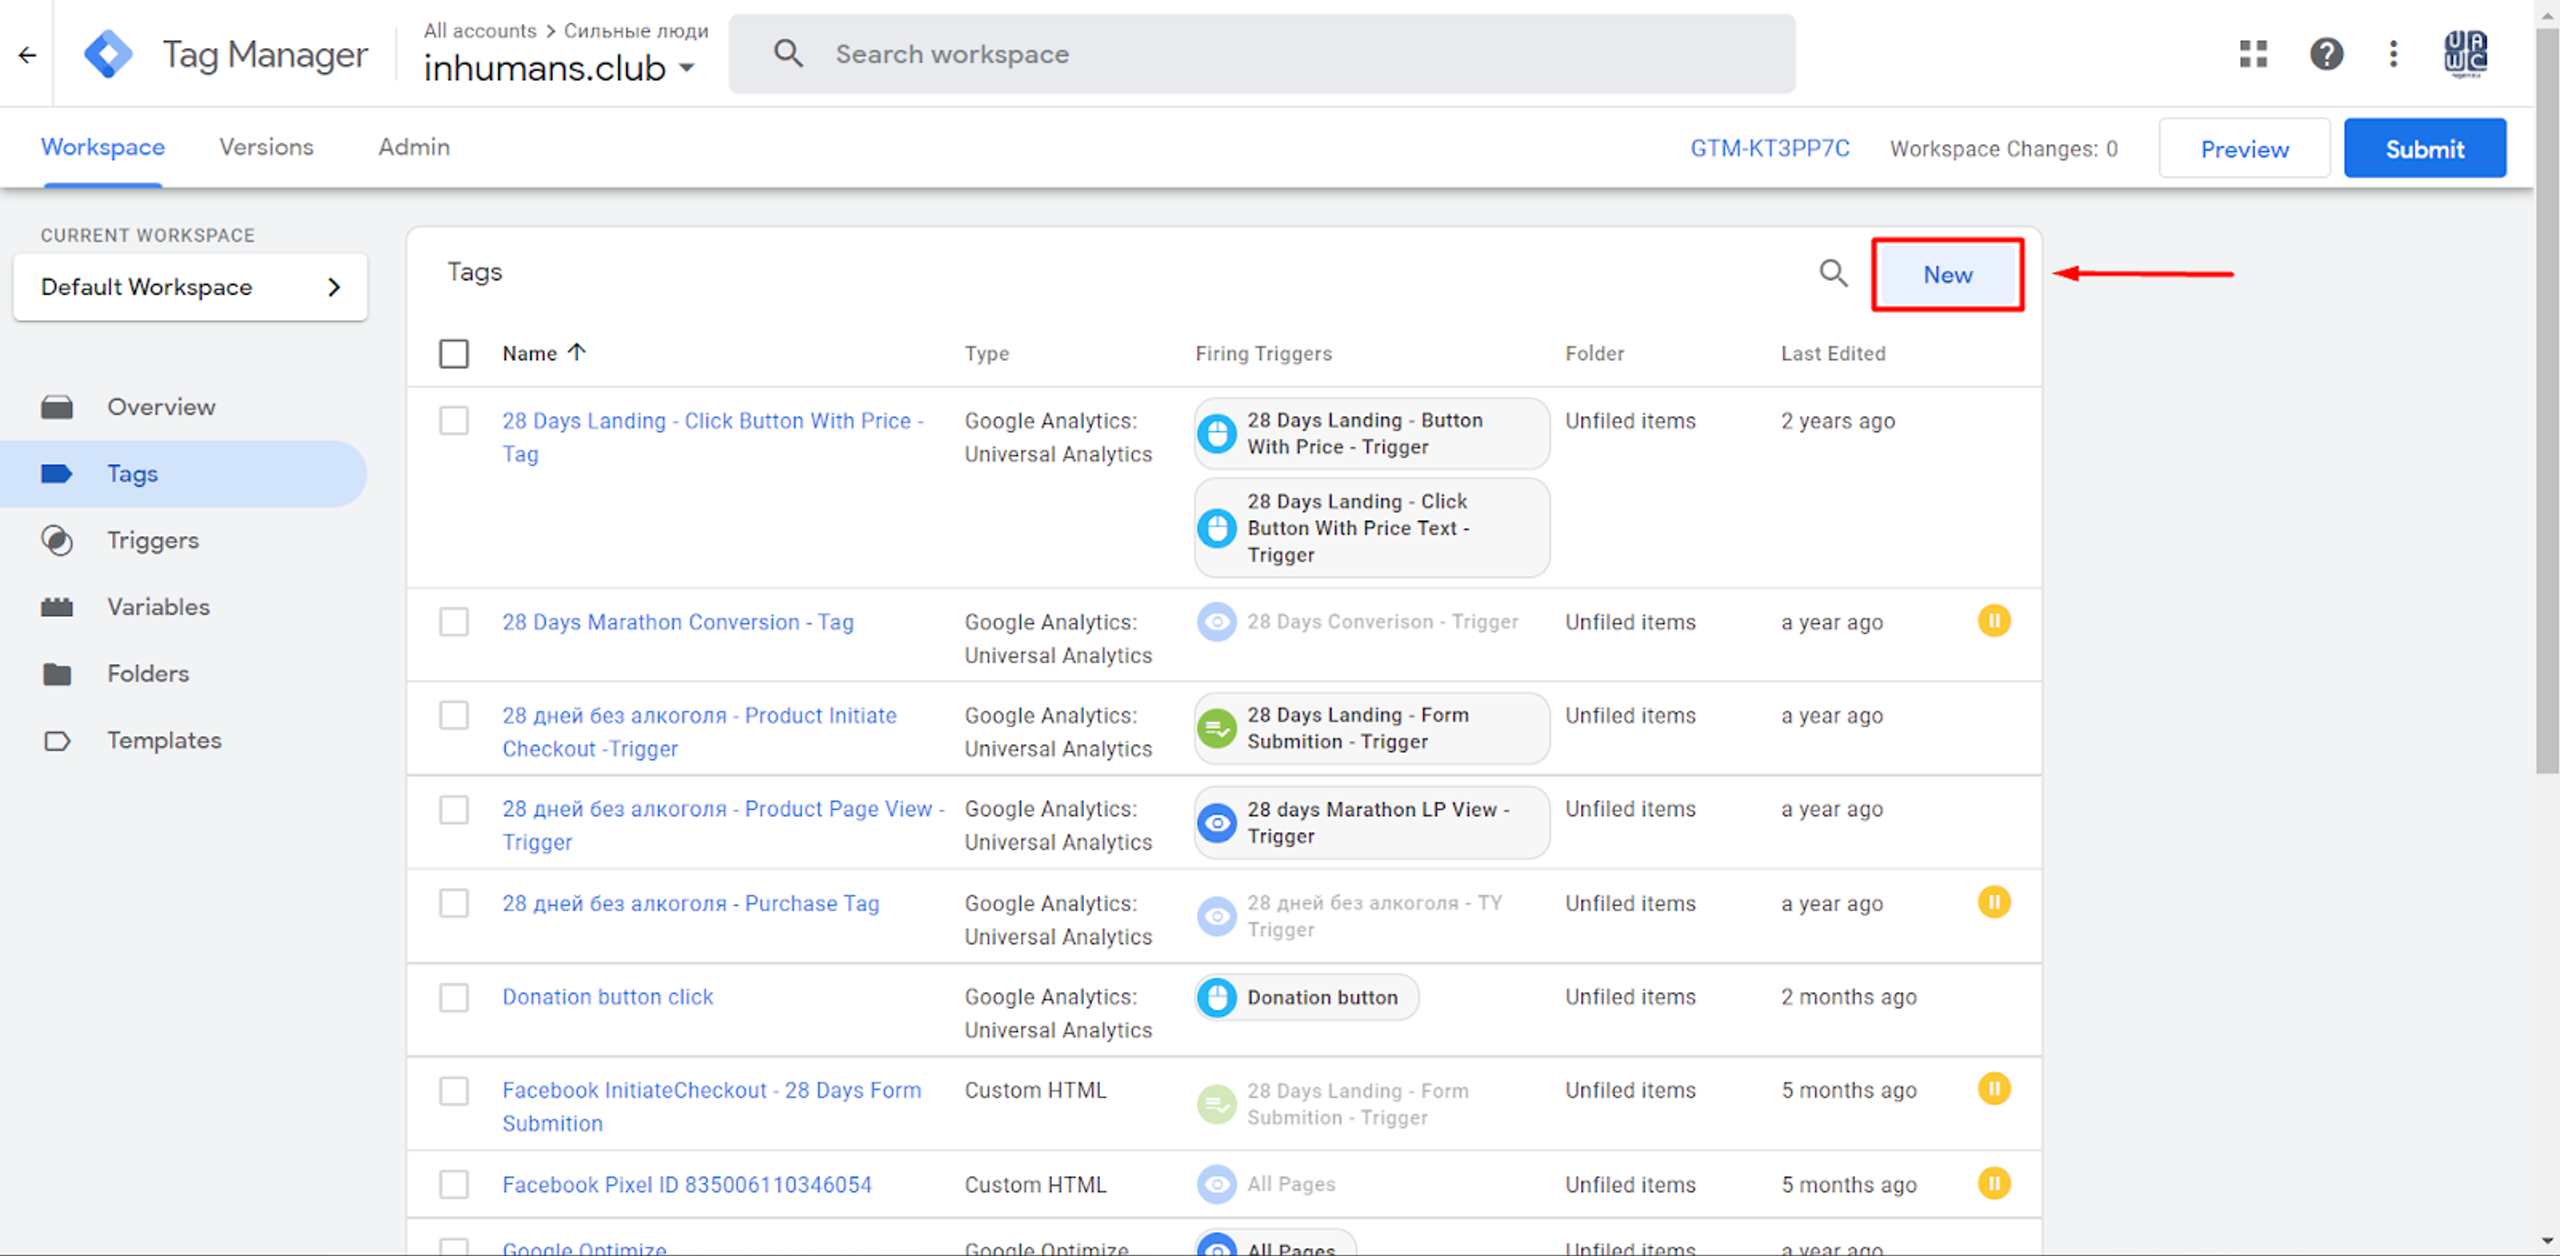
How to create a “Page View” Tag?
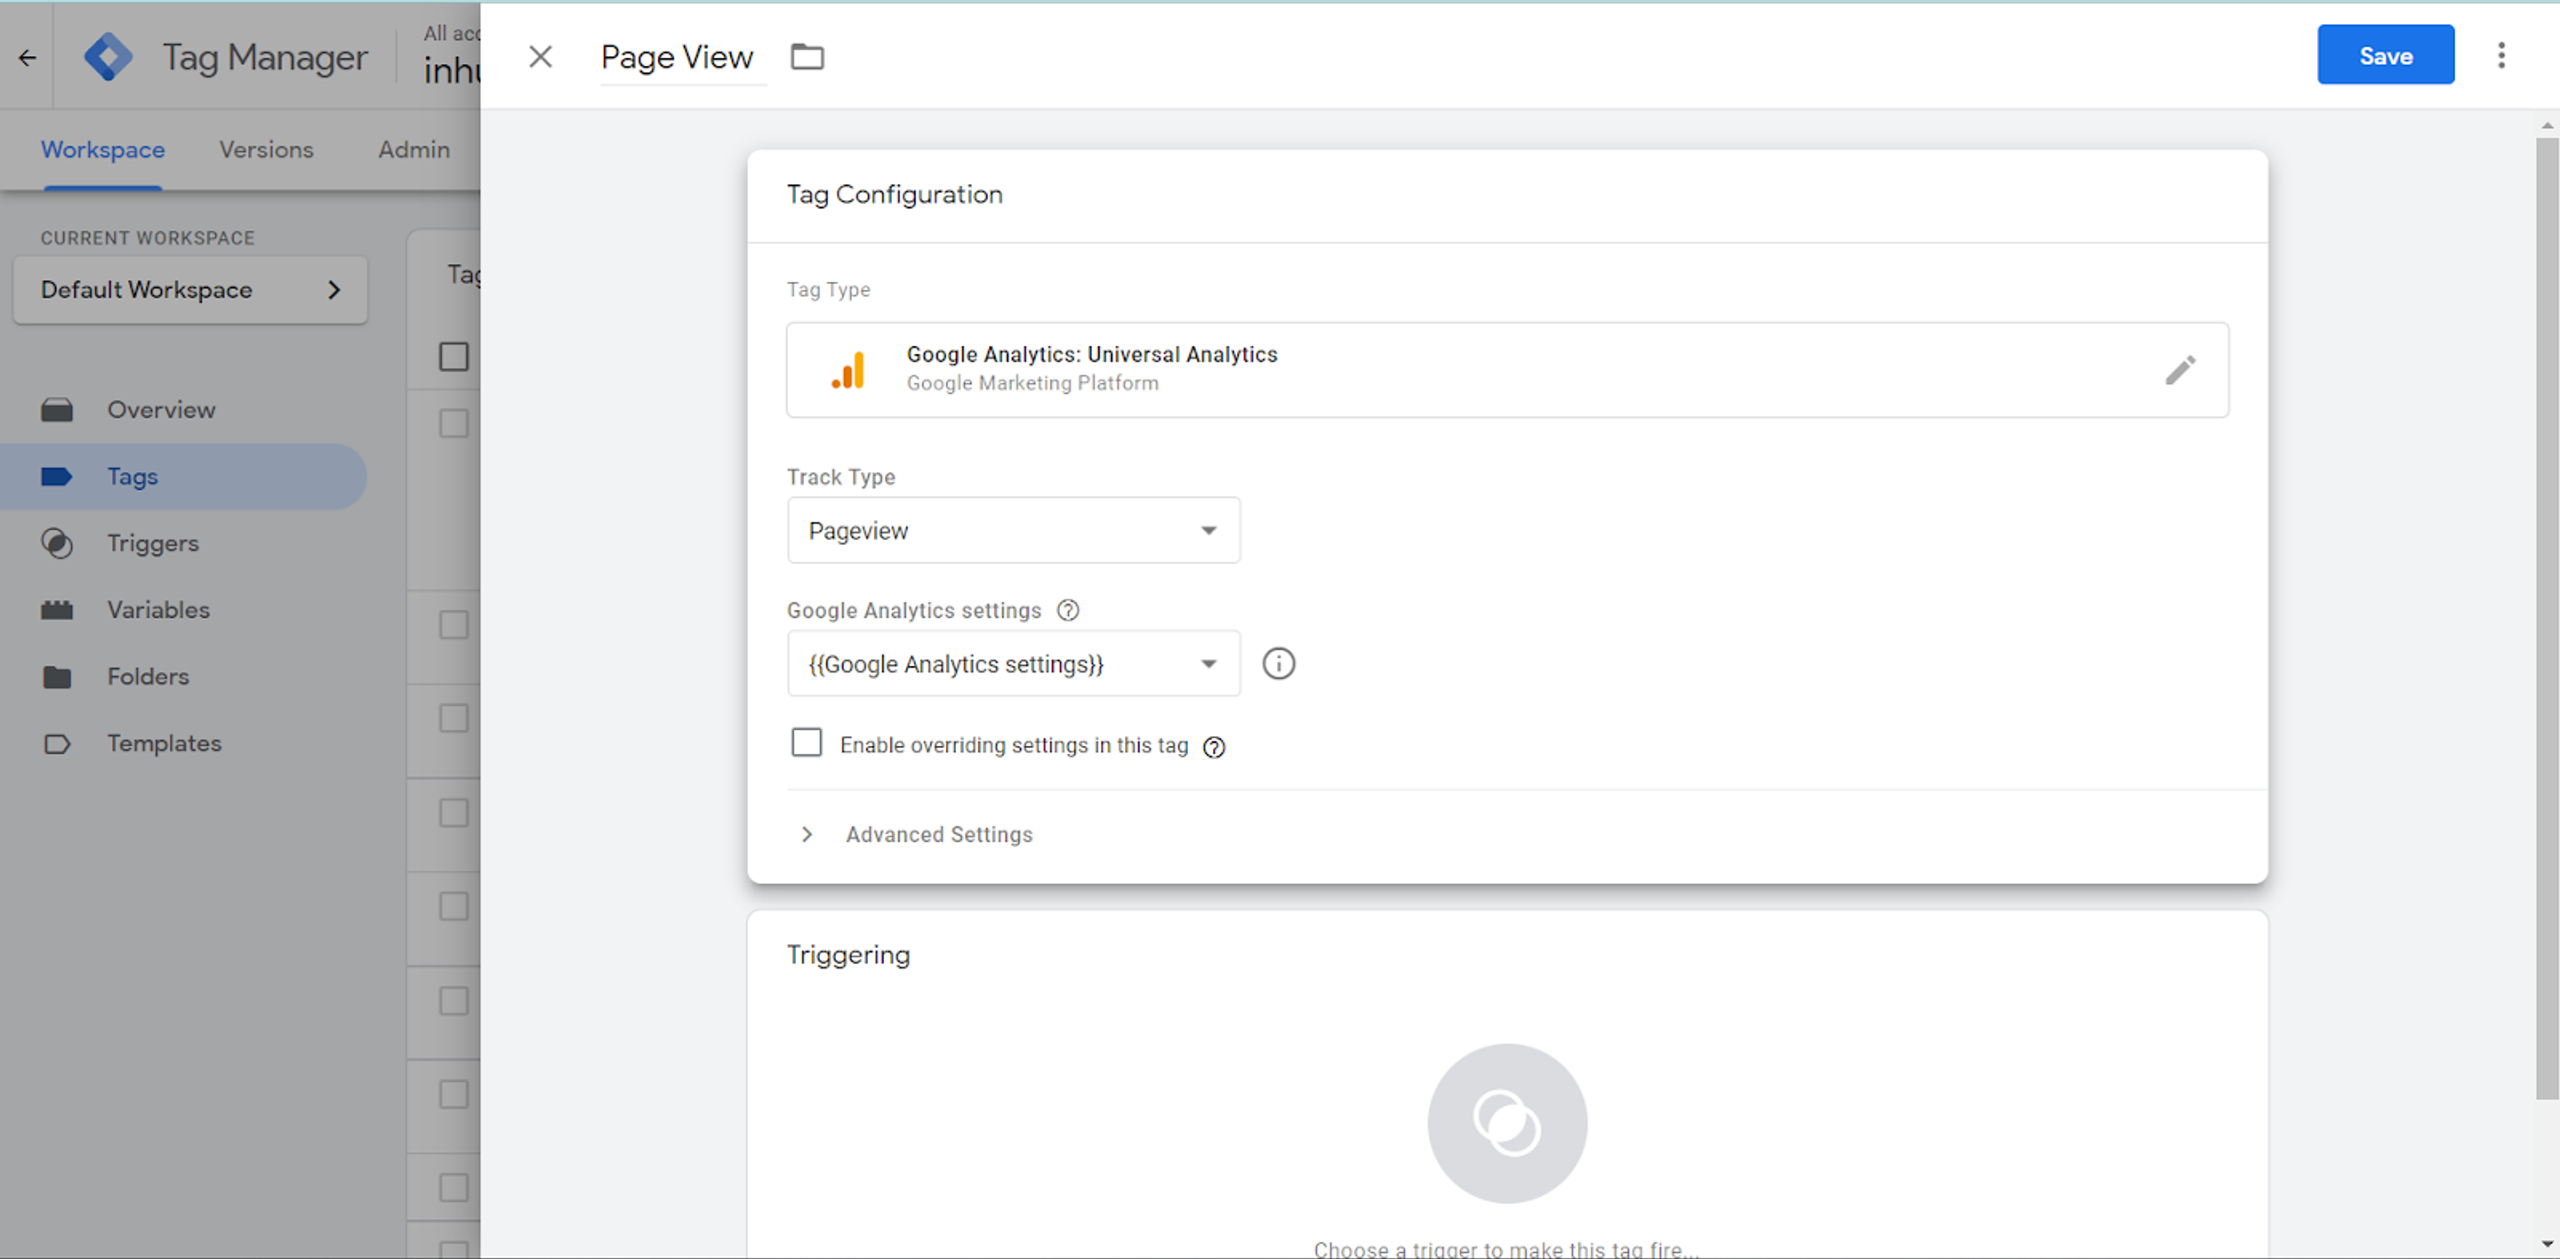
Firstly, in Tag Configuration, our type of Google Analytics must be chosen, which in my case is Universal Analytics.
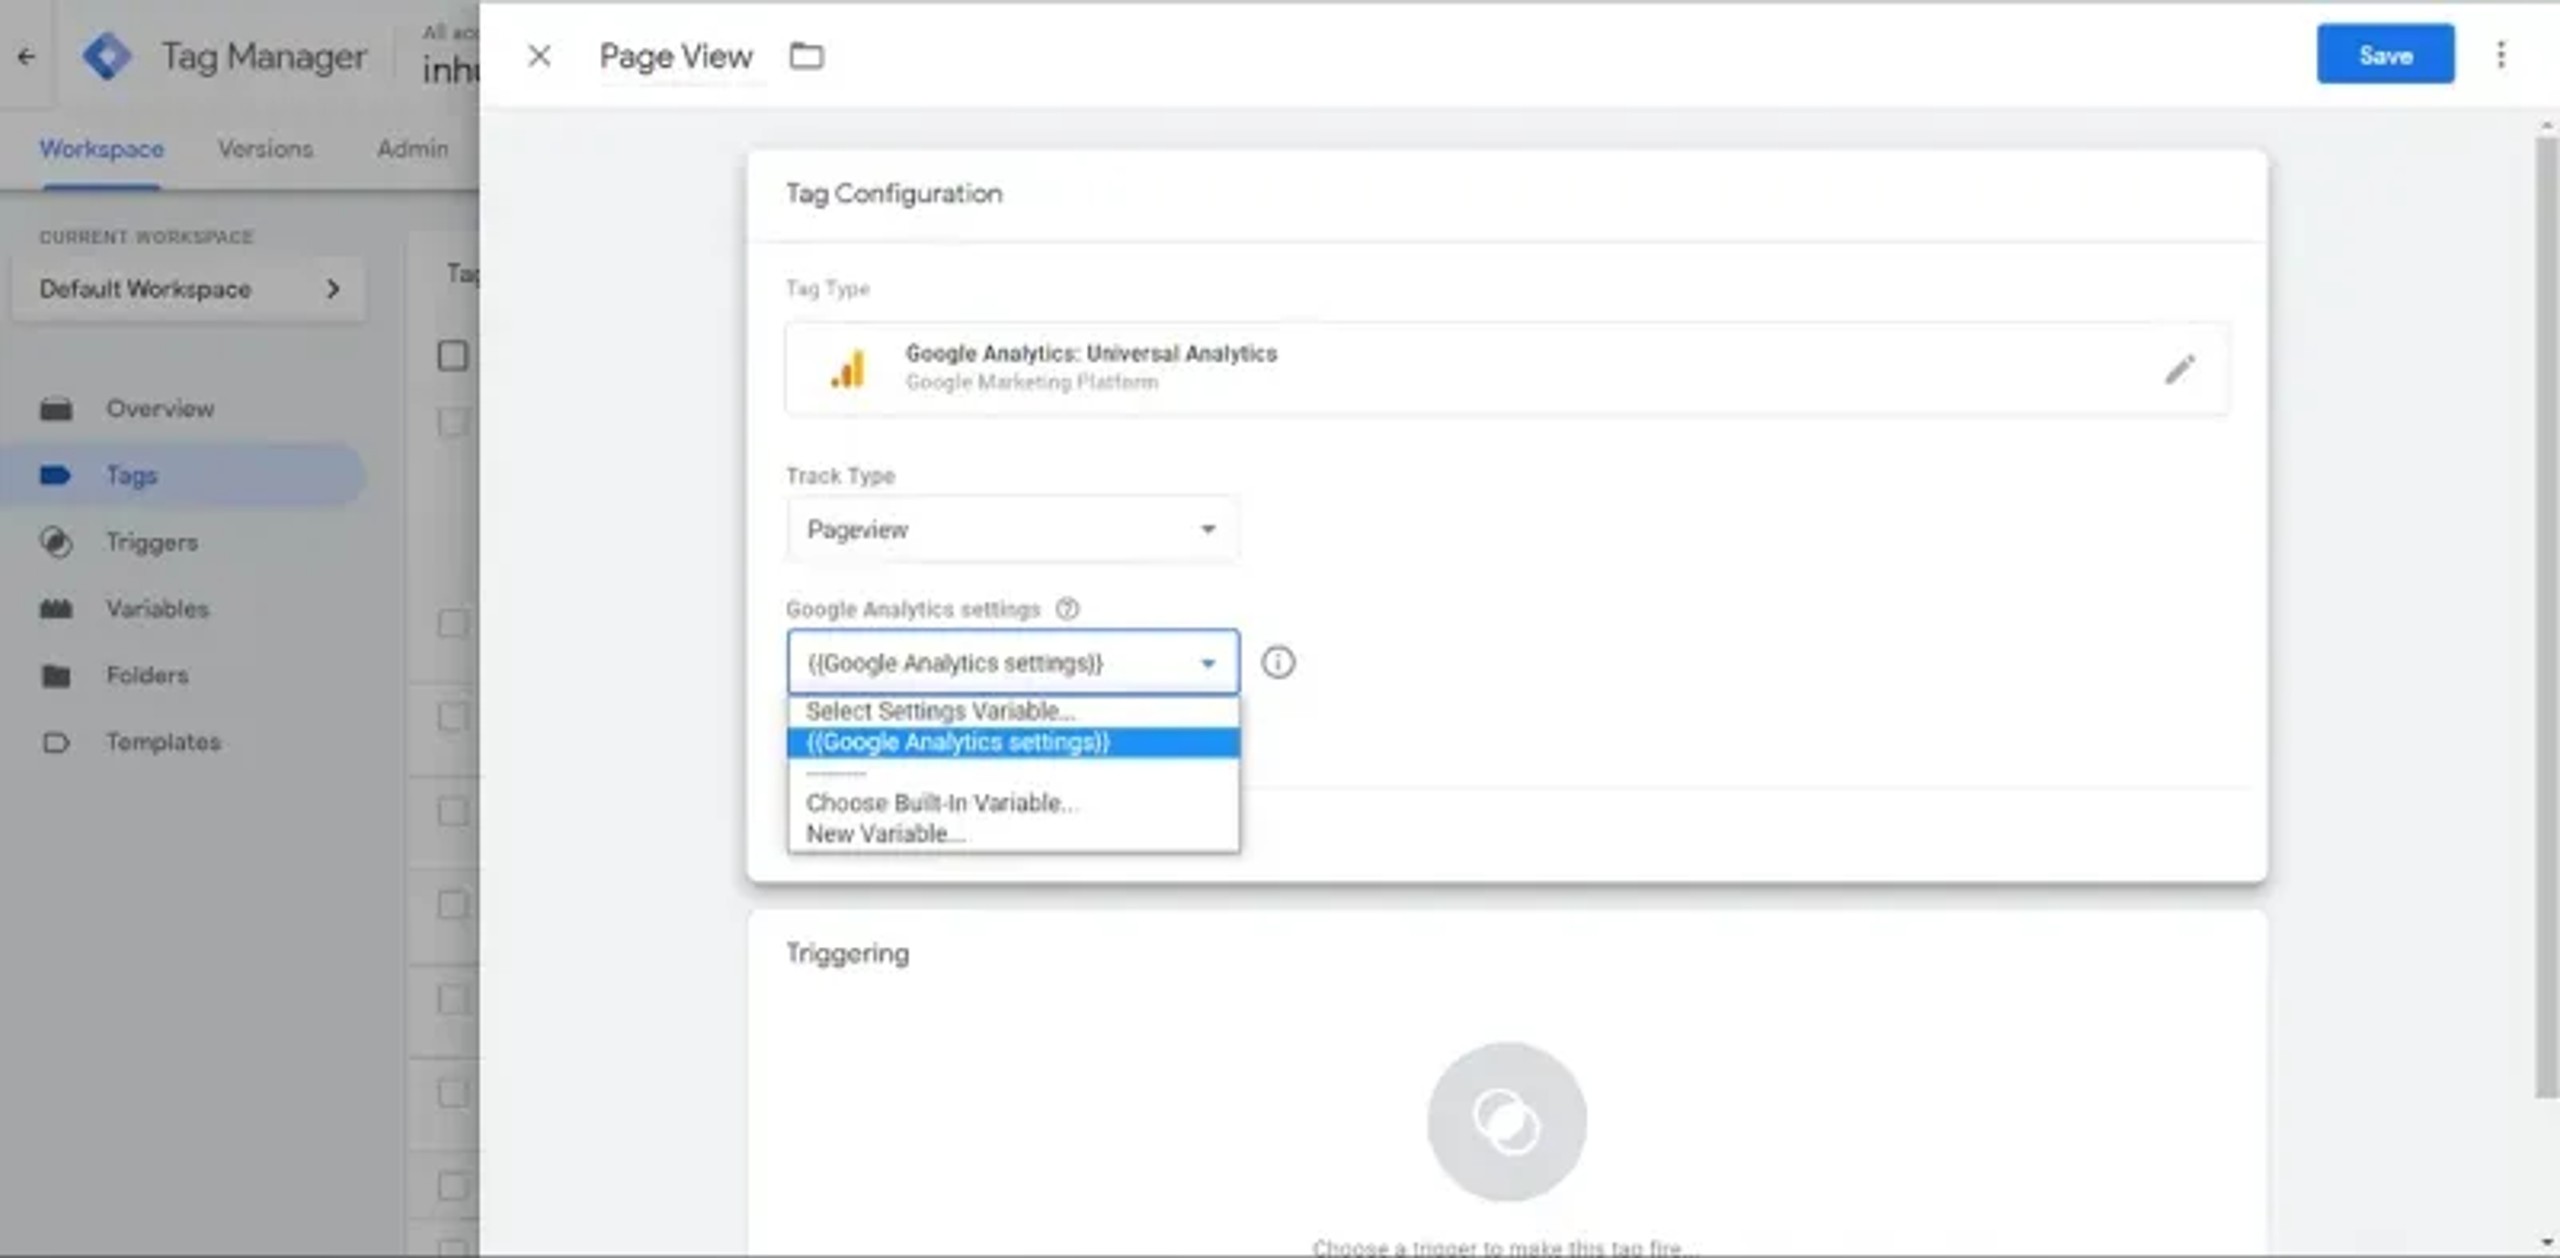
Below, in “Google Analytics” Settings we should choose the main “Variable”: Google Analytics Settings.
That is all we need to set up in Tag Configuration. Now, we need to launch a Trigger which will be “fired”.
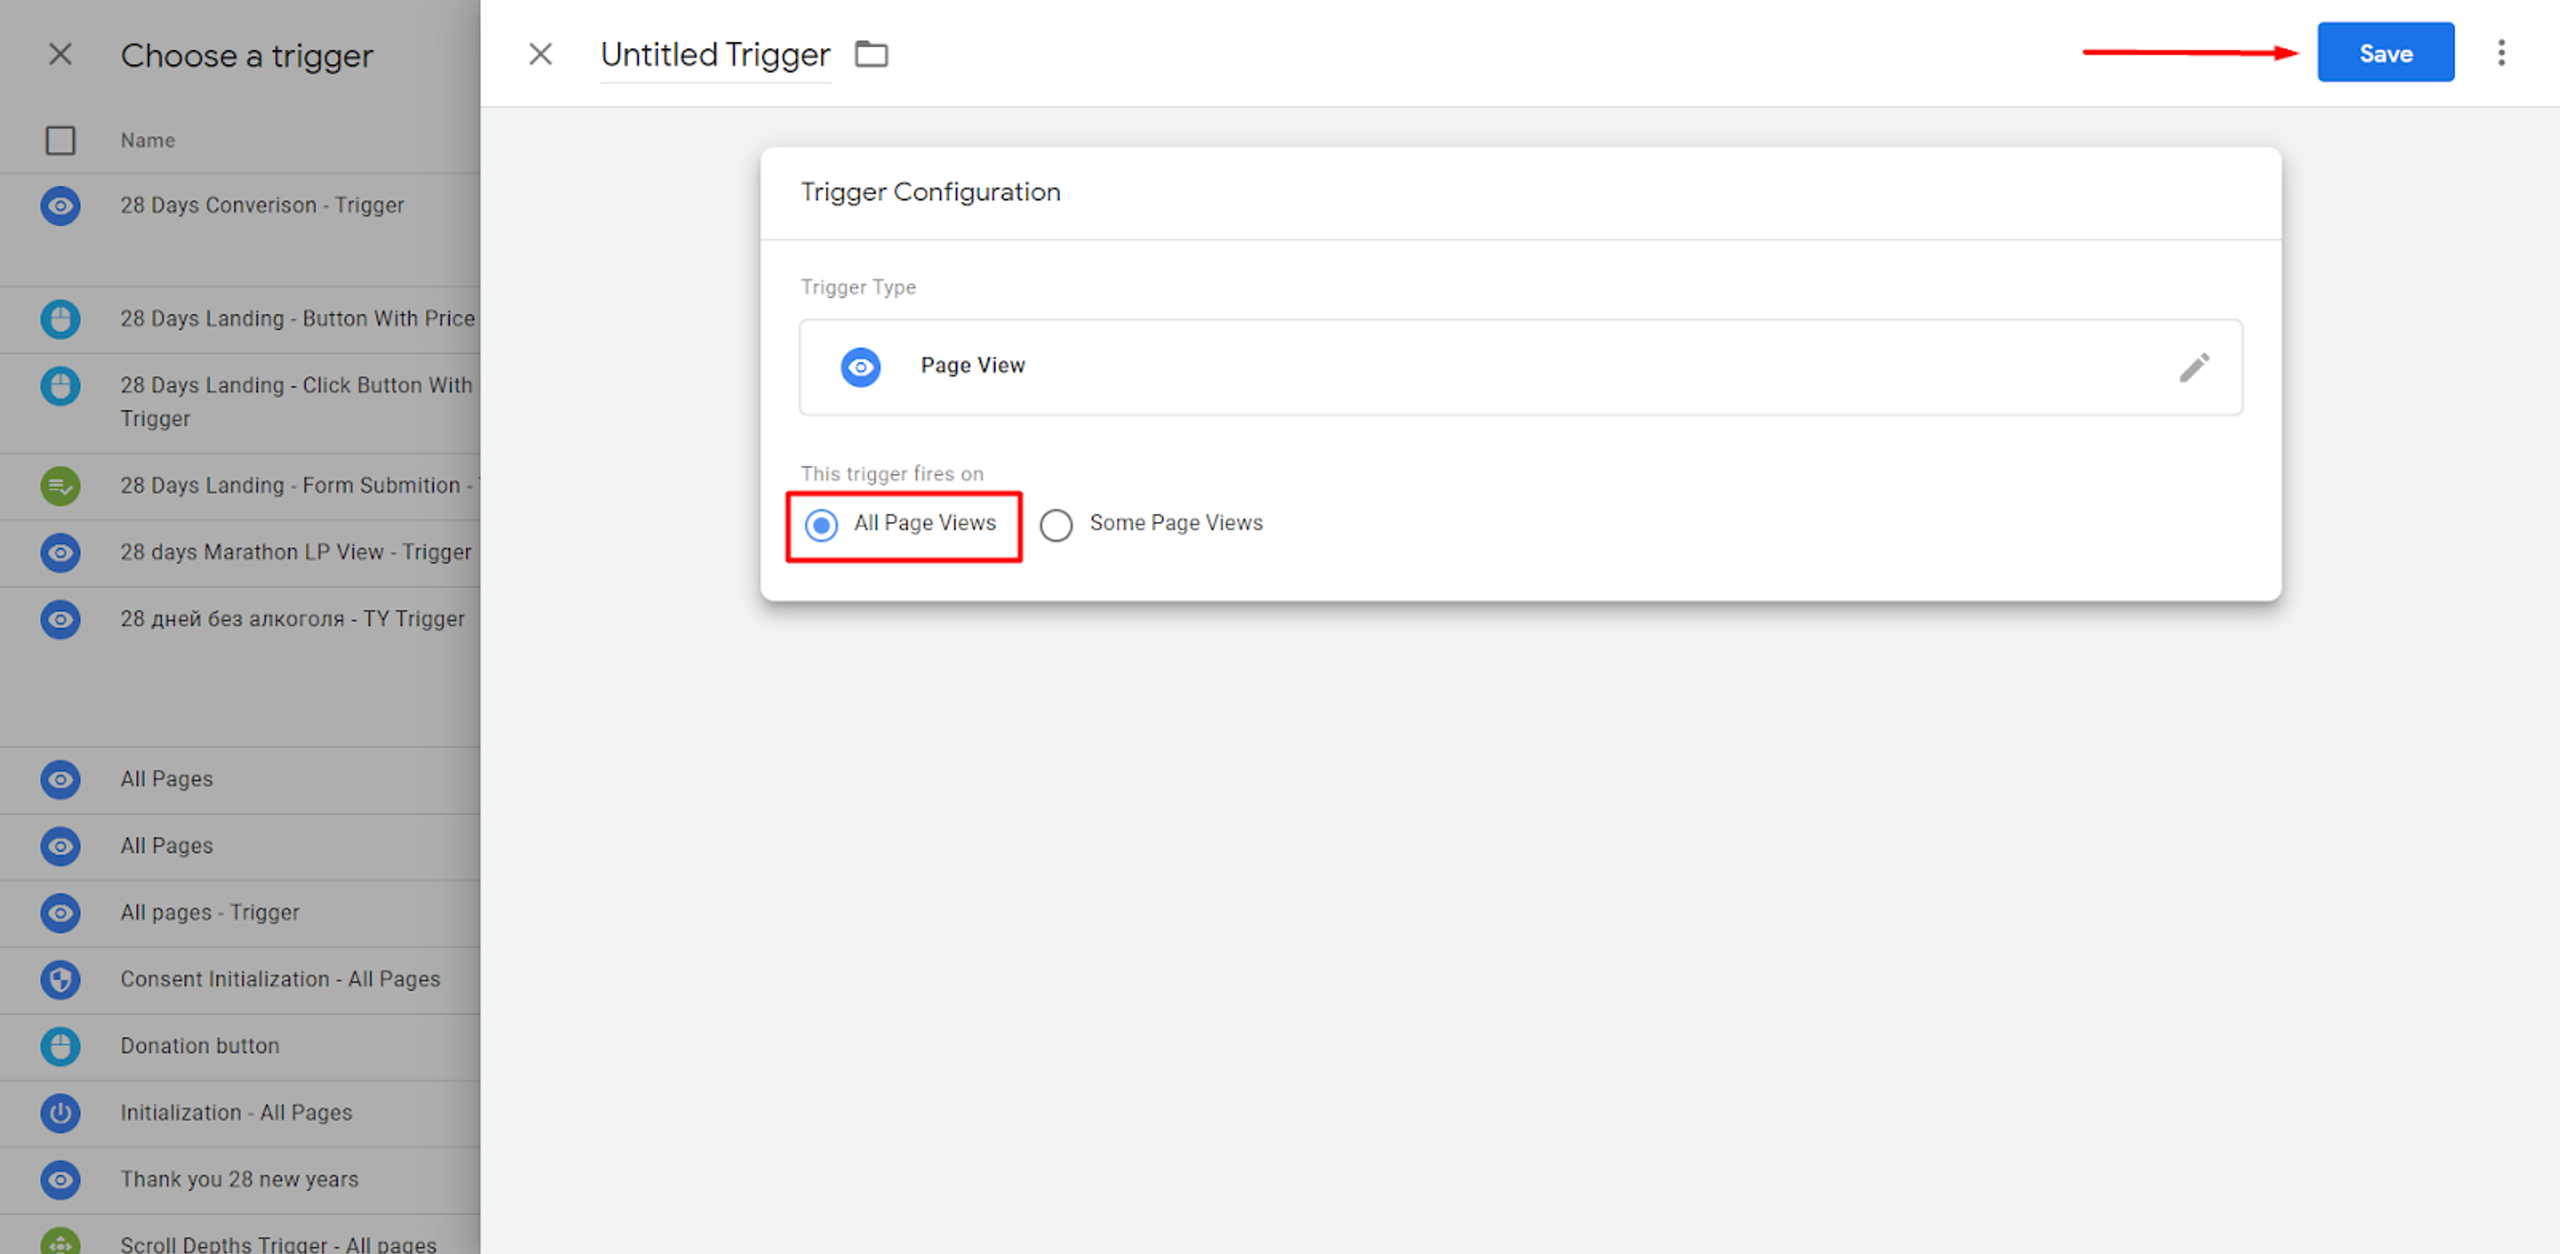
Here, we click on the “Page View” section.
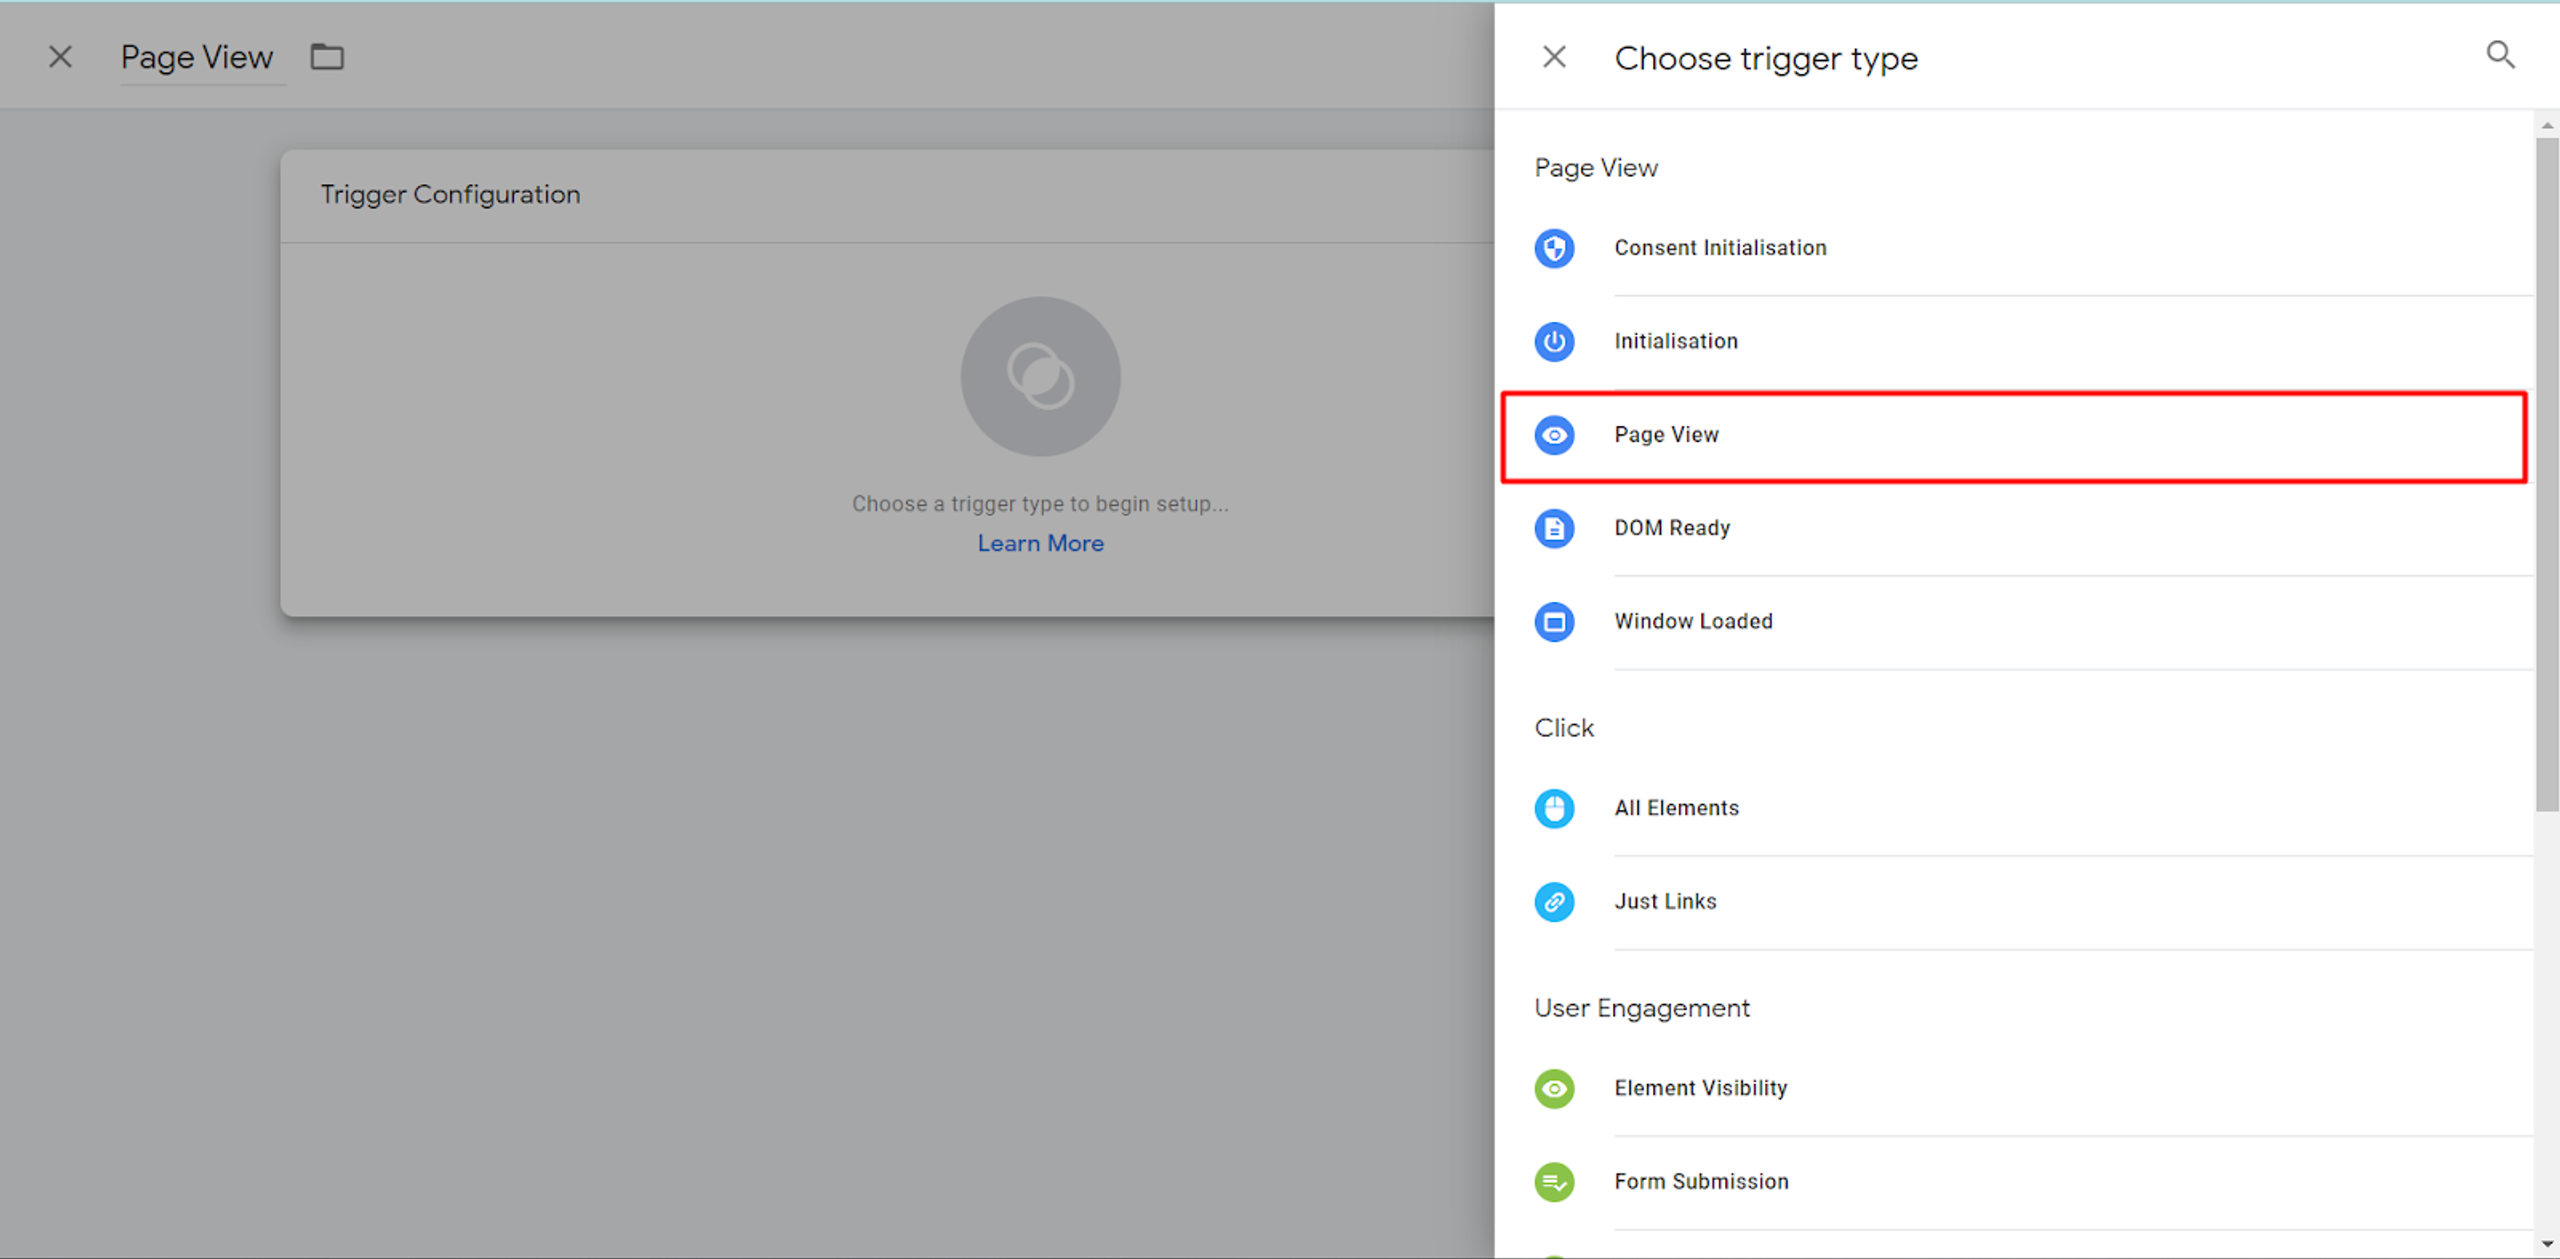
You can either choose that this “Page View” Trigger will “Fire” on all Website’s Pages or only on some pages. In our example, this is set up for All Website Pages.
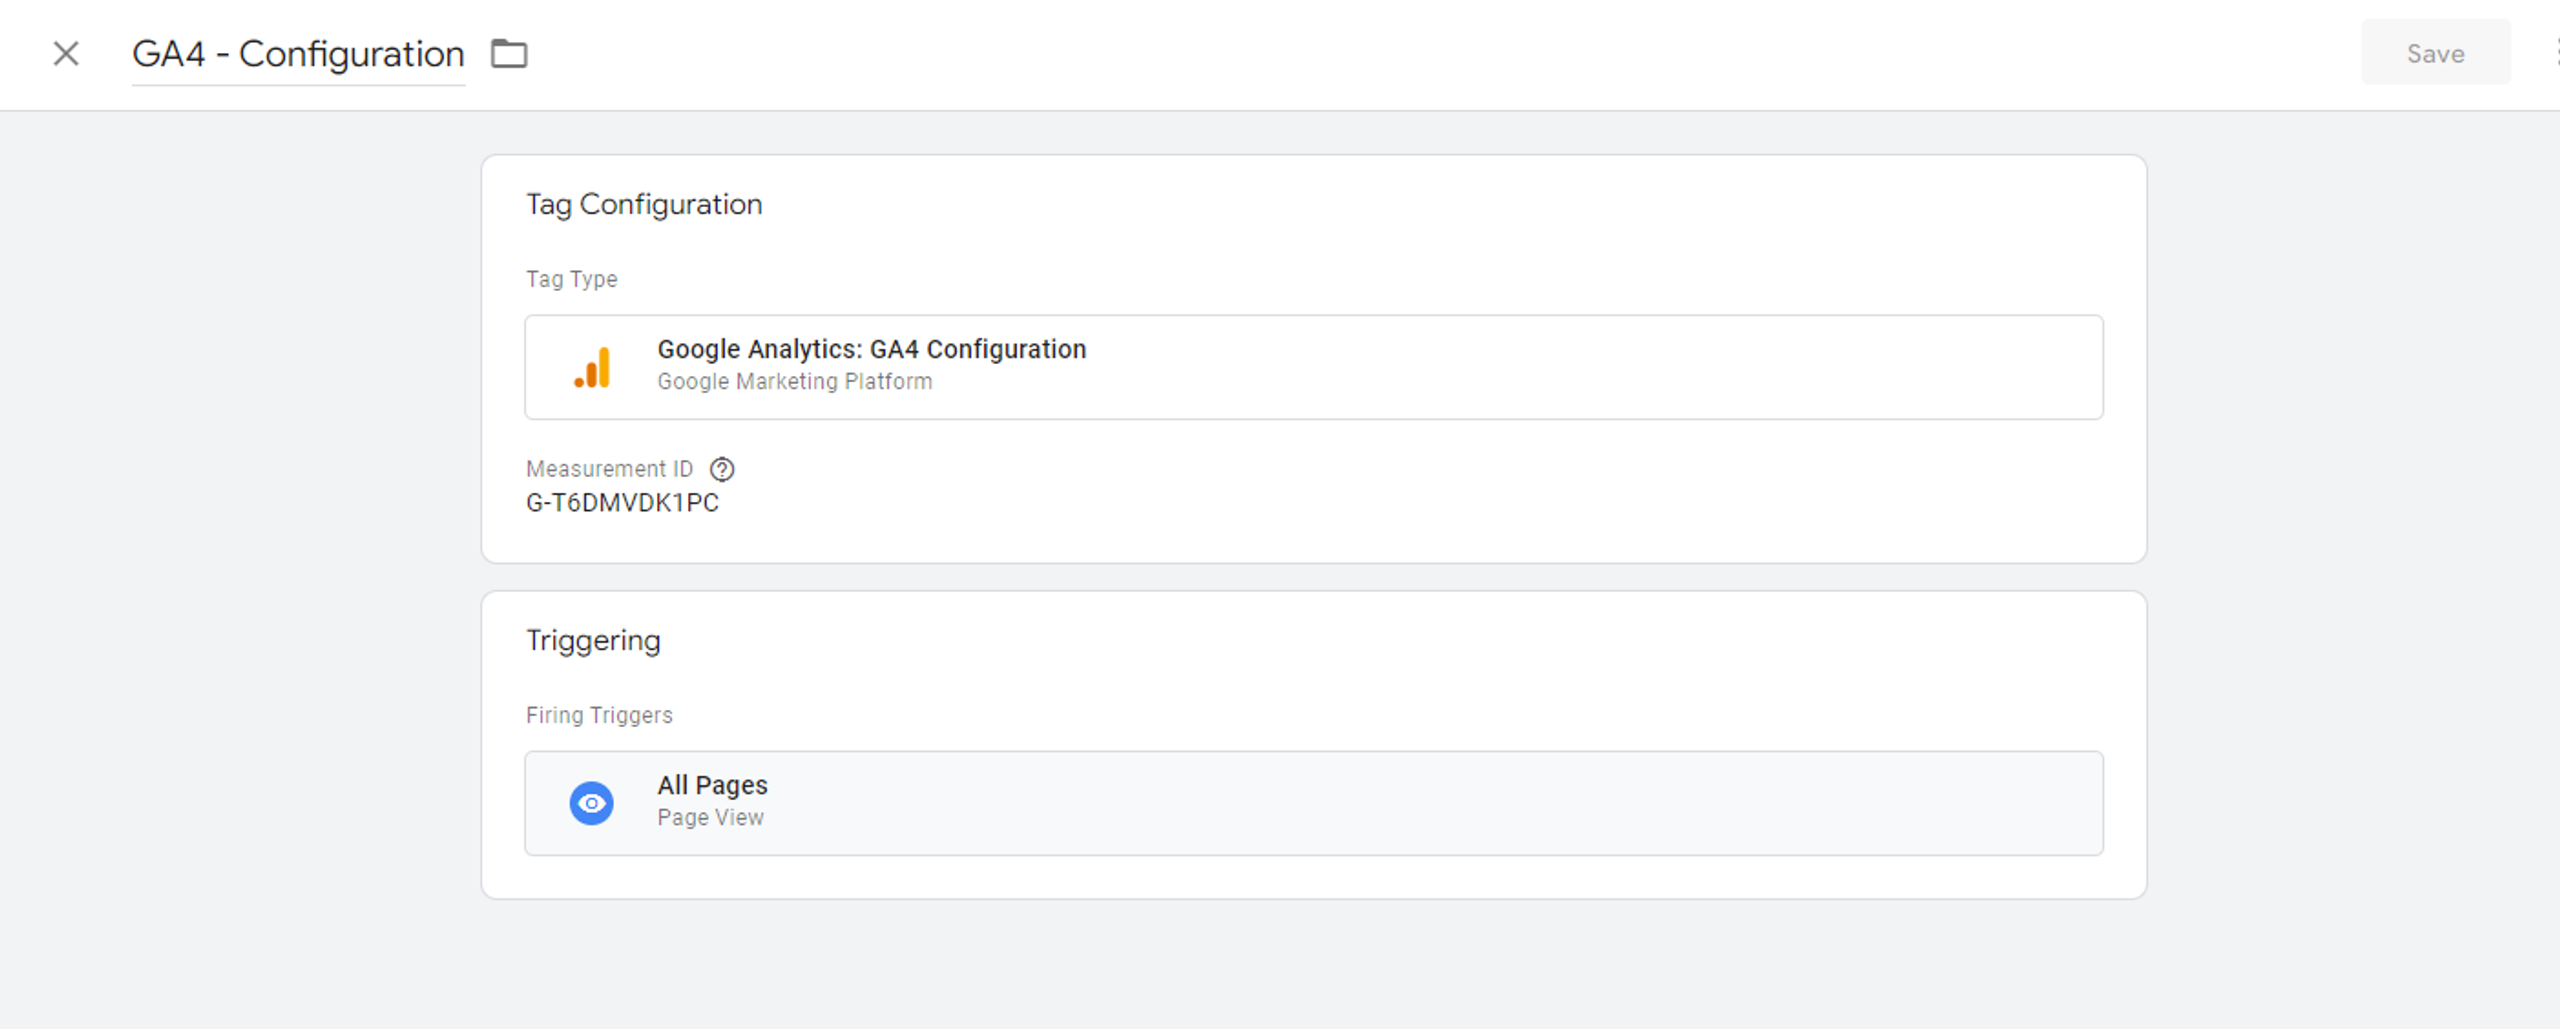
You'll need to create a GA4 configuration tag in the same way, adding the corresponding Measurement ID as we have mentioned above.
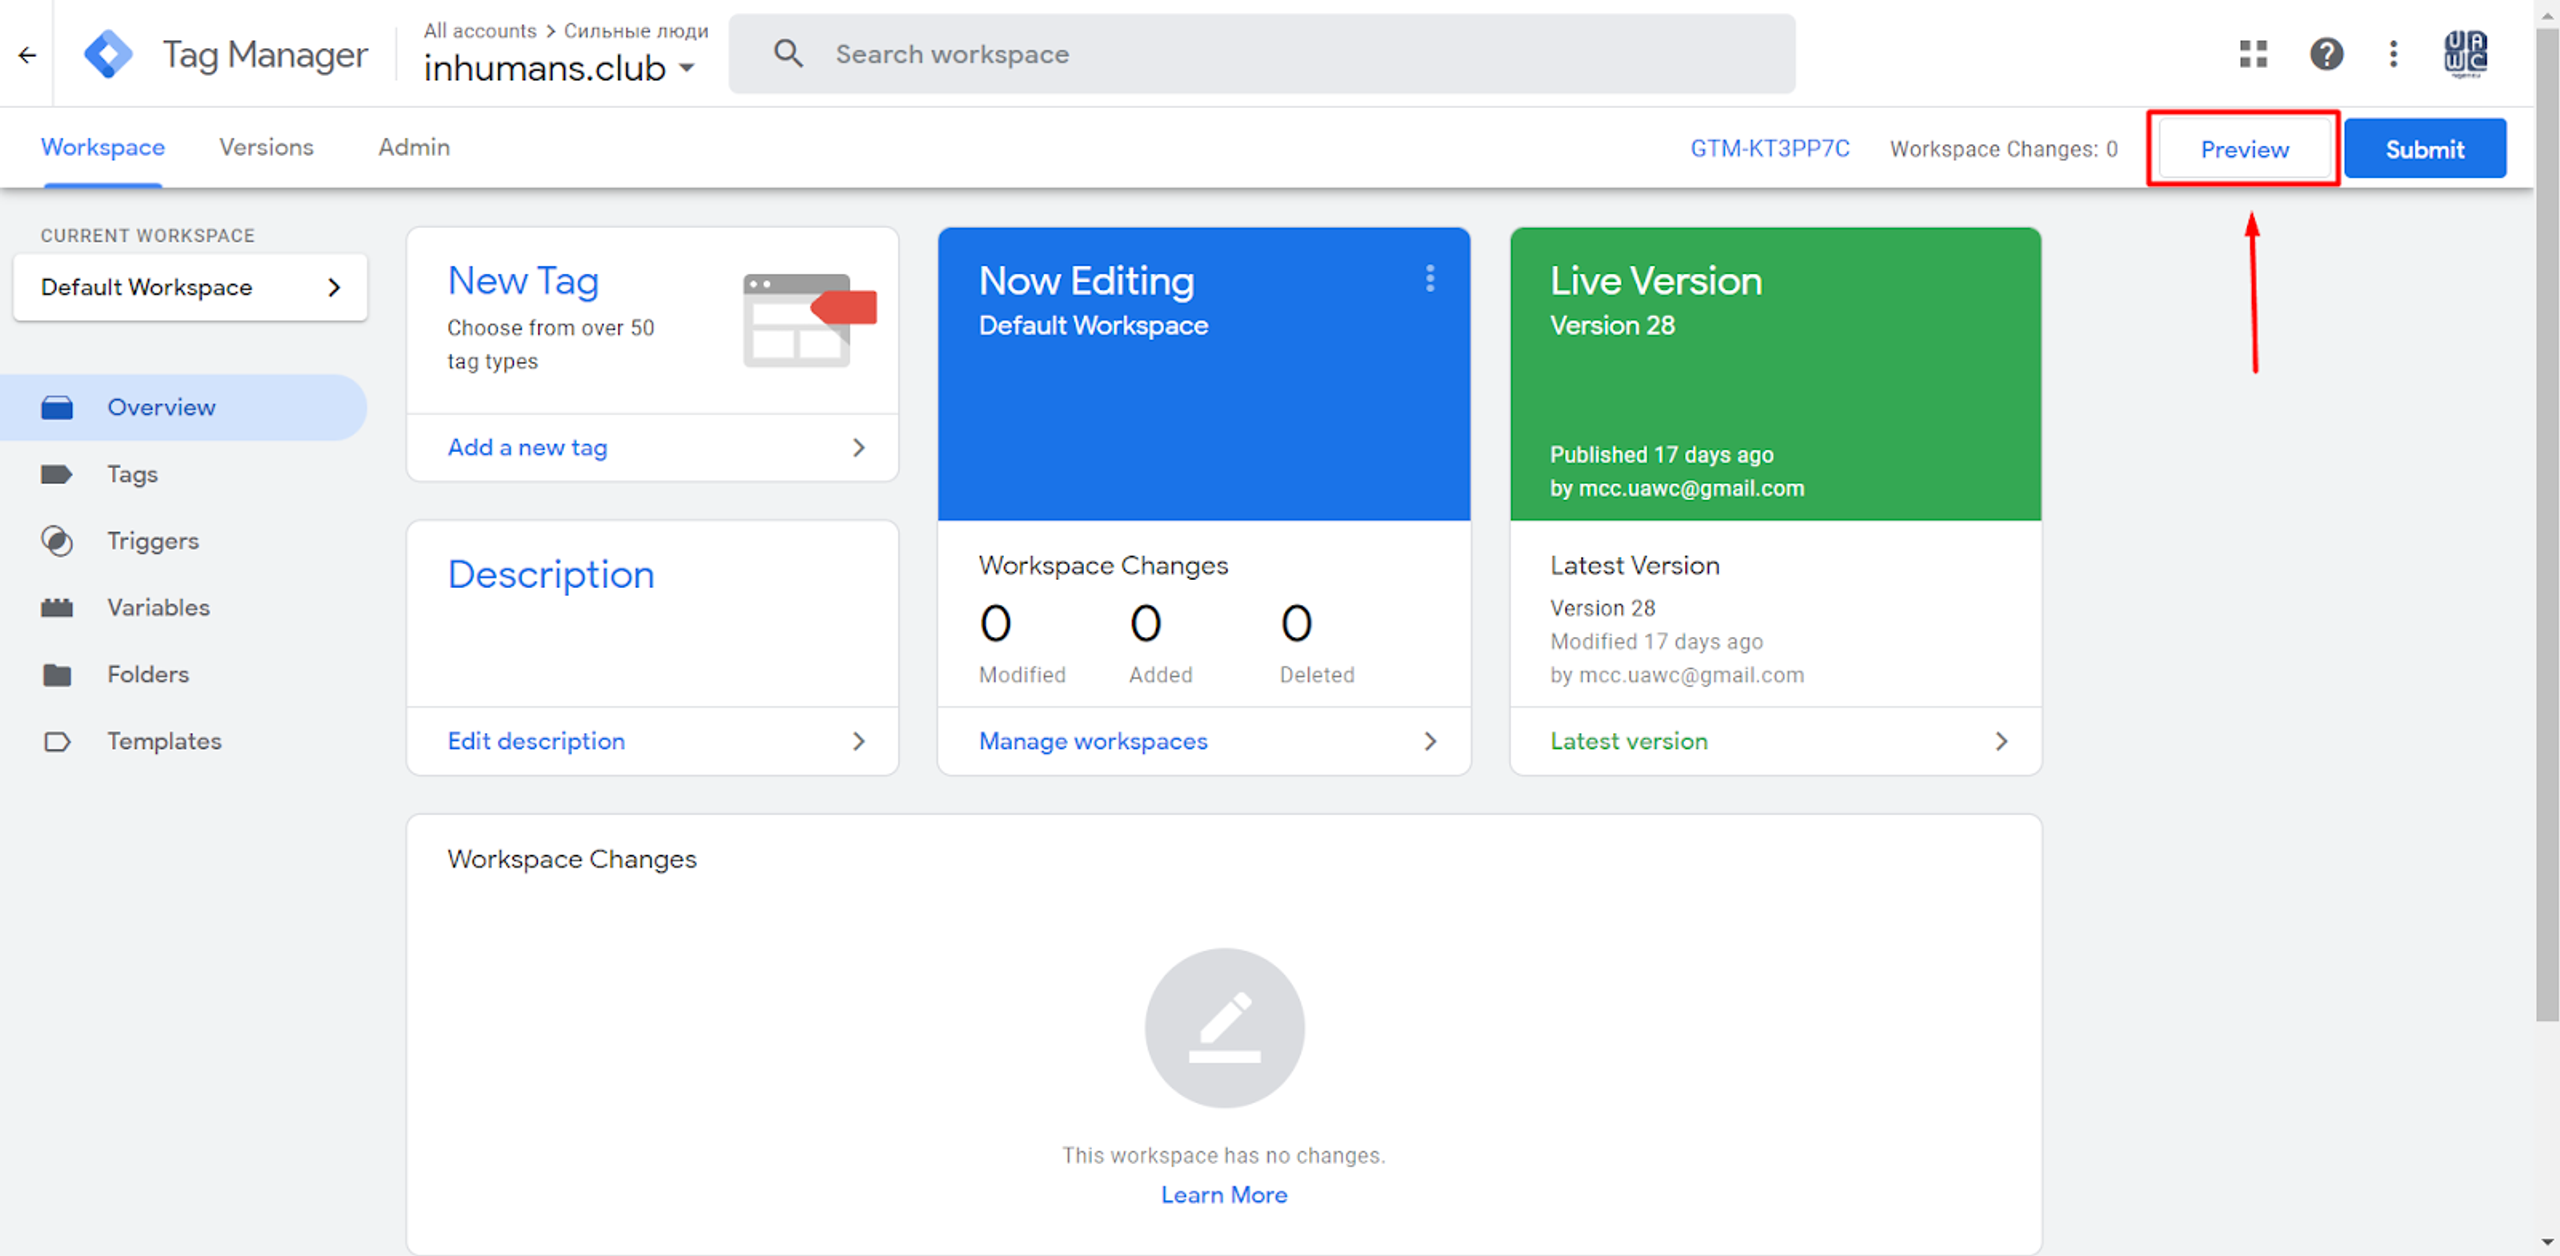
Our Tags will be ready after we created them - we can click Preview, to ensure that everything works.
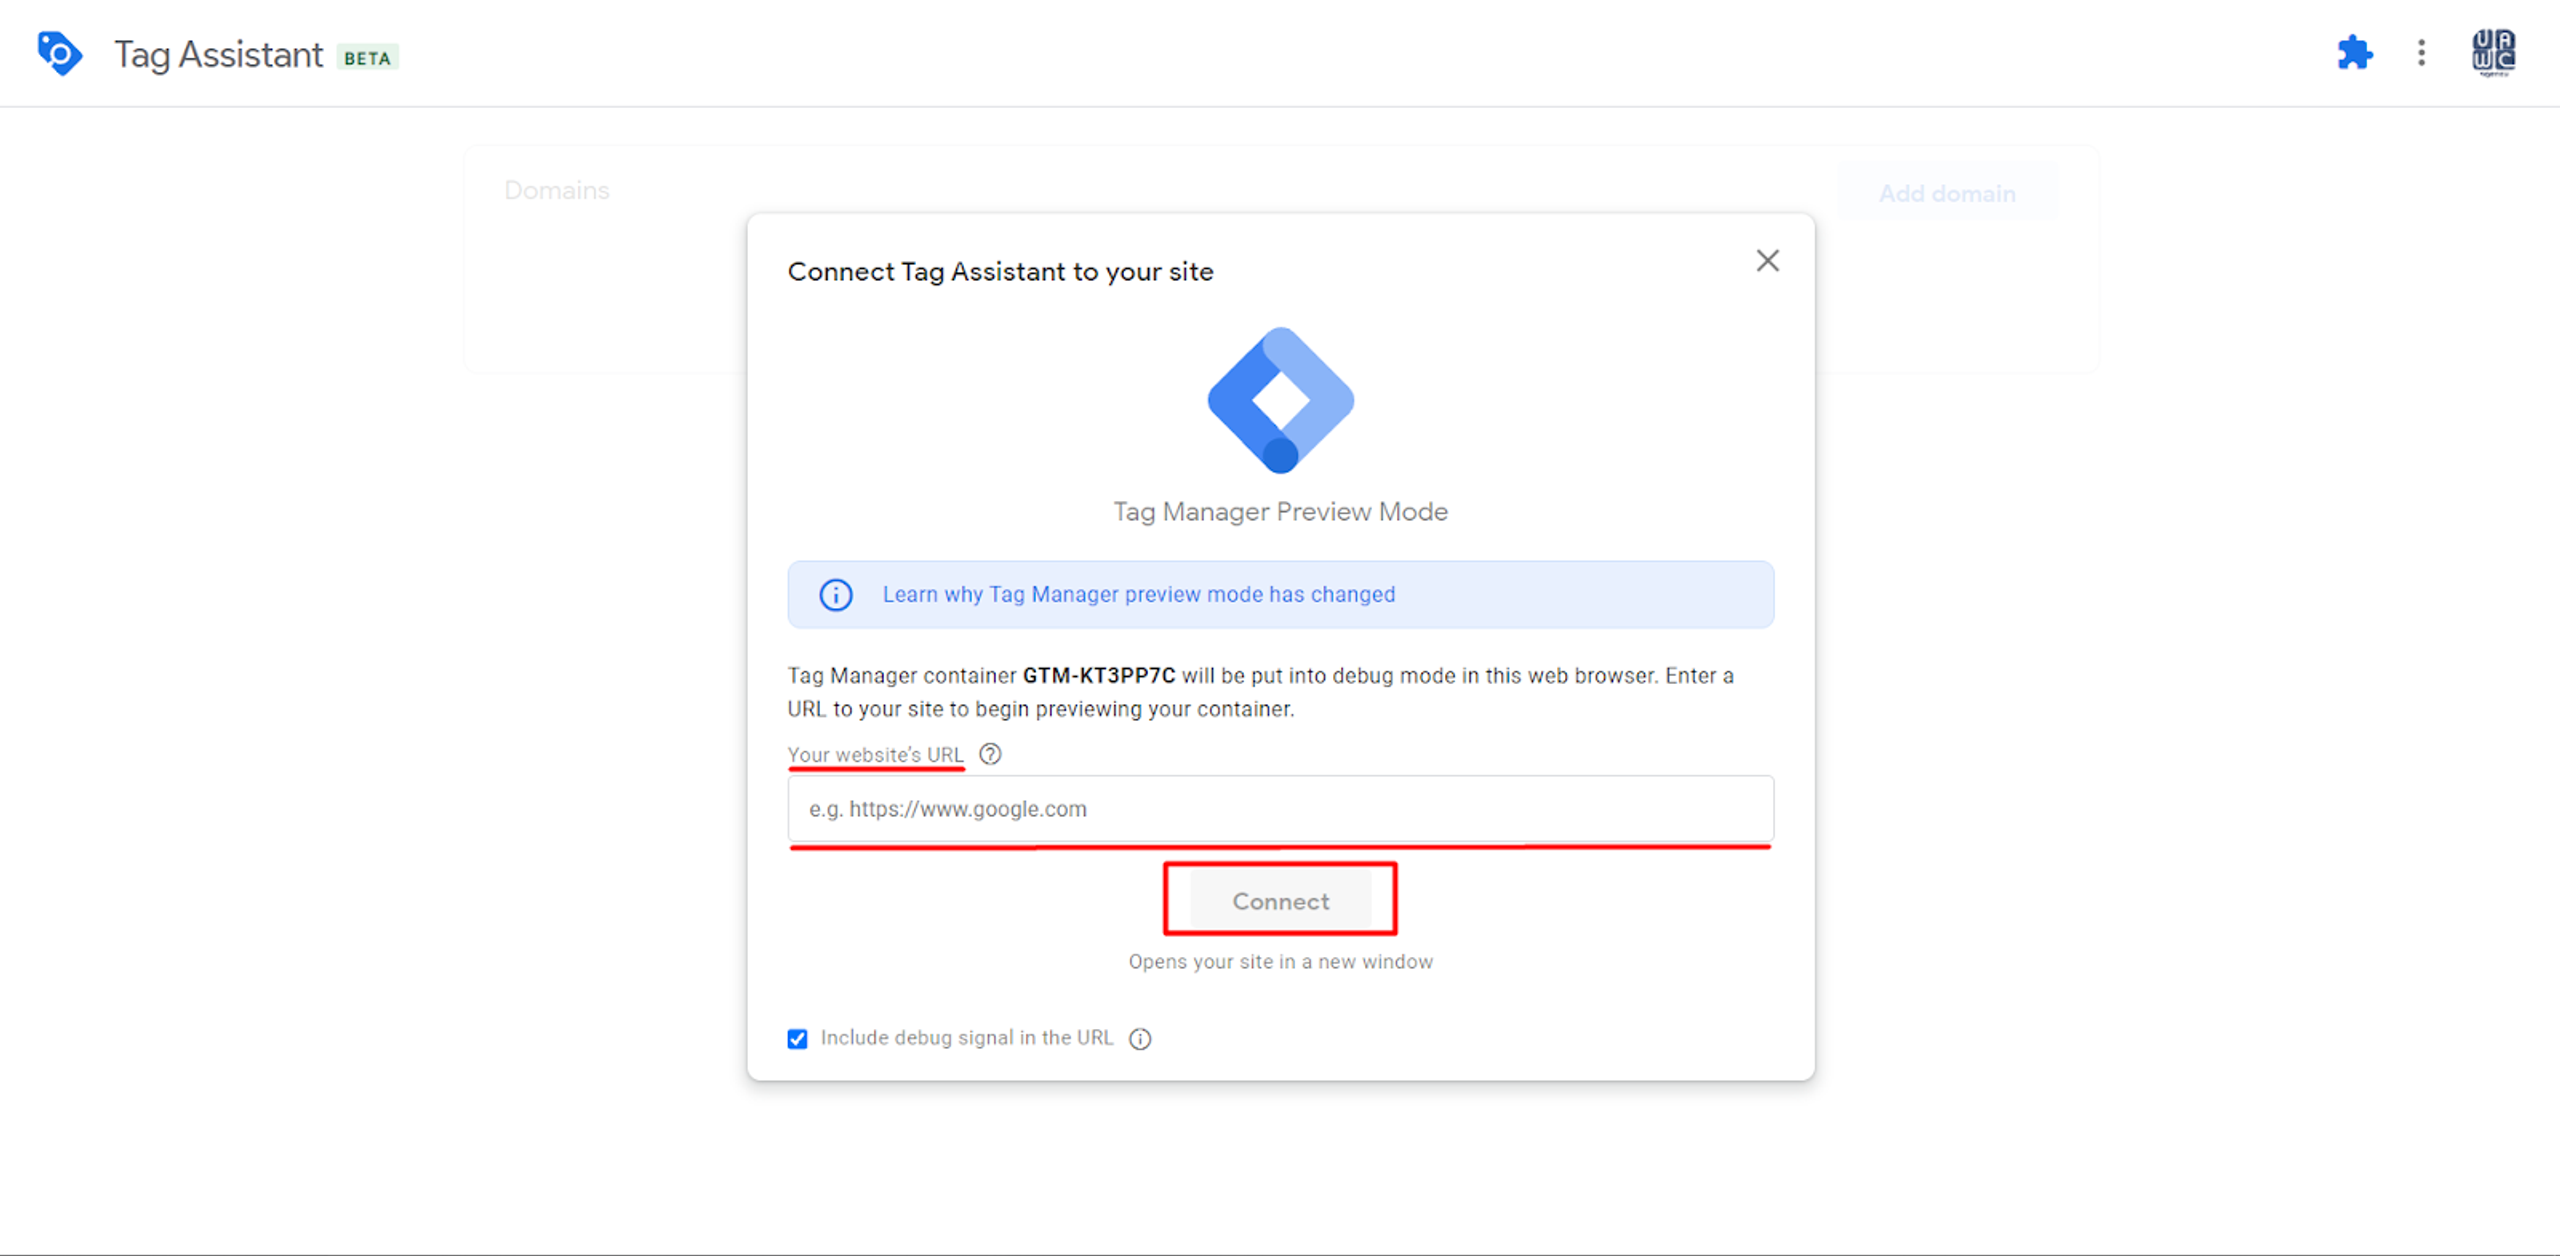
If you see your Tags under the “Fired Tags” text, you can be sure that it works.

Now, our Web and Server Containers can be connected.
First, we should verify our domain on the Google Cloud Platform.
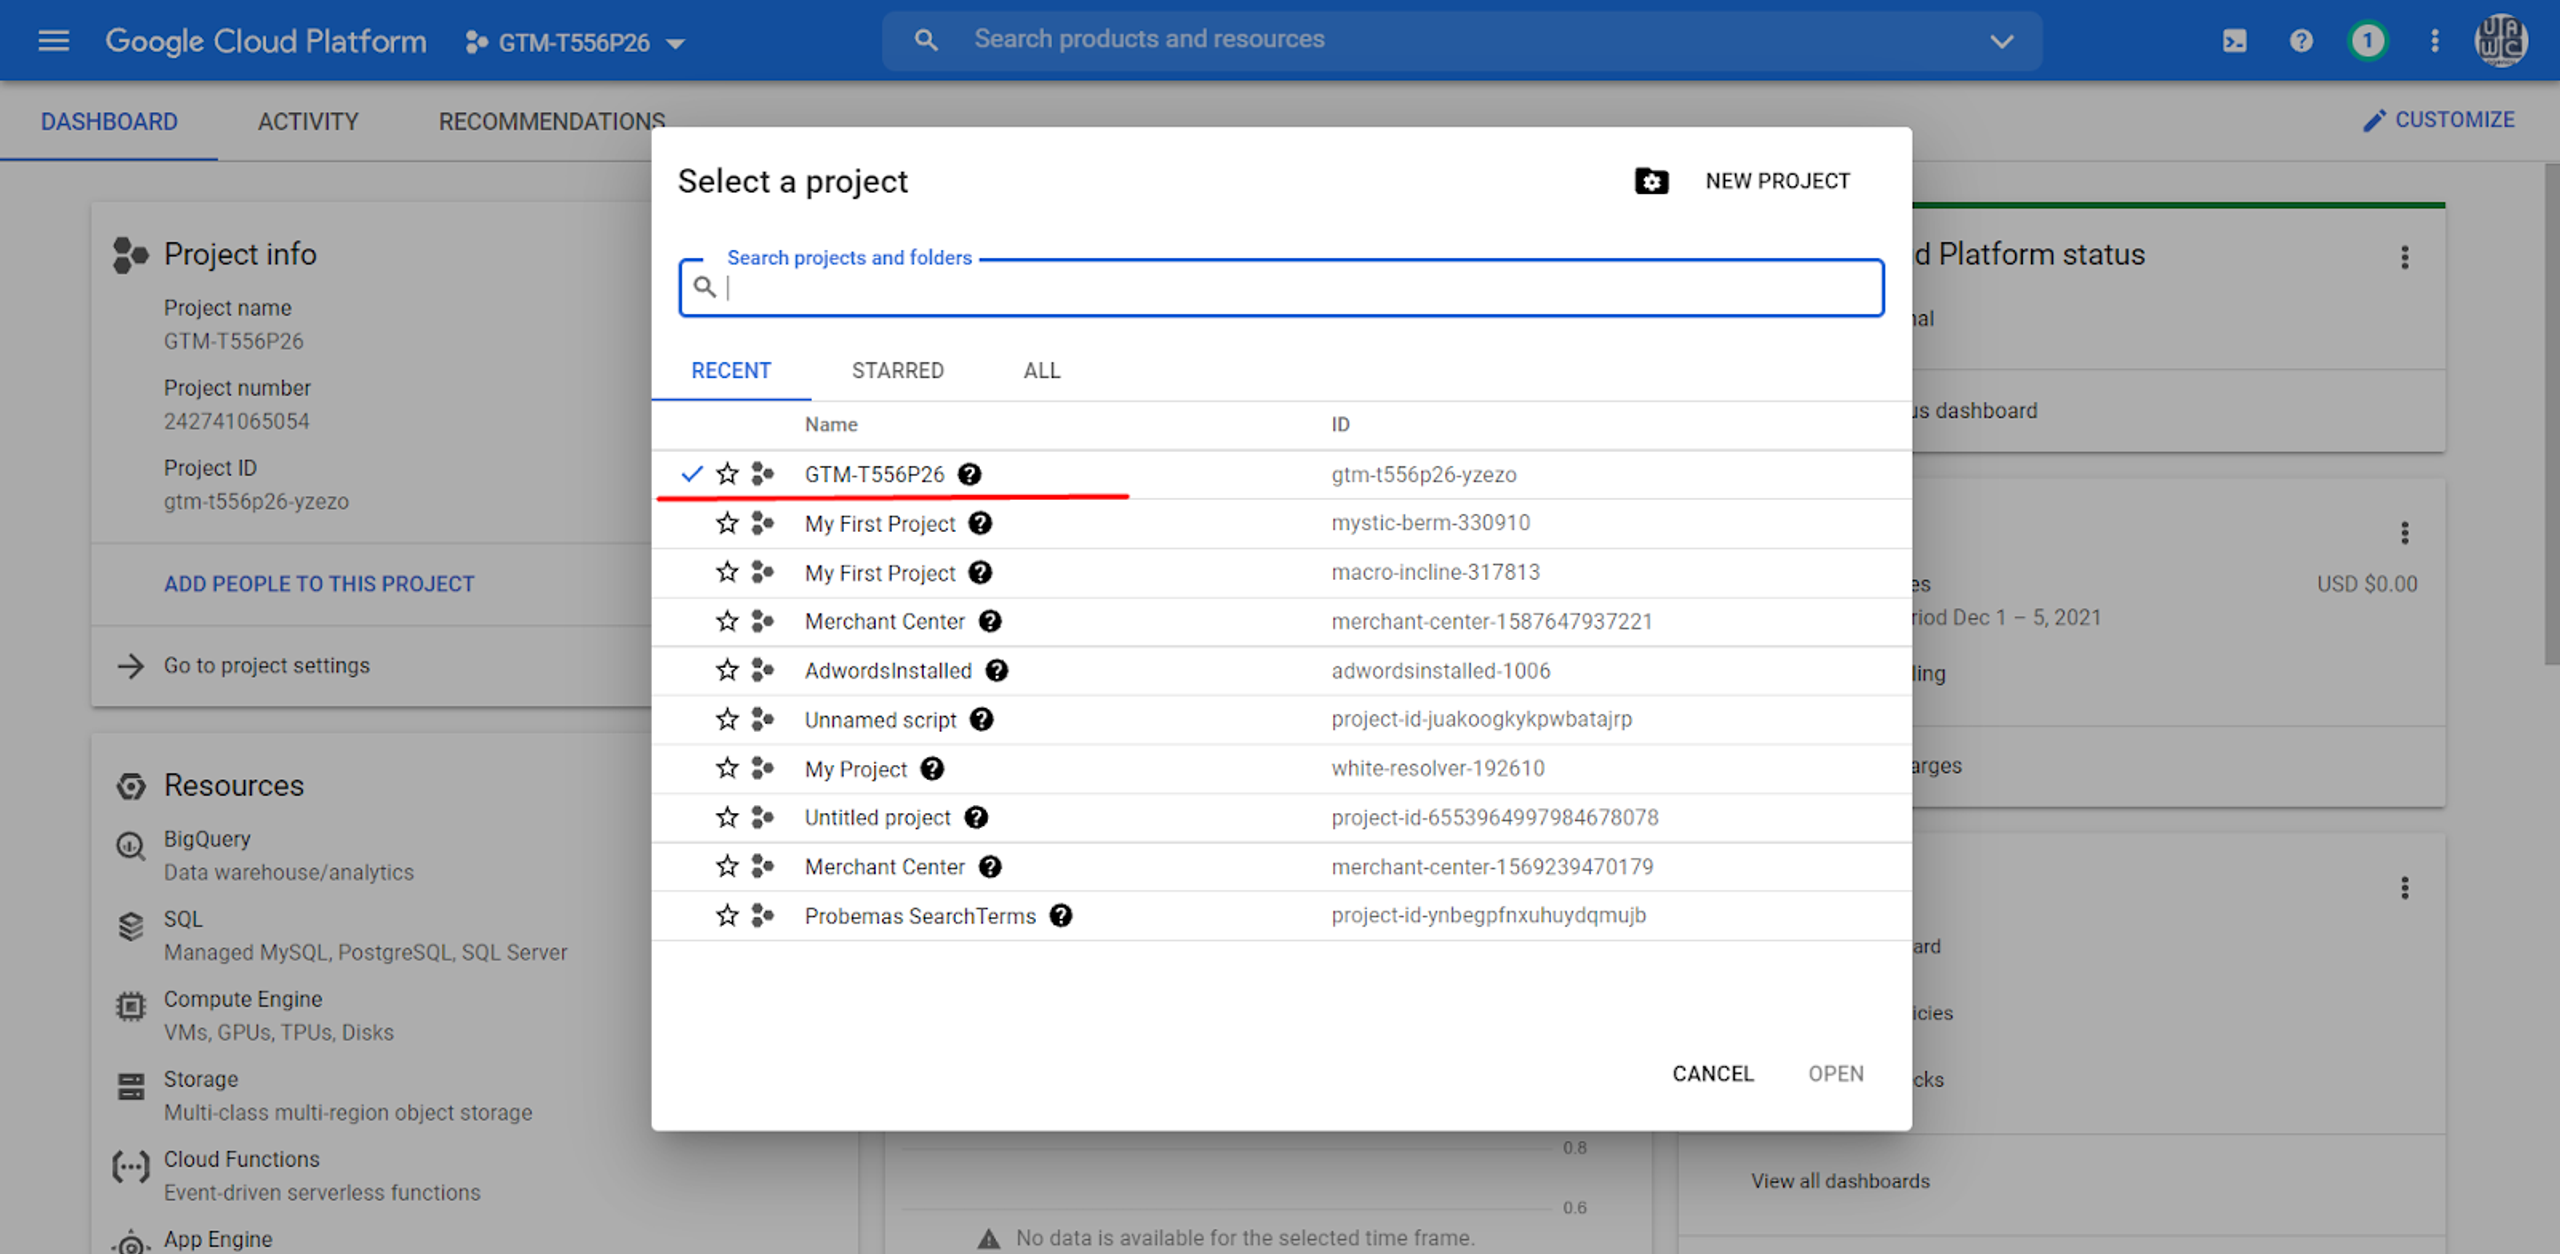
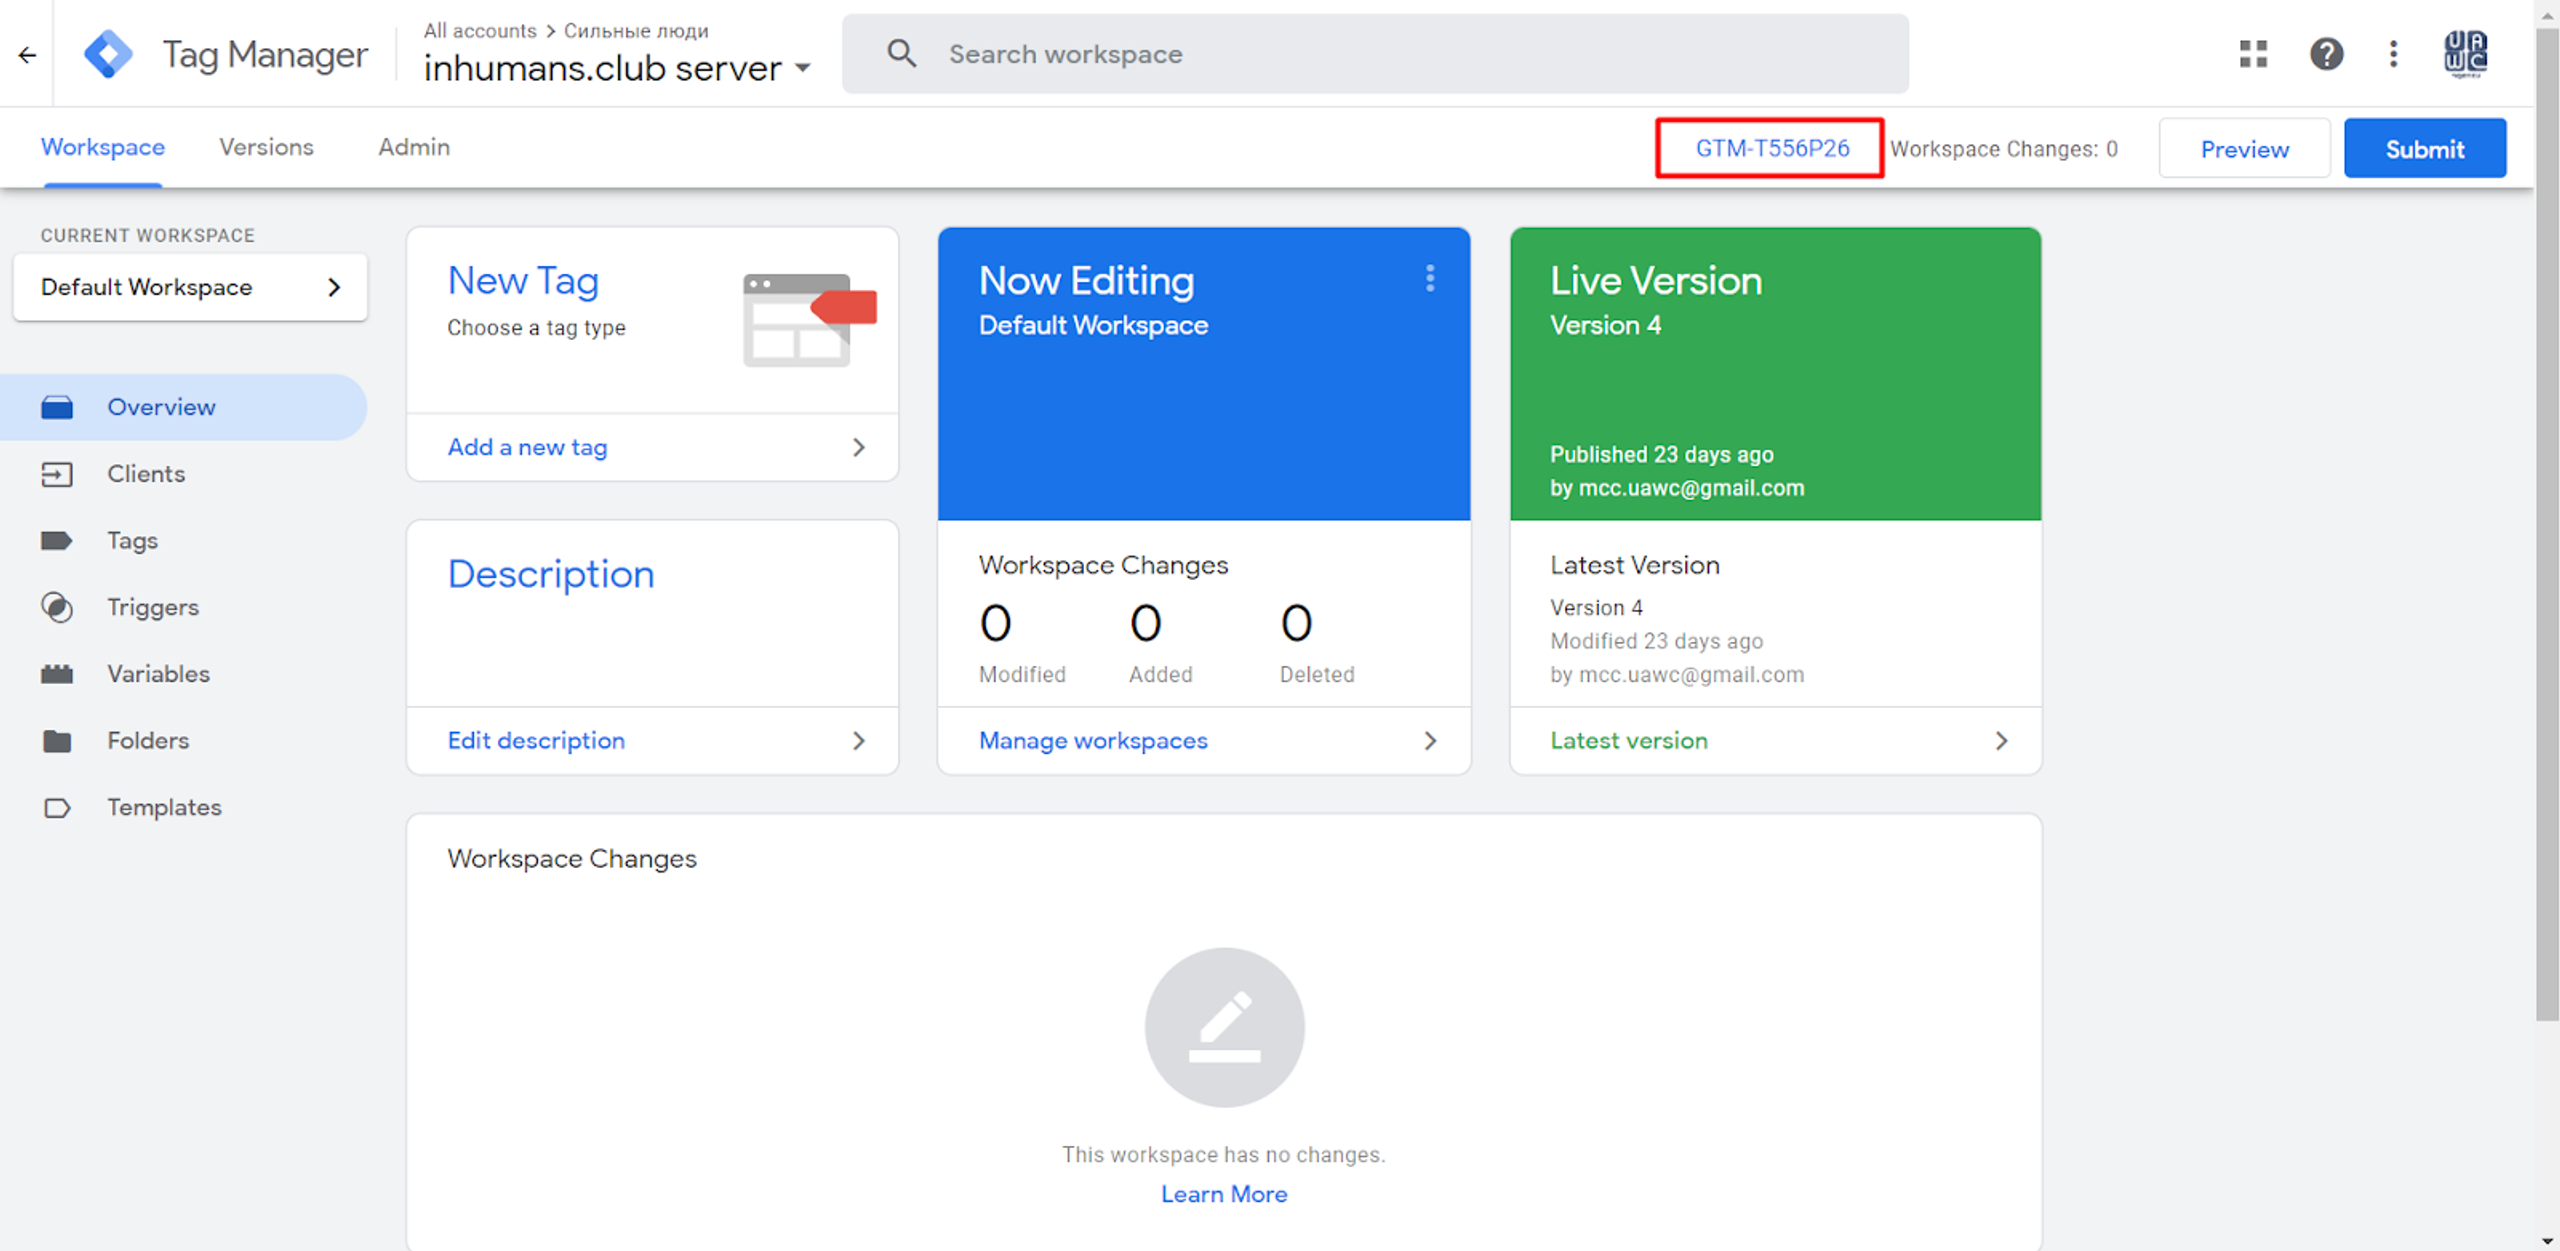
Here, we choose the ID of our GTM Server Account. You can find it on the Homepage in the Server Container.
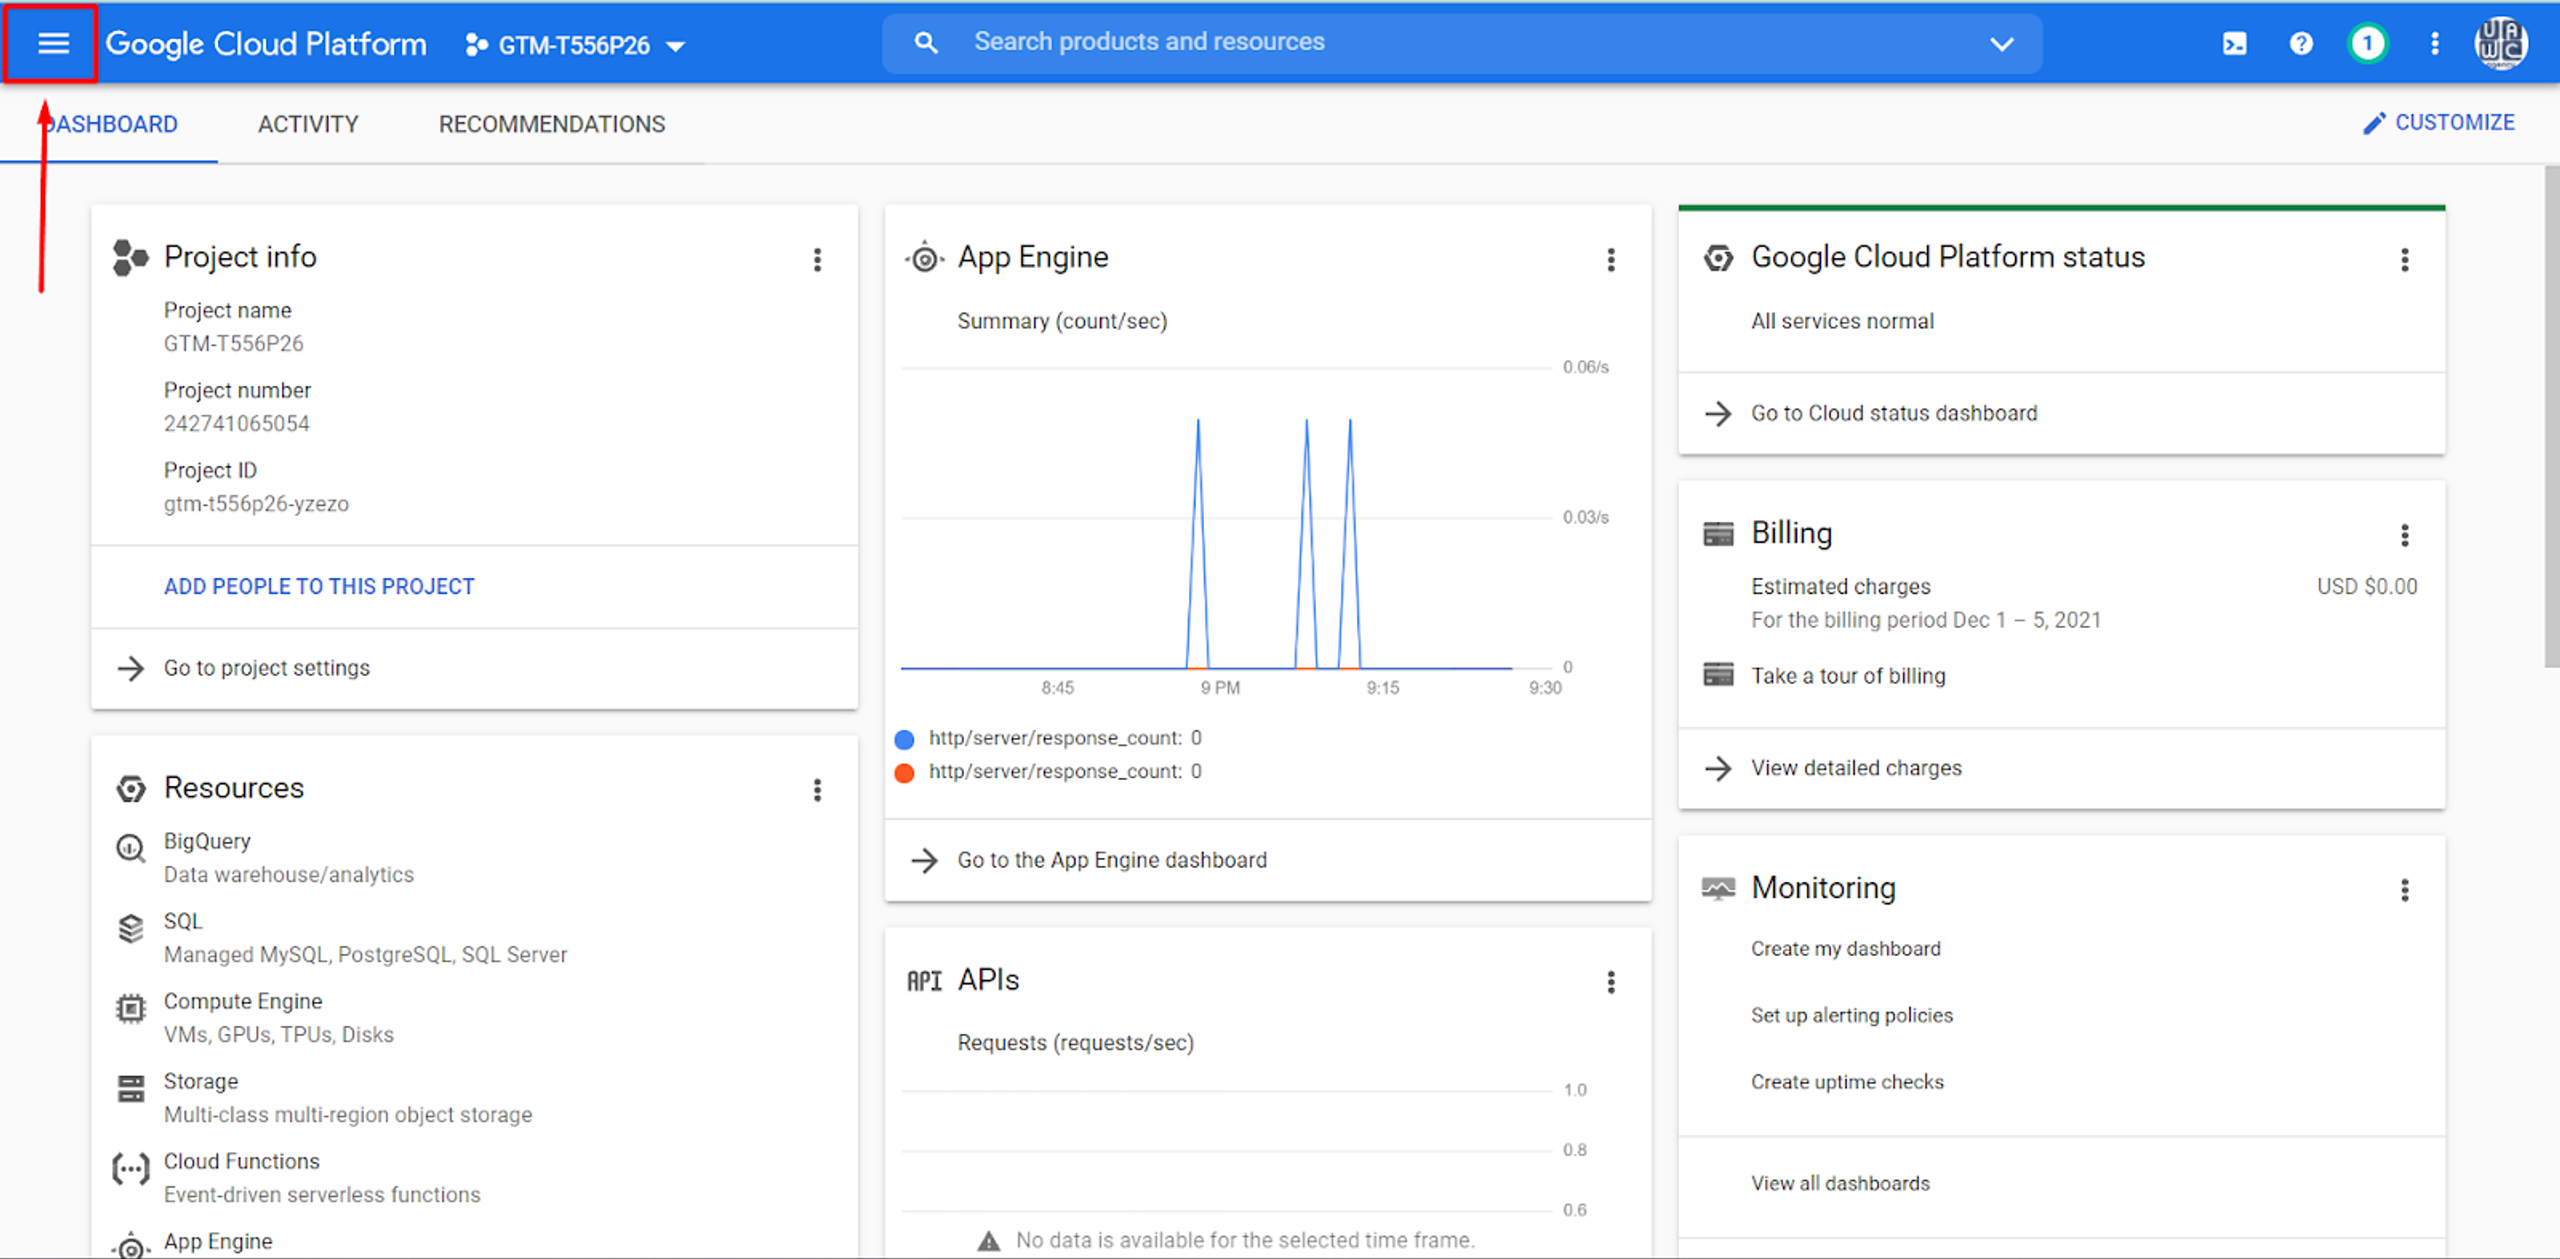
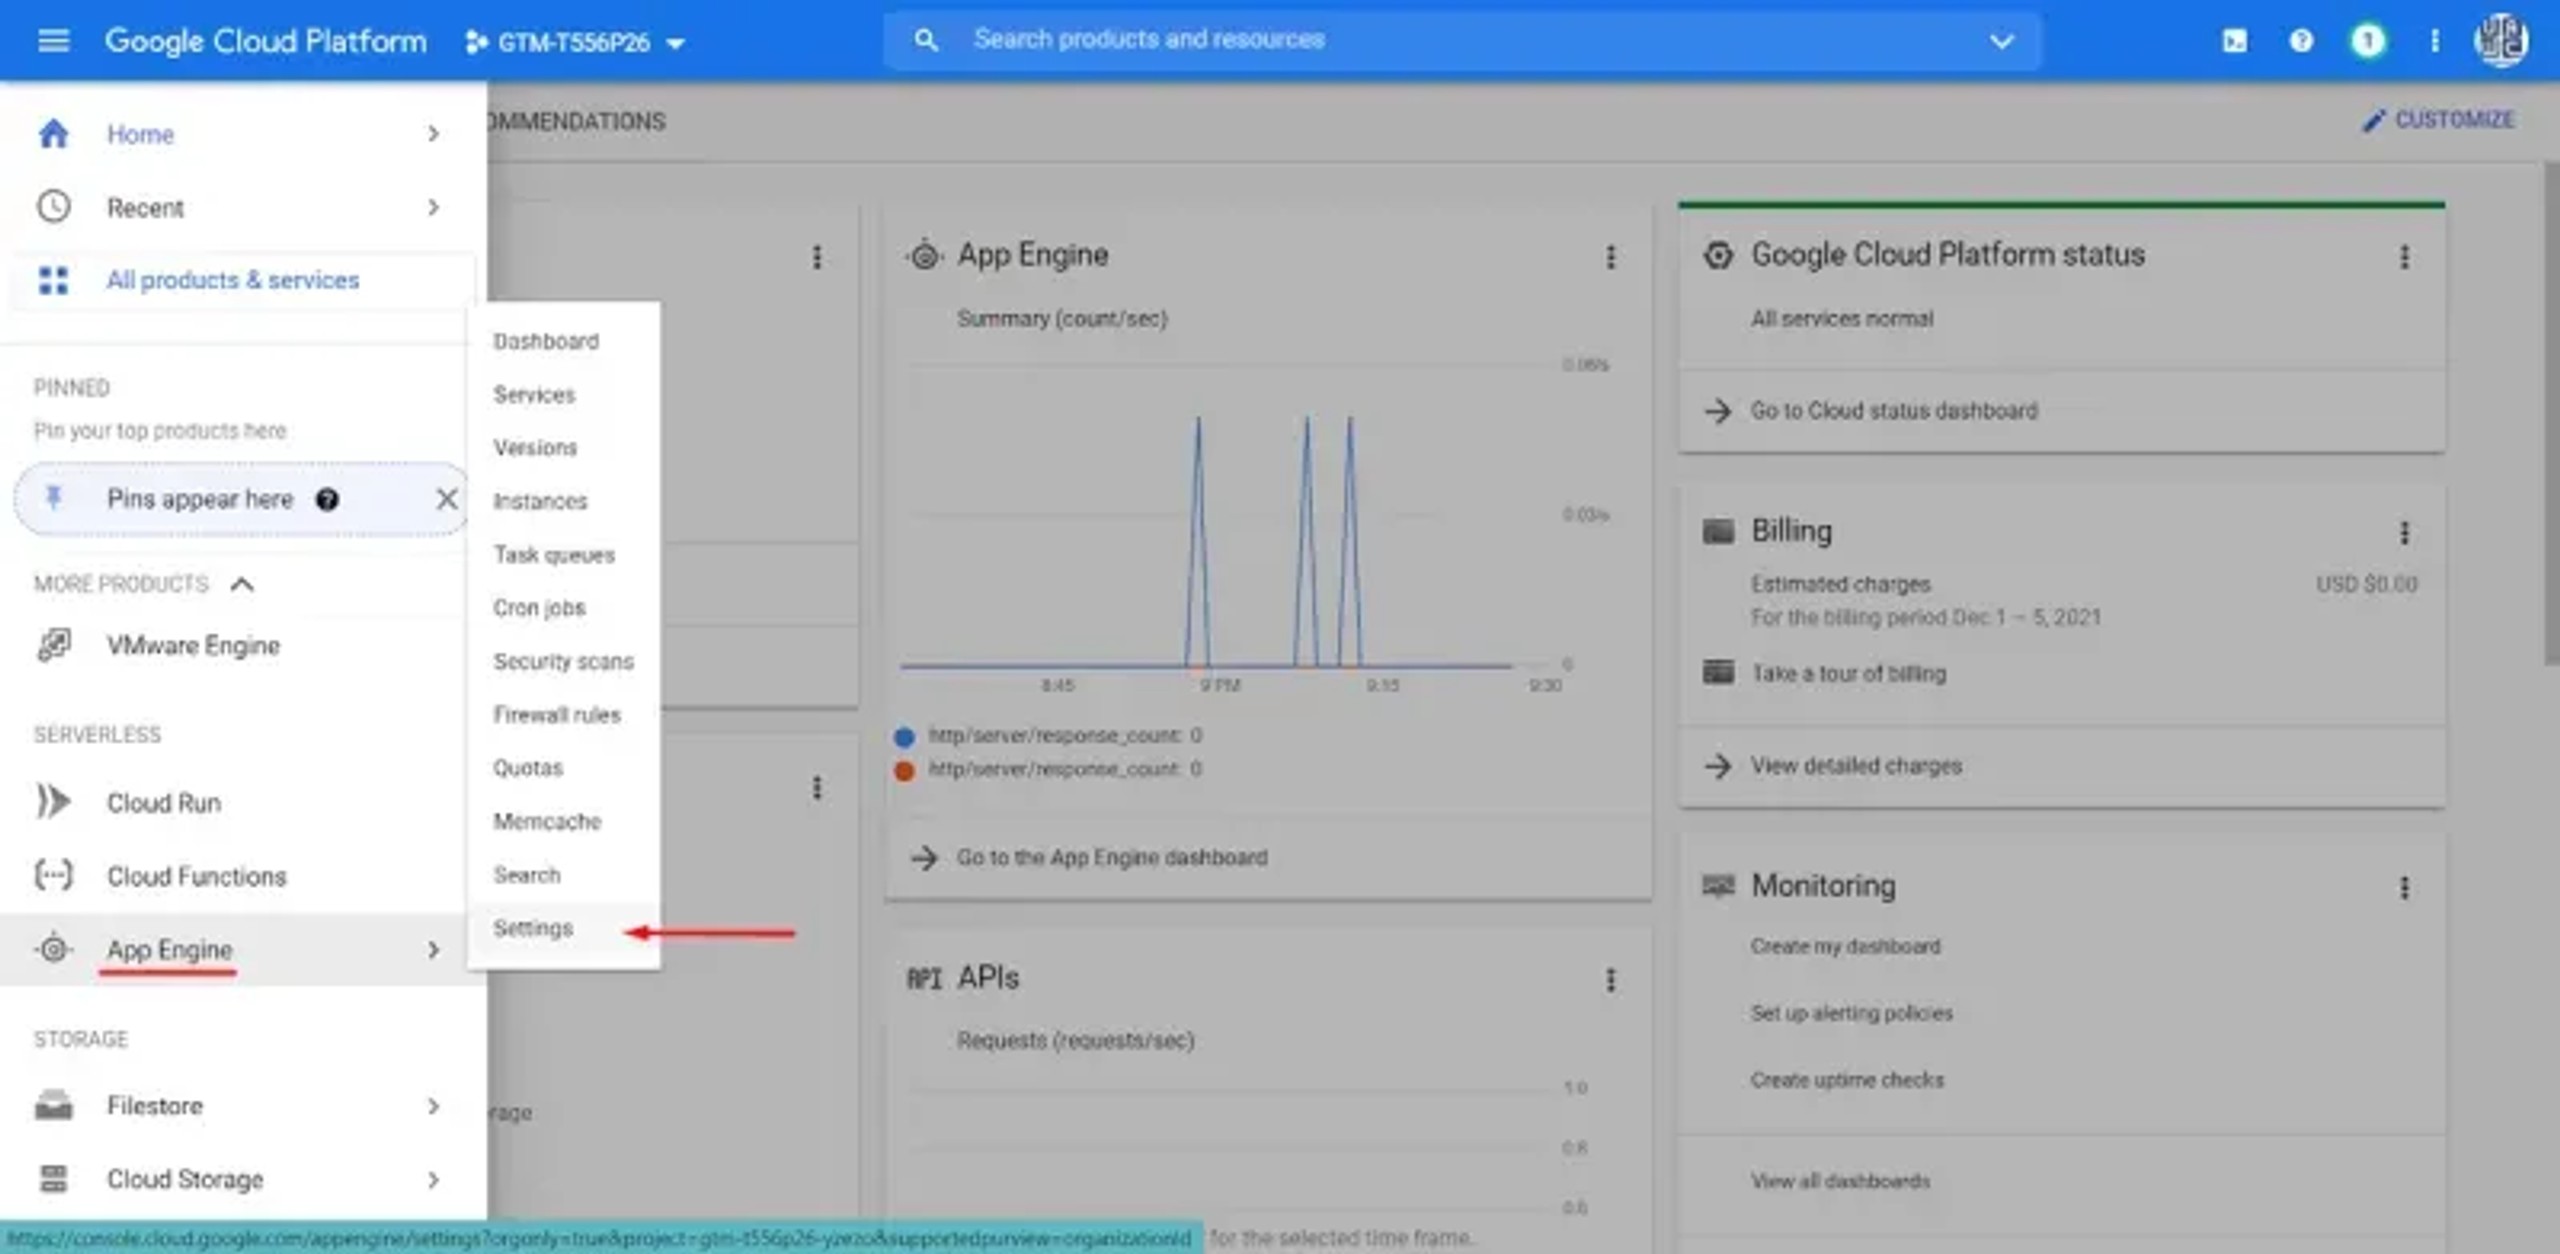
In the “App Engine” settings, you must add a new custom domain.
After you have done so, Google Cloud Platform will generate eight different IPs for you, which you must add to the DNS settings at your Hosting site.
* please note that verification may take several minutes.
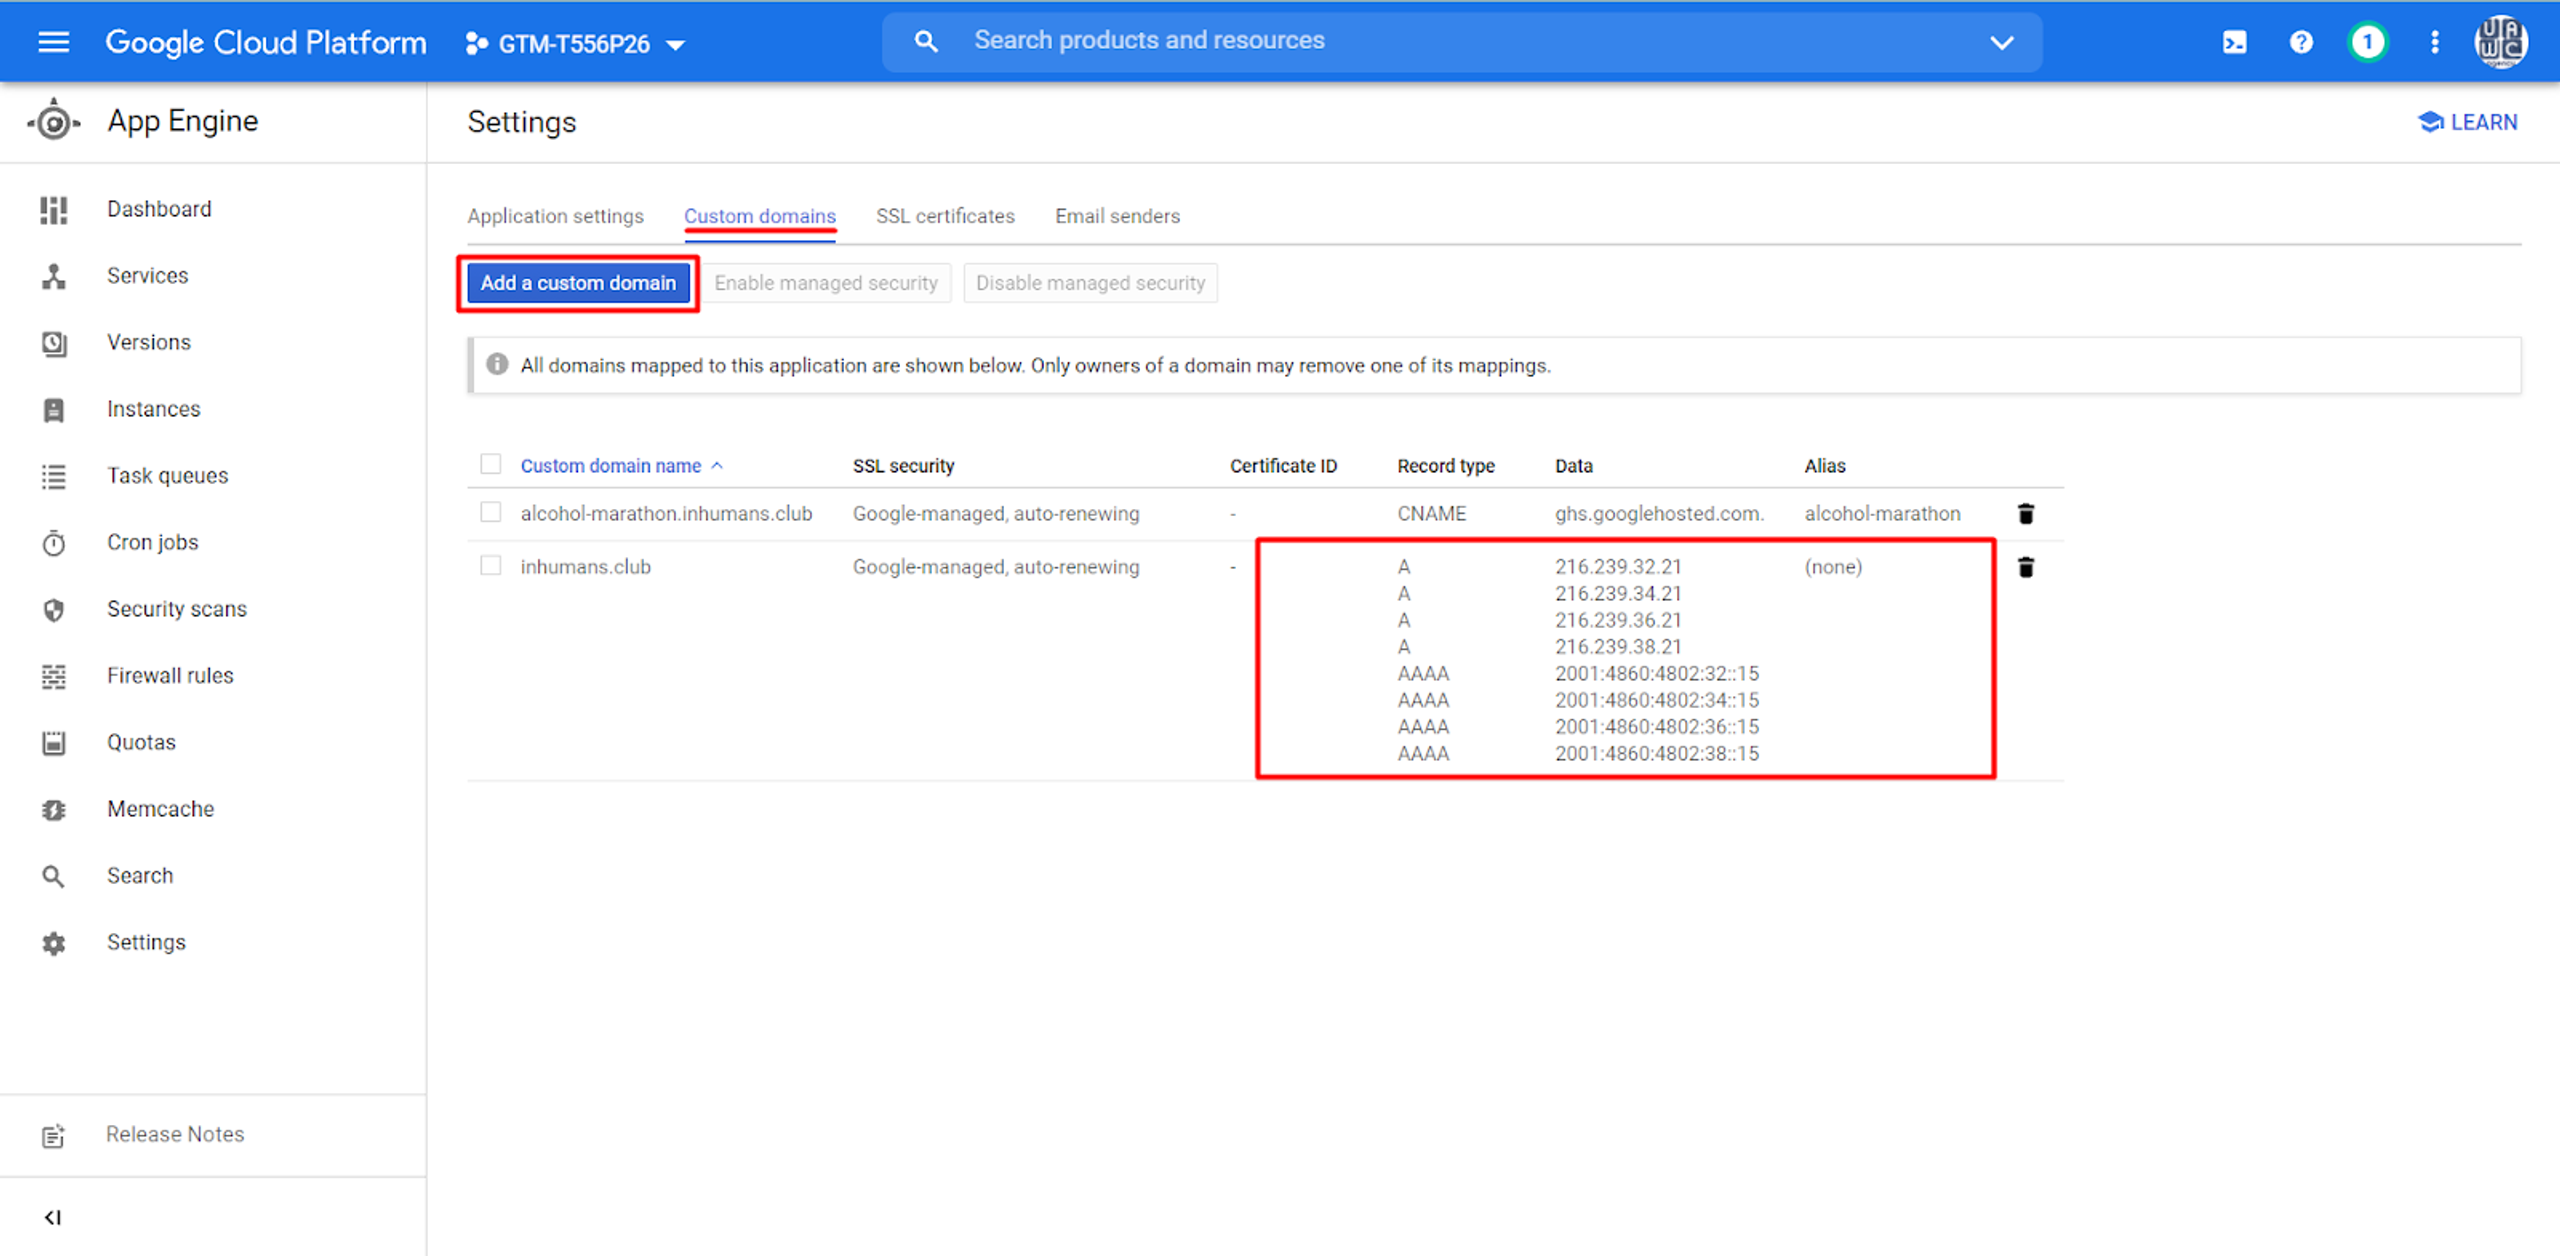
When you verify your domain on the Google Cloud Platform, you should use it like a connector between the Web and Server Container.
For this, you must go to the Server Container and click on the Admin section.
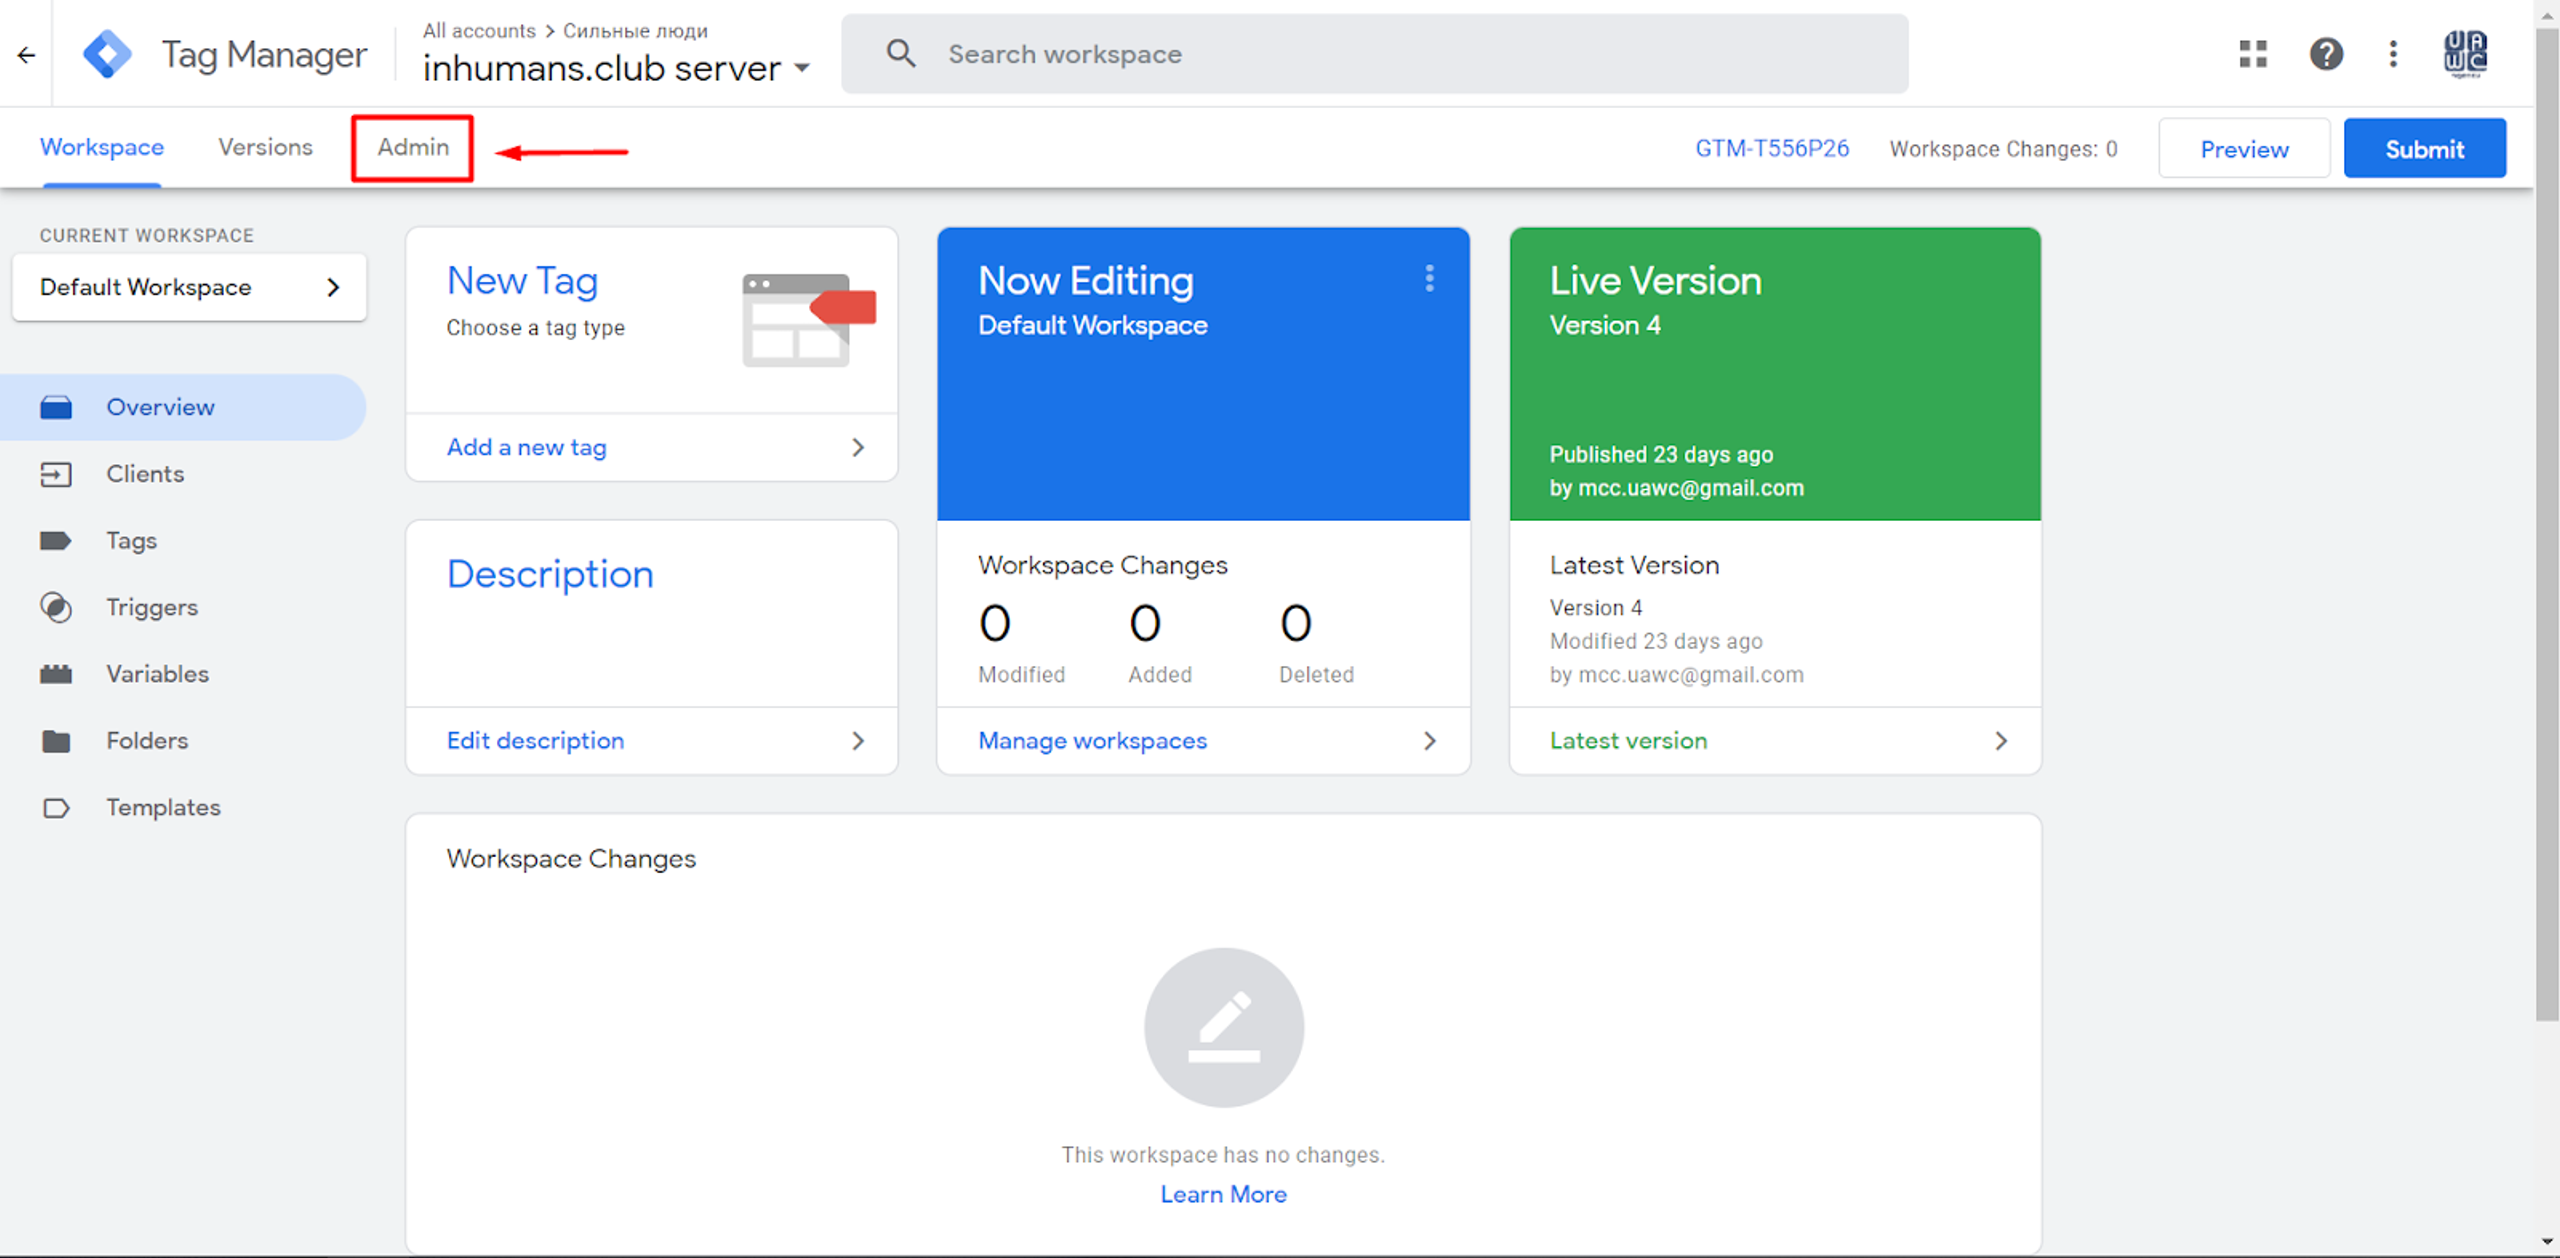
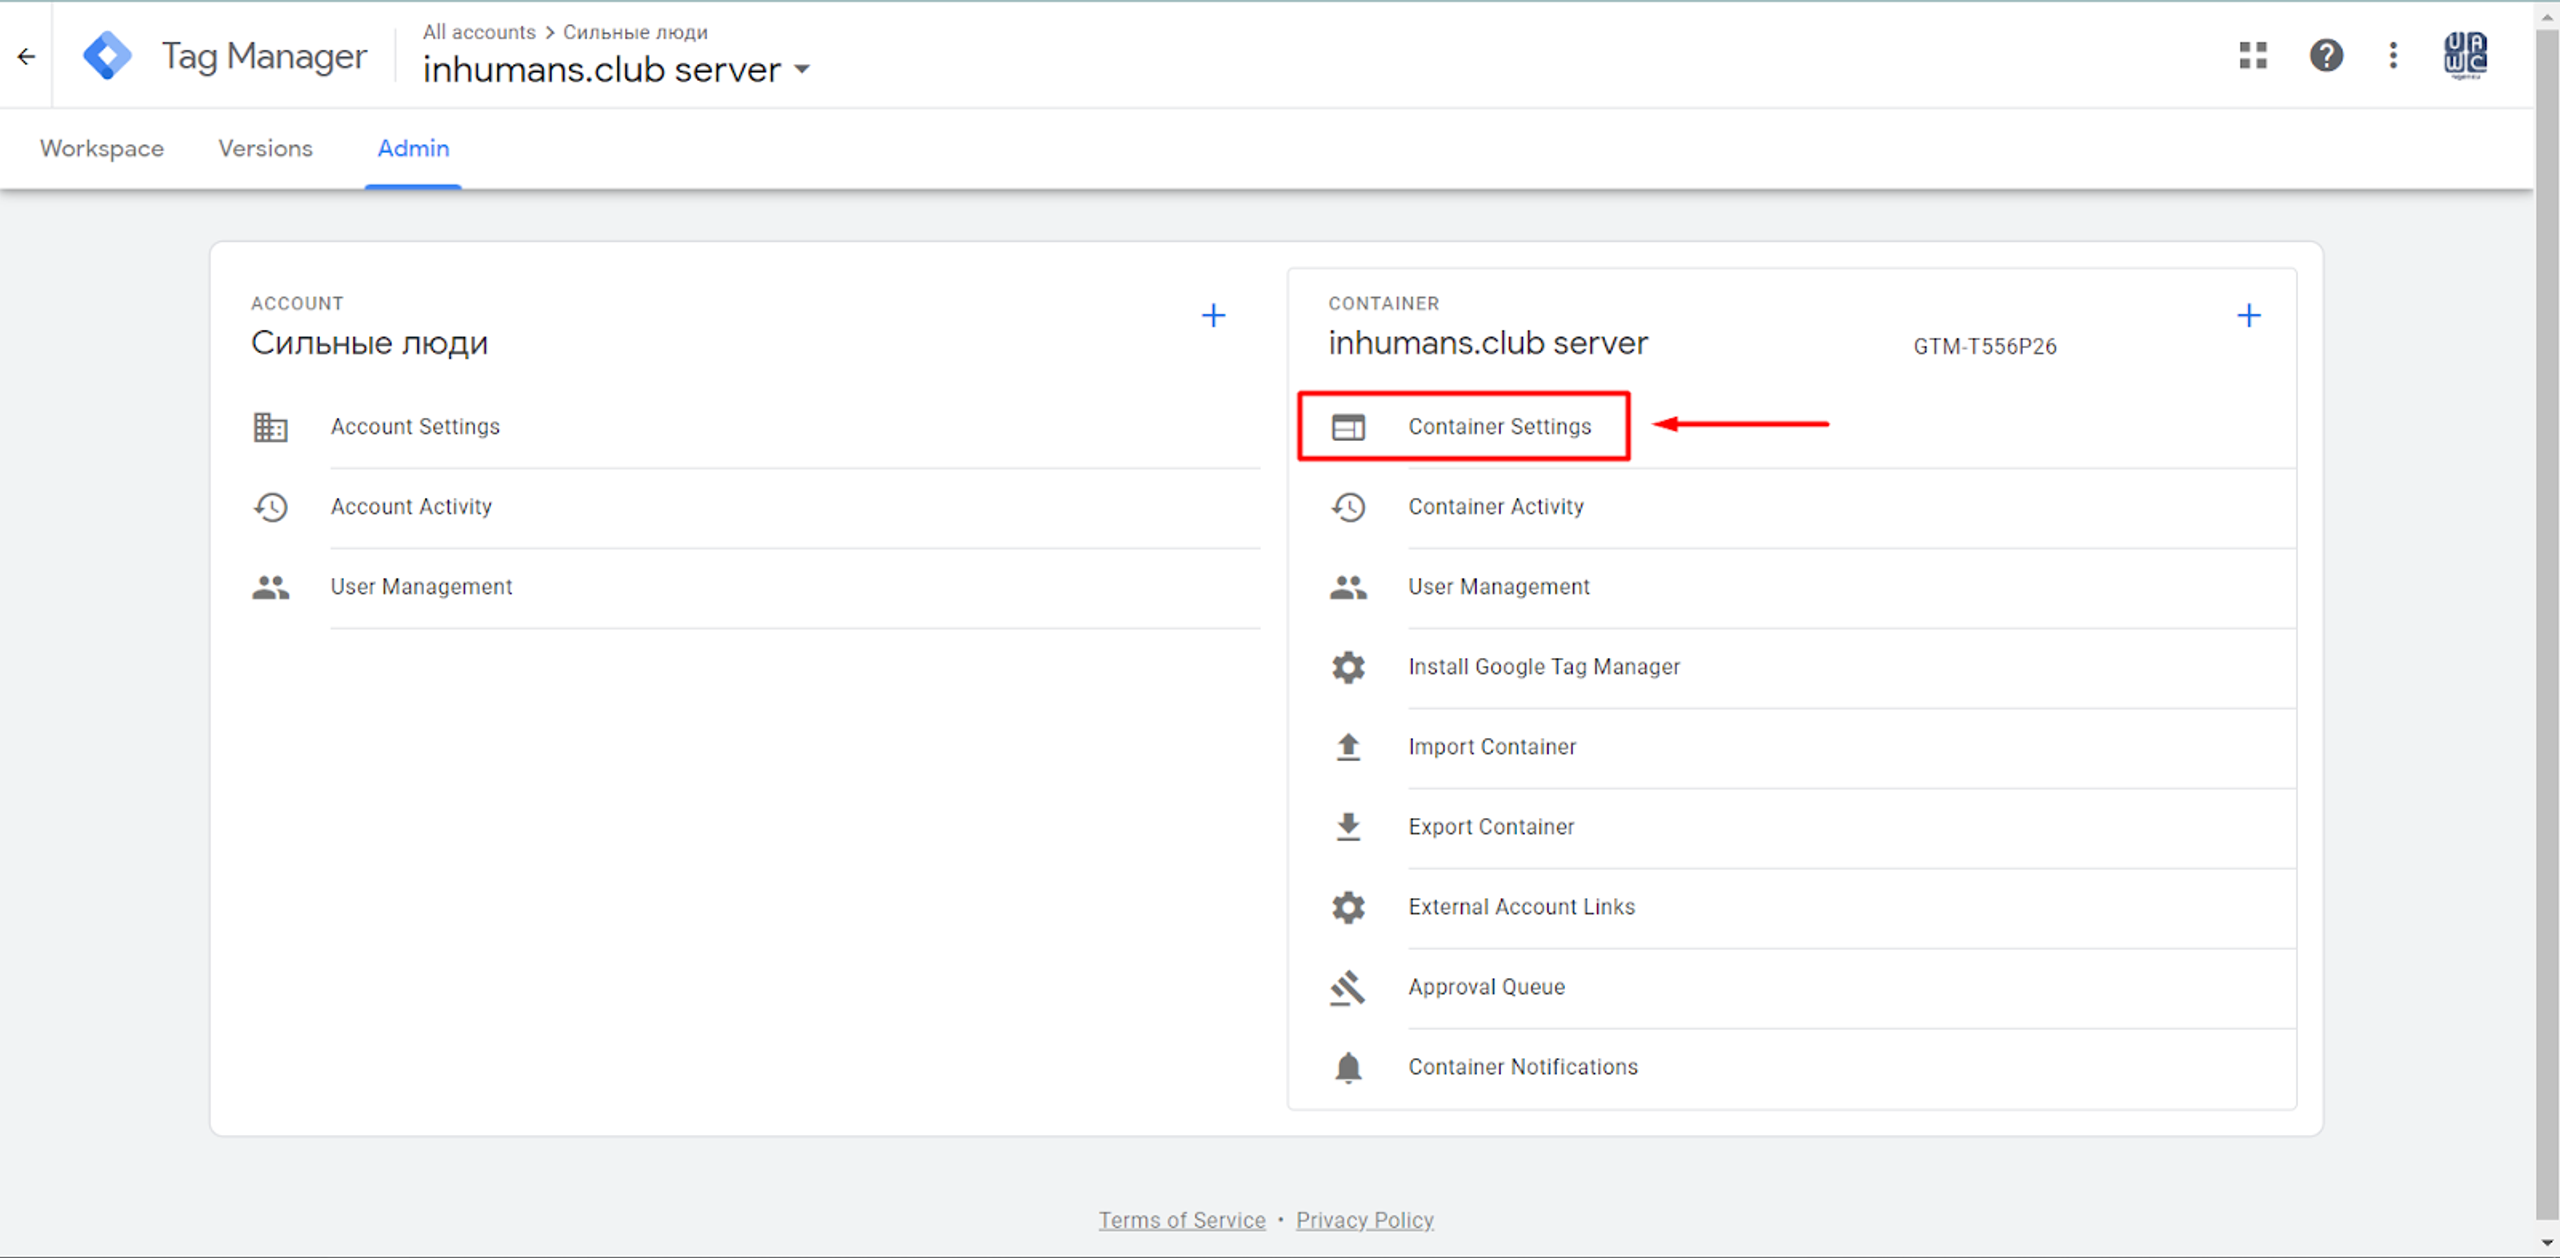
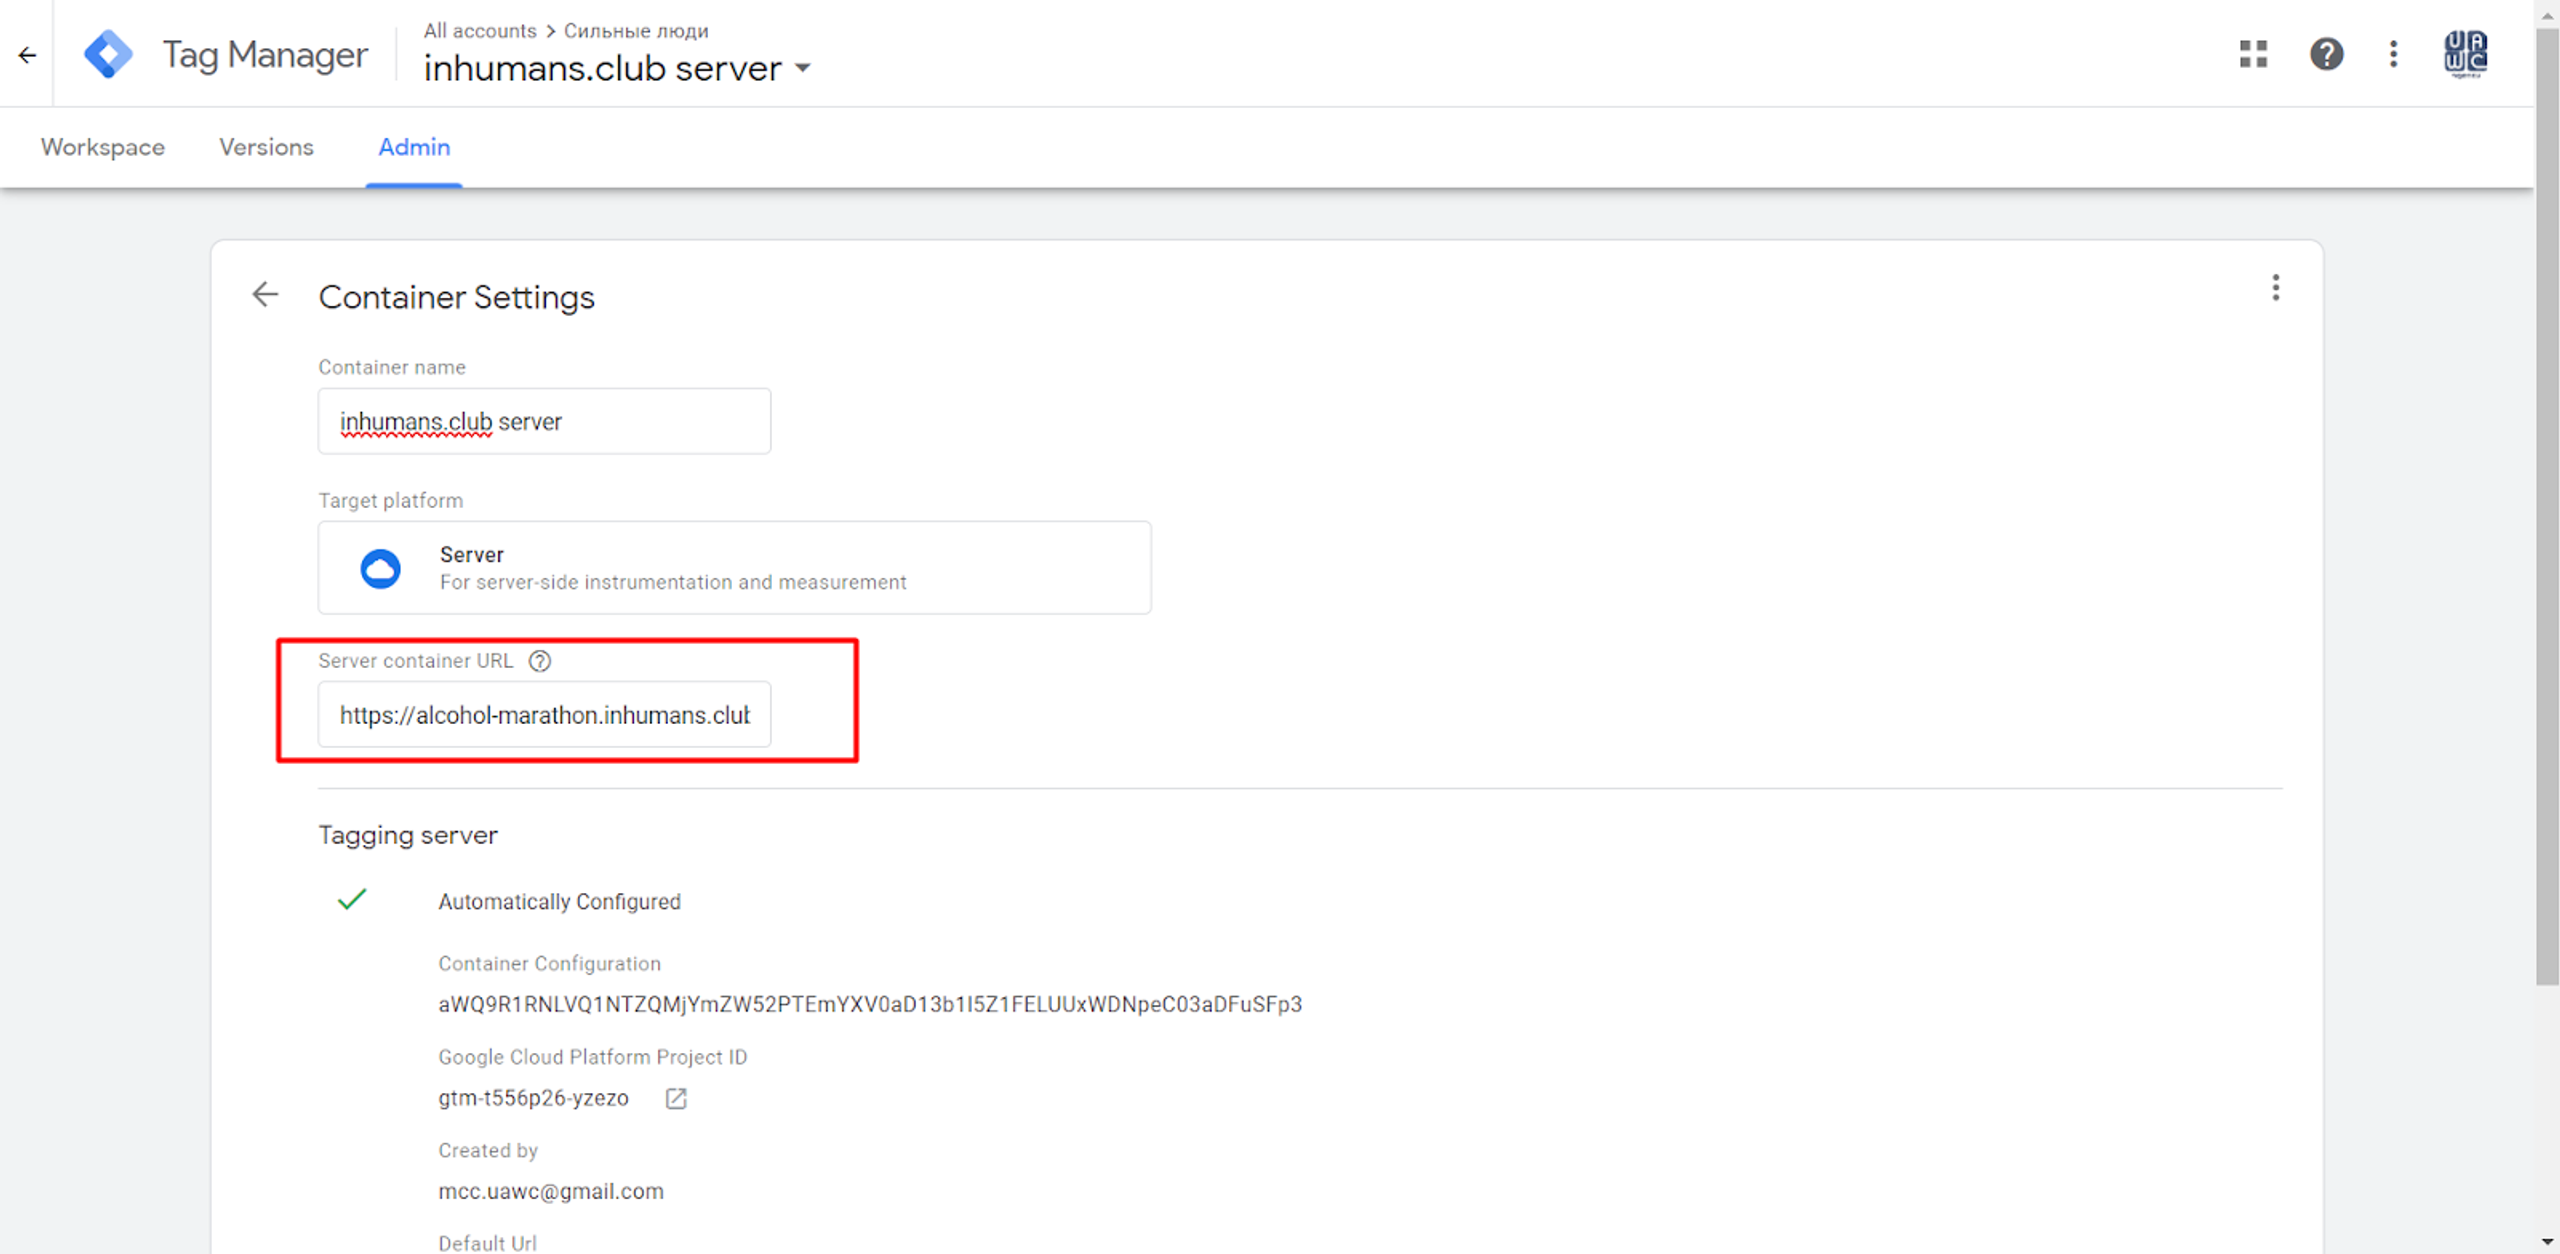
Here, you should add the domain that was verified on the Google Cloud Platform. (Don’t forget to add “https://” before the domain).
Click “Save” and go to the Web Container to finish the connection.
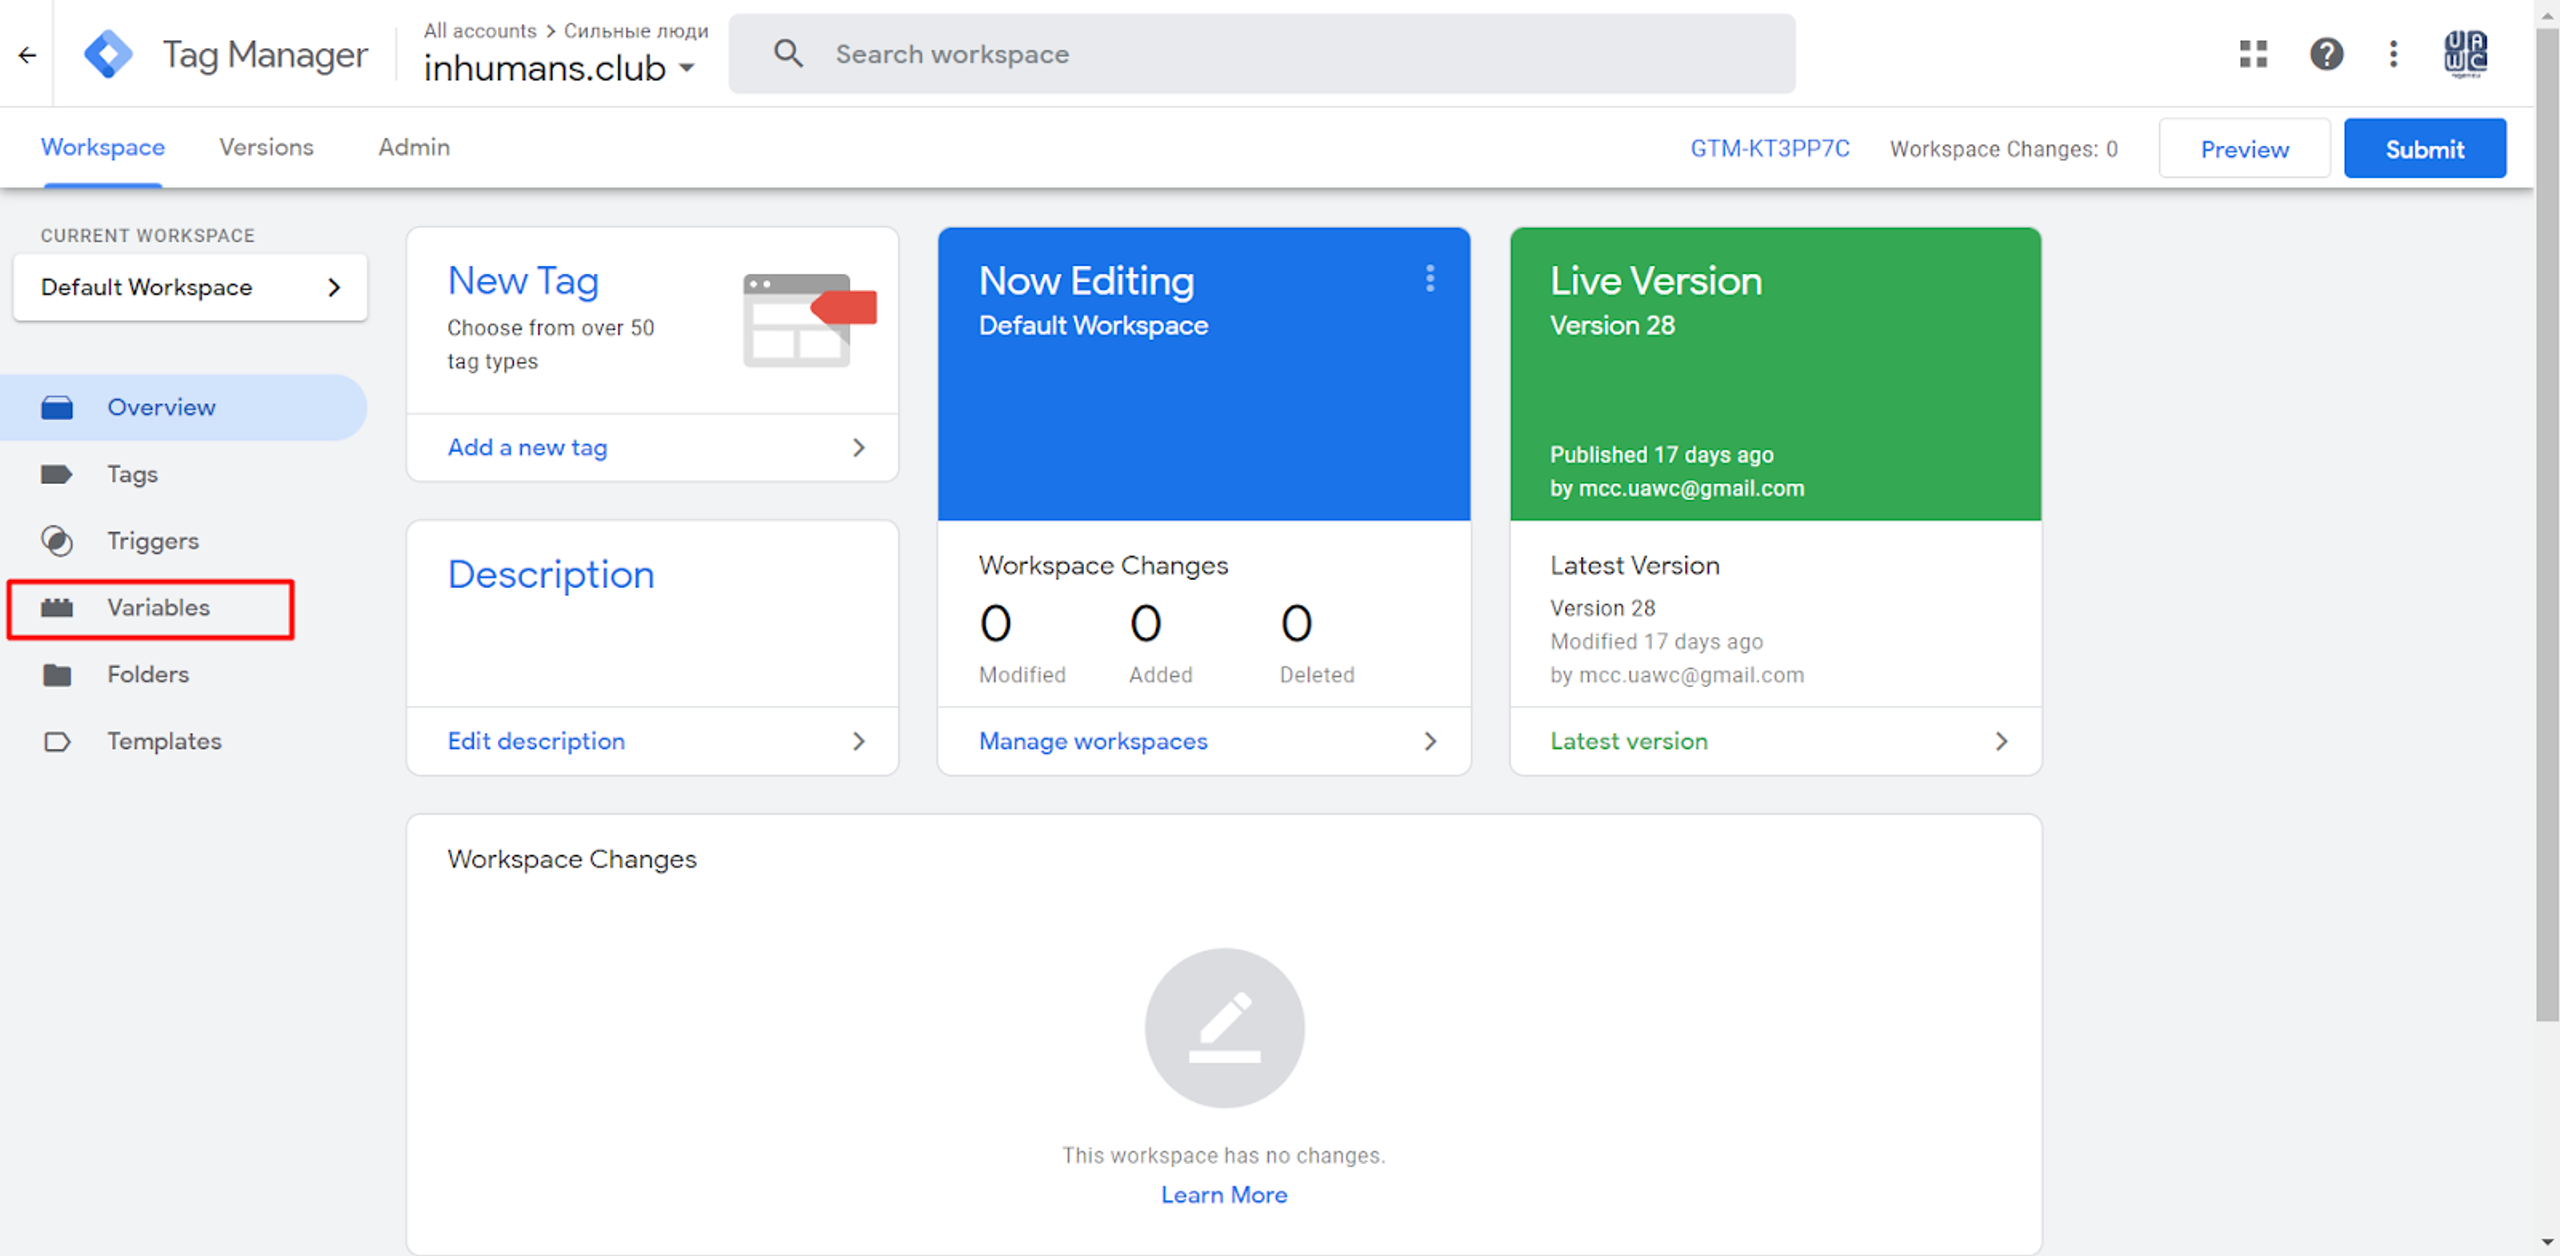
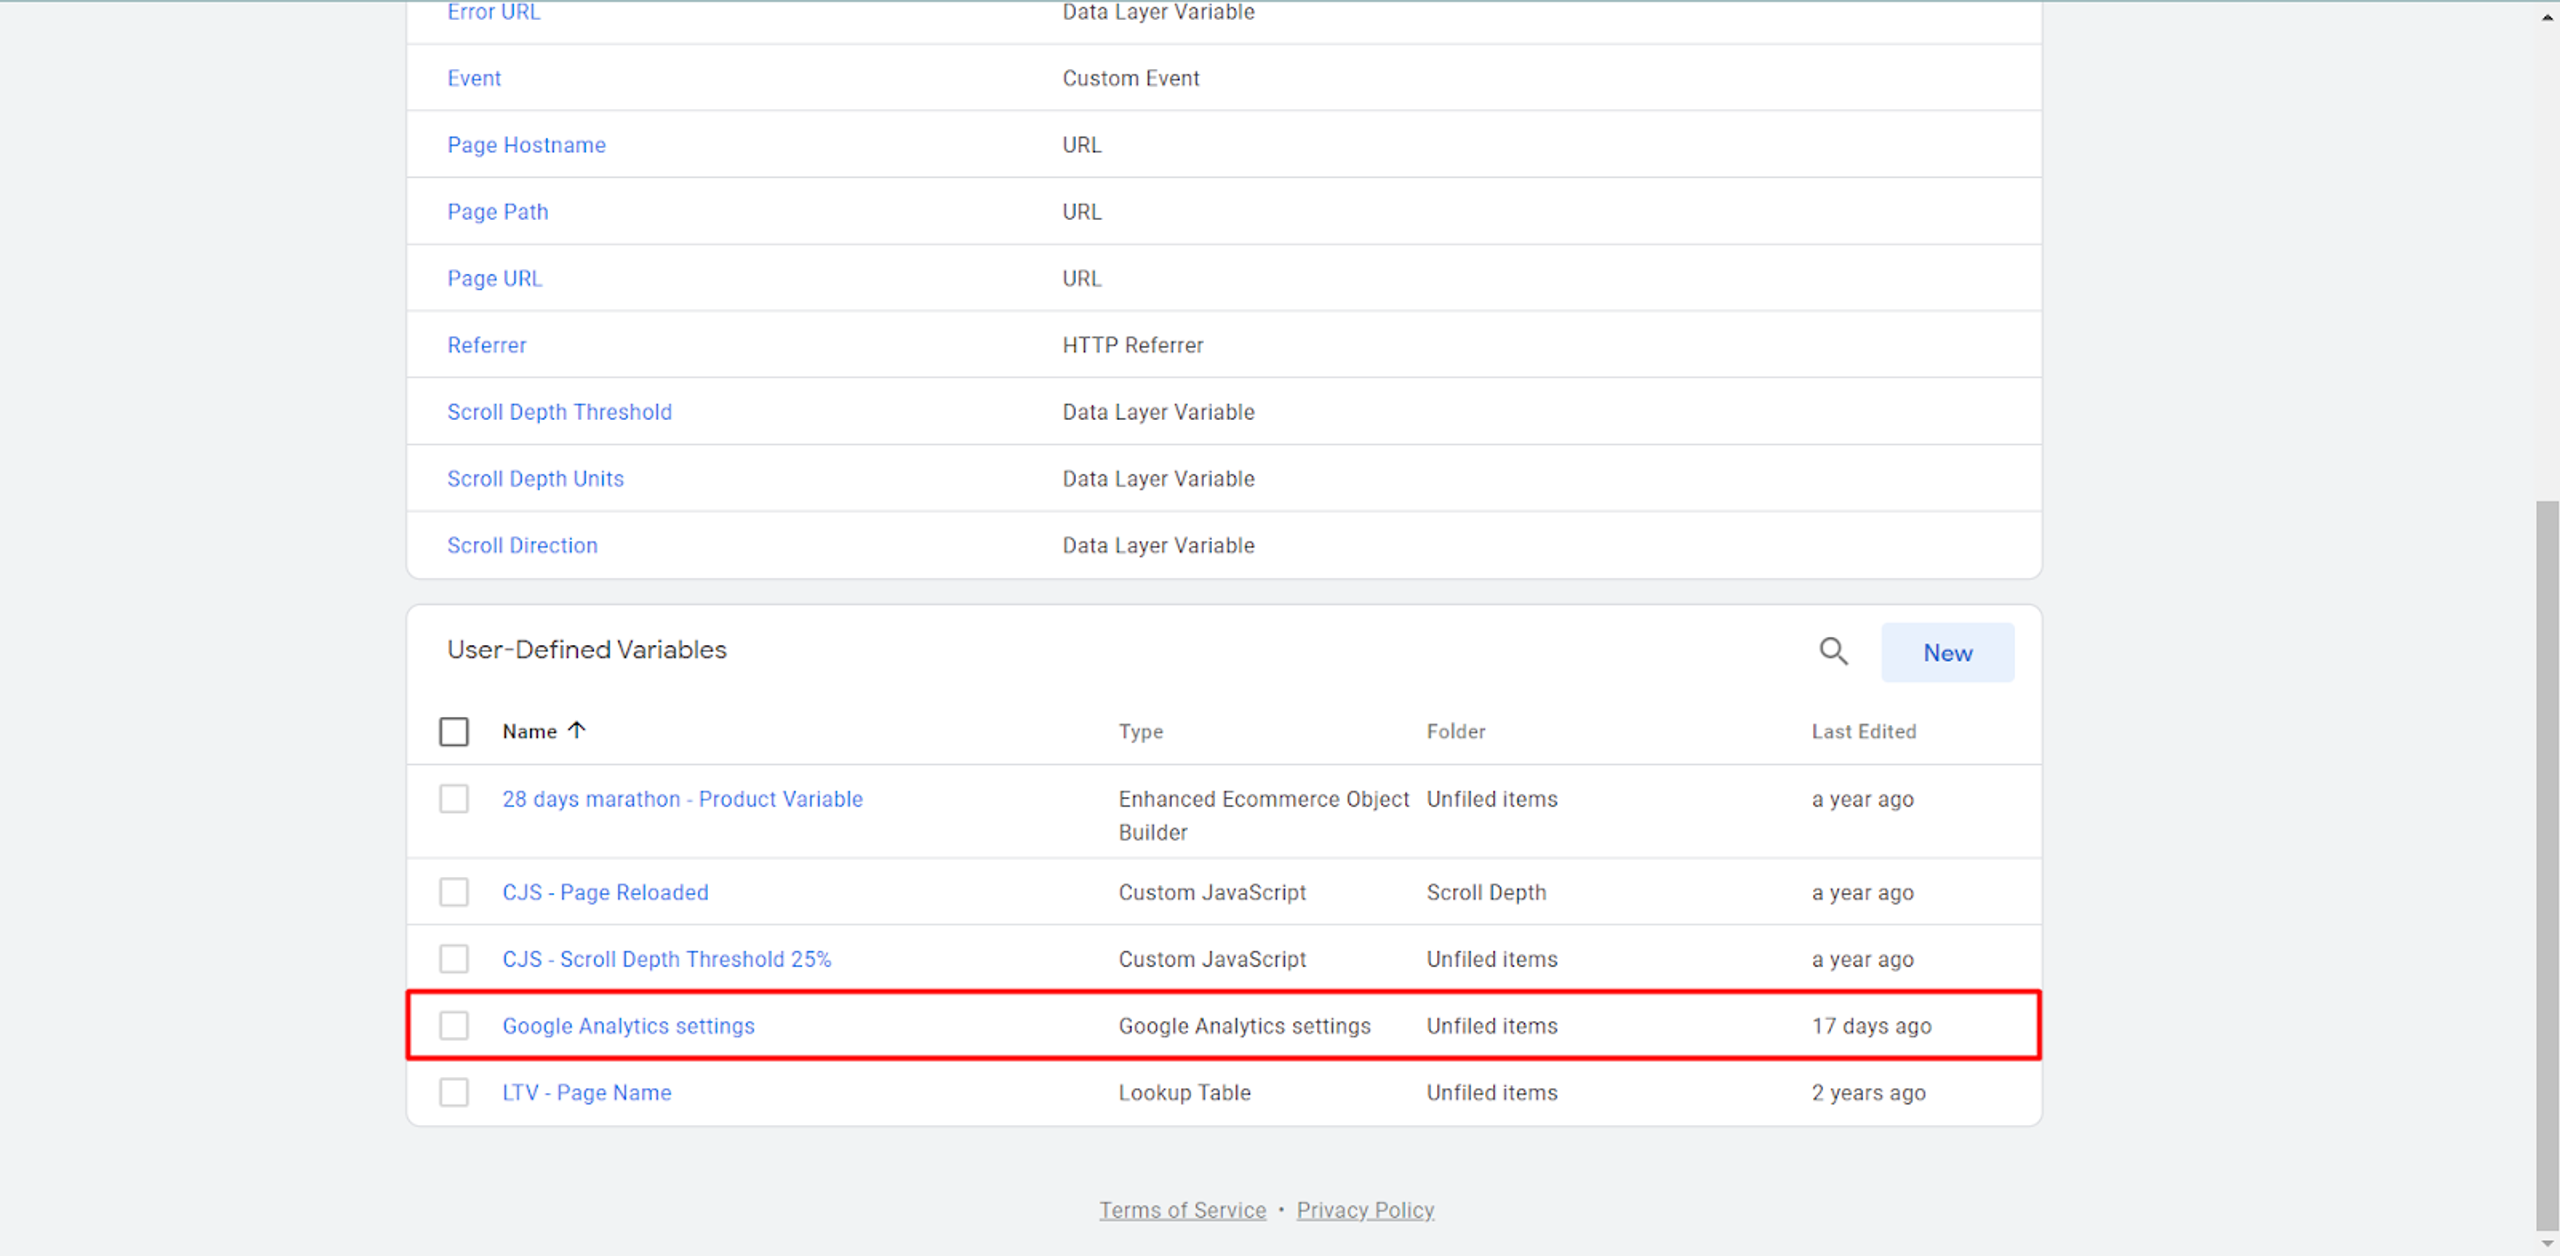
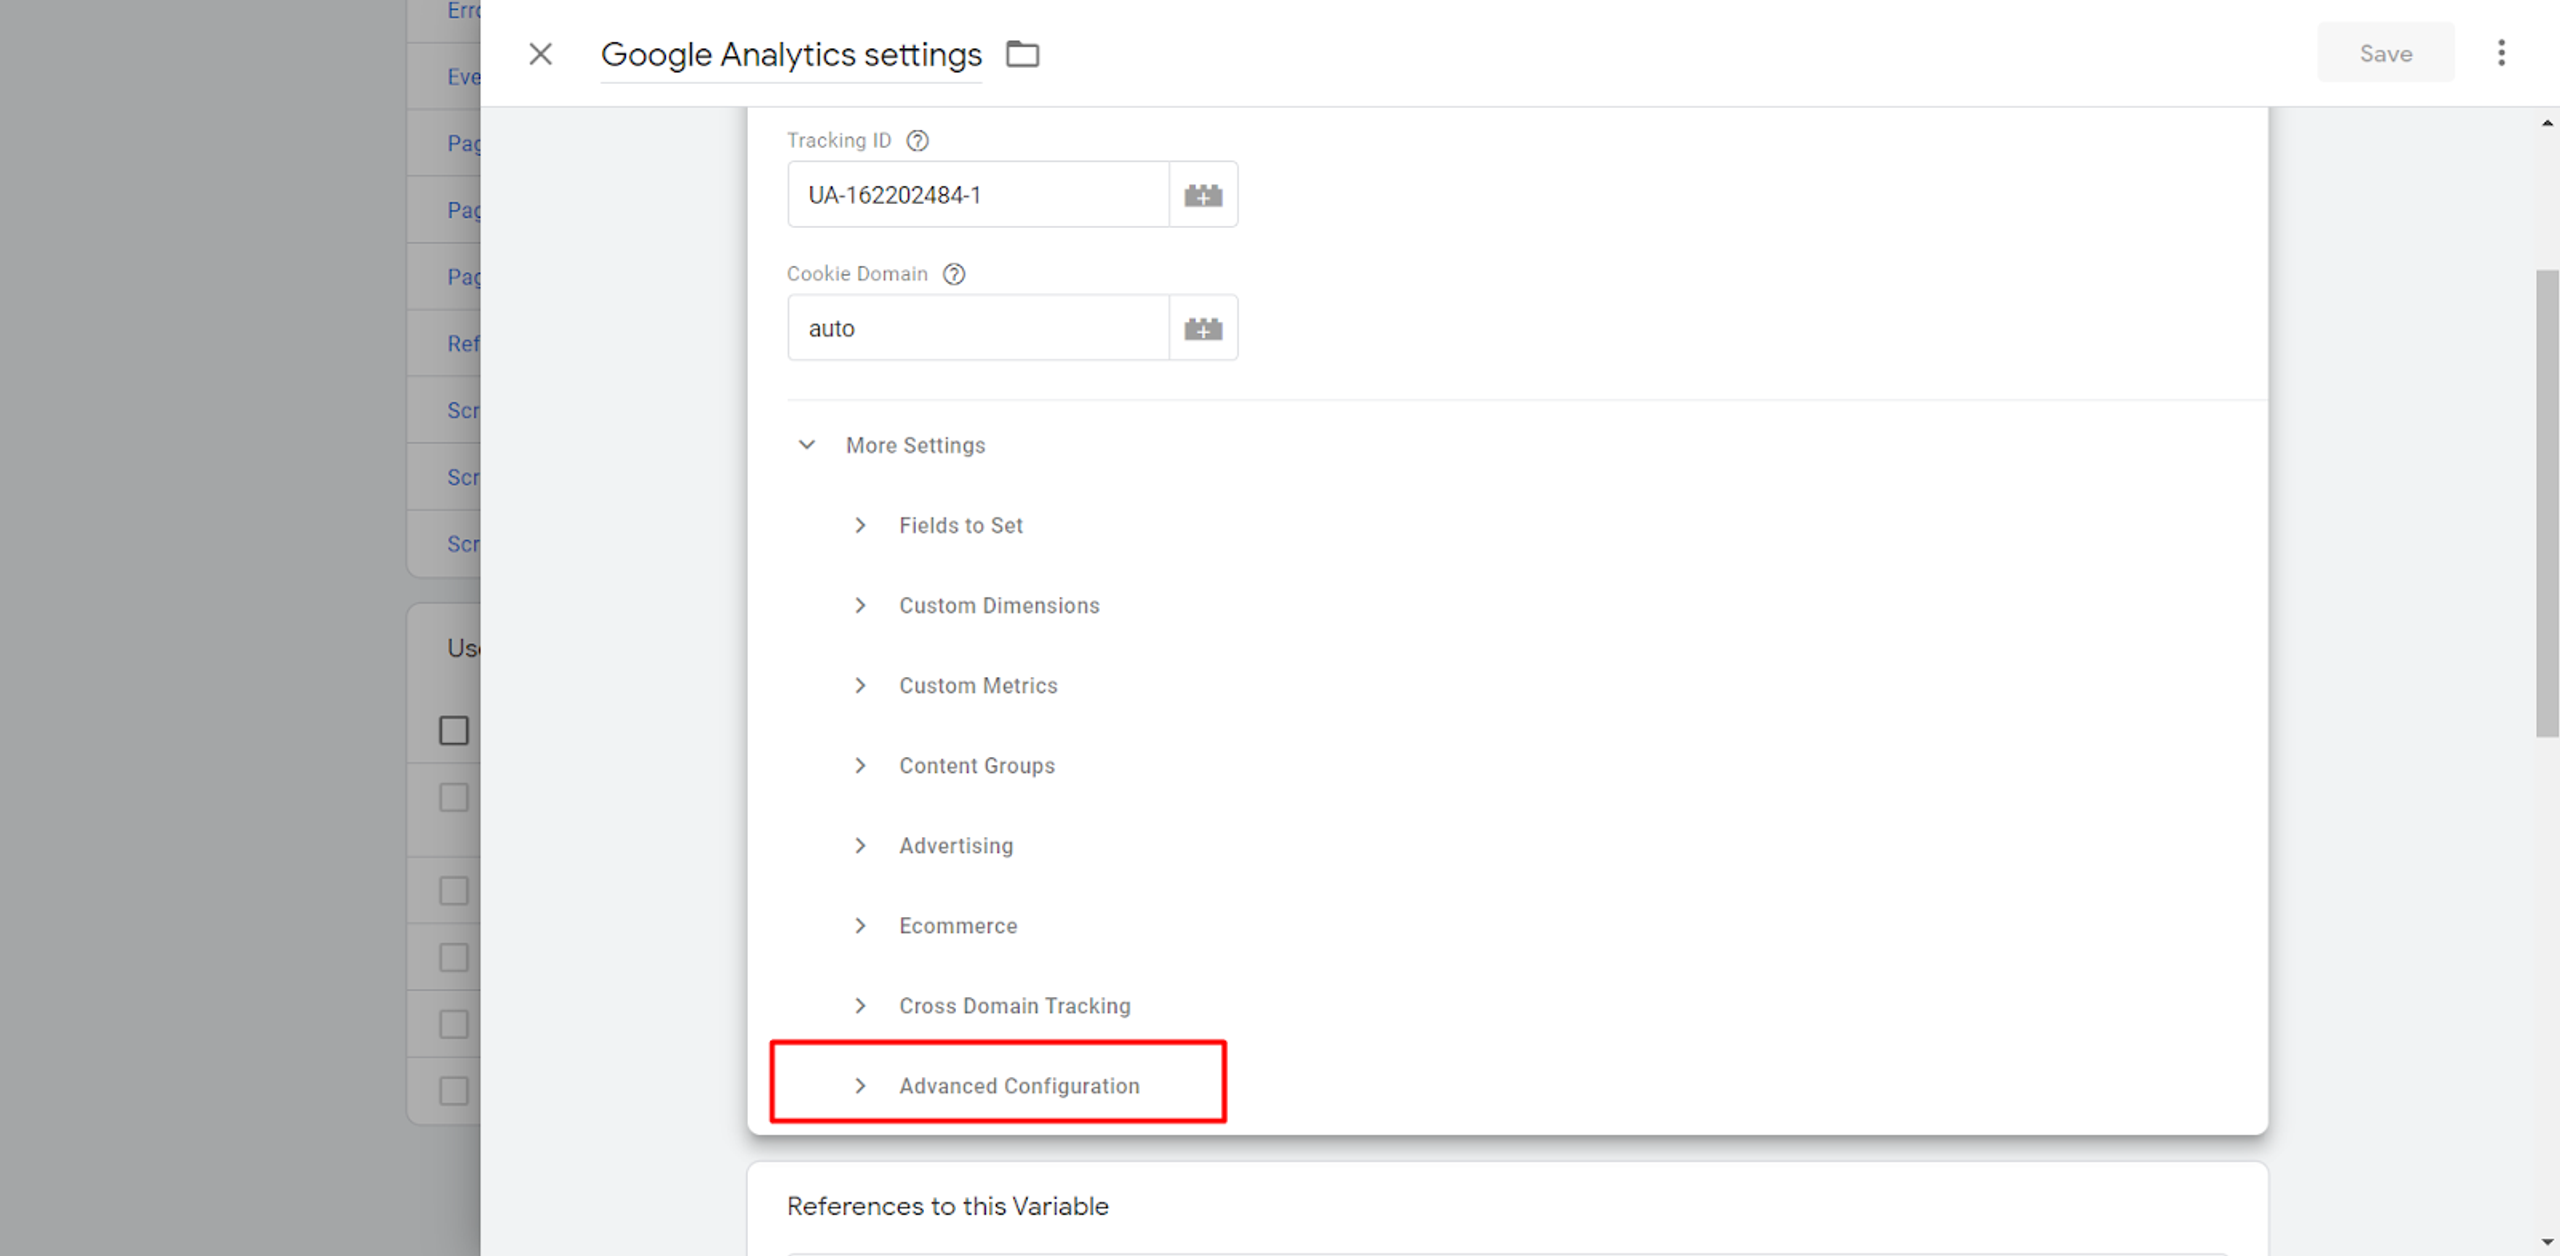
In “Variable Configuration”, click “Advanced Configuration”.
Here you can add your verified Google Cloud Platform domain which was added to the Server Container.
For GA4 property connection in GA4 configuration tag settings, enable the Send to server container option and add your verified Google Cloud Platform domain above.
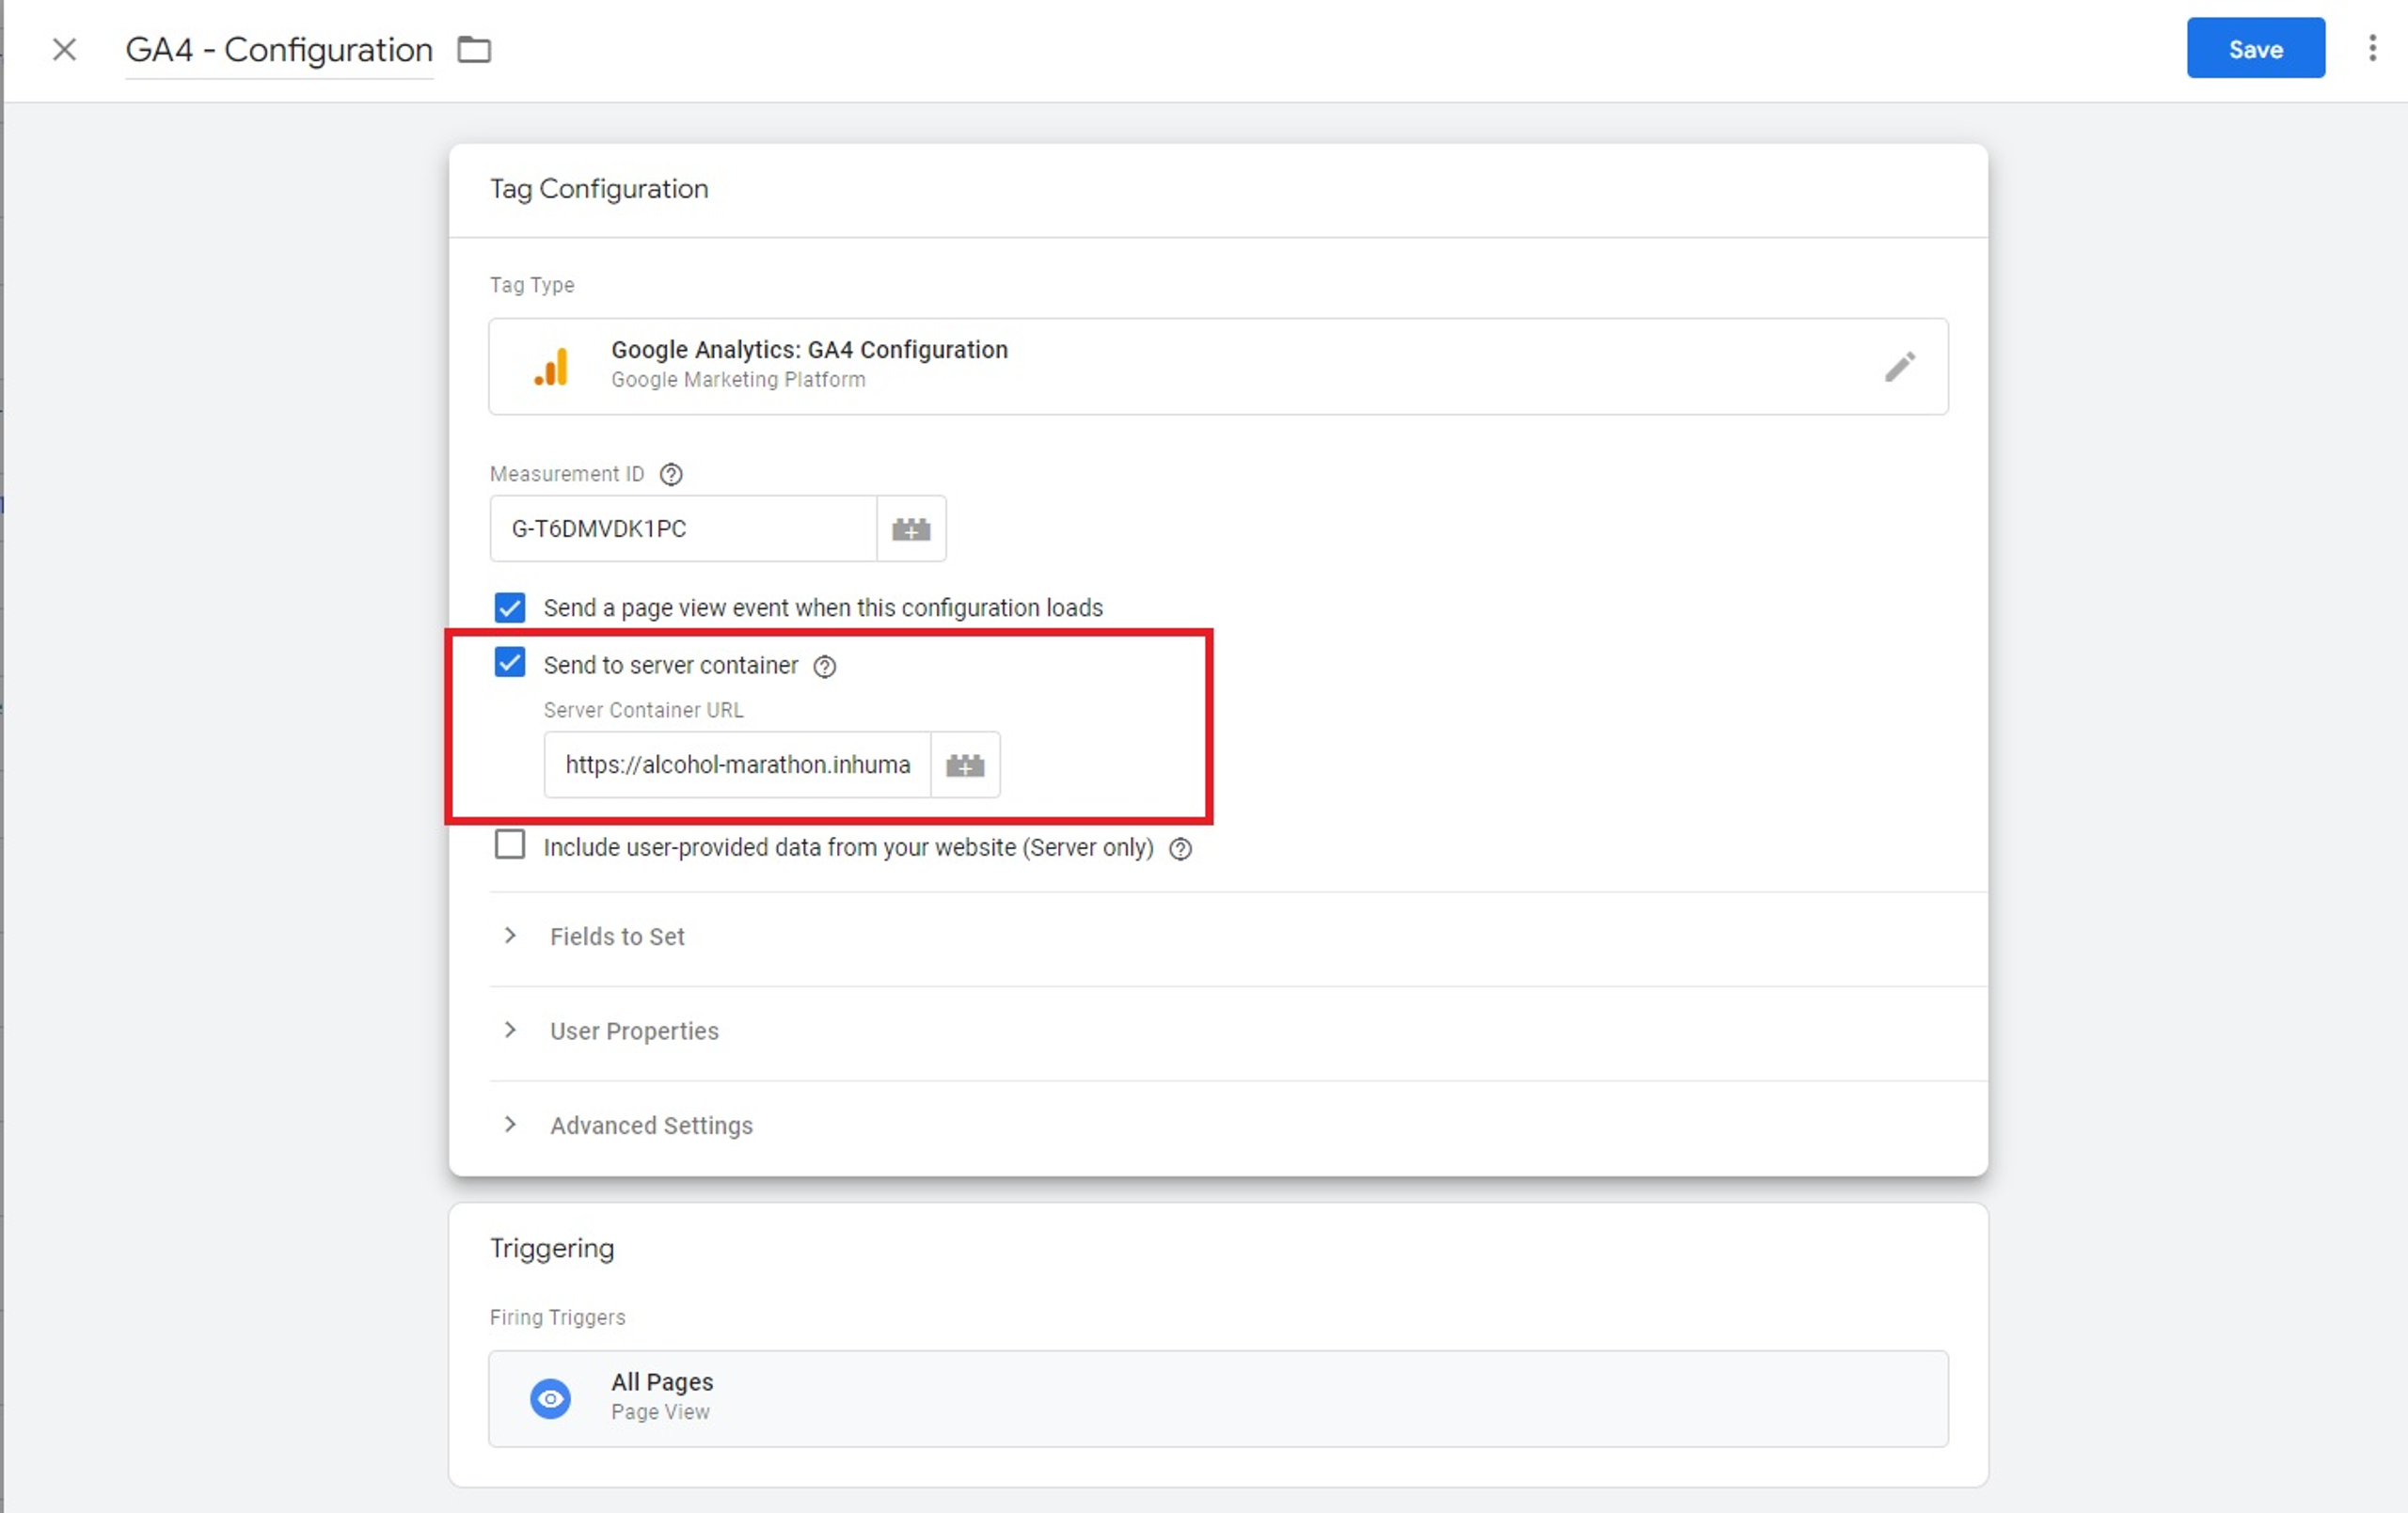
After you have added it, Containers will connect with each other.
Click “Preview” in Server Container. If you see “Fired Tags” and a “Page View” Tag, which we created before in the Web Container - congratulations - you have set up 1st Party Cookies on your website.
