Setting Up Google Merchant Center
Posted on 11/14/2023
Reviewed by Arnt Eriksen updated at 12/5/2023
Introduction
Almost any successful eCommerce strategy includes the Google Shopping marketing channel. This article walks you through the process of Google Merchant setup and explains the benefits of using the Google Merchant Center and the process of creating your first Google Shopping campaign.
The primary benefit of setting up a Google Merchant Center account is that it allows you to upload product business information directly from your eCommerce website or third-party inventory service so that you can create, manage, and monitor Google Ads performance for those products. You can individualize your product feed specifically for Google Ads without having to change it on your website.
What is the Google Merchant Center?
The Google Merchant Center is a digital platform where online stores may upload product data that is used to generate Google Shopping Ads (formerly Product Listing Ads).
You may also provide information about your eCommerce business, shipping, and taxes in the Merchant Center.
Advantages of the Google Merchant Center
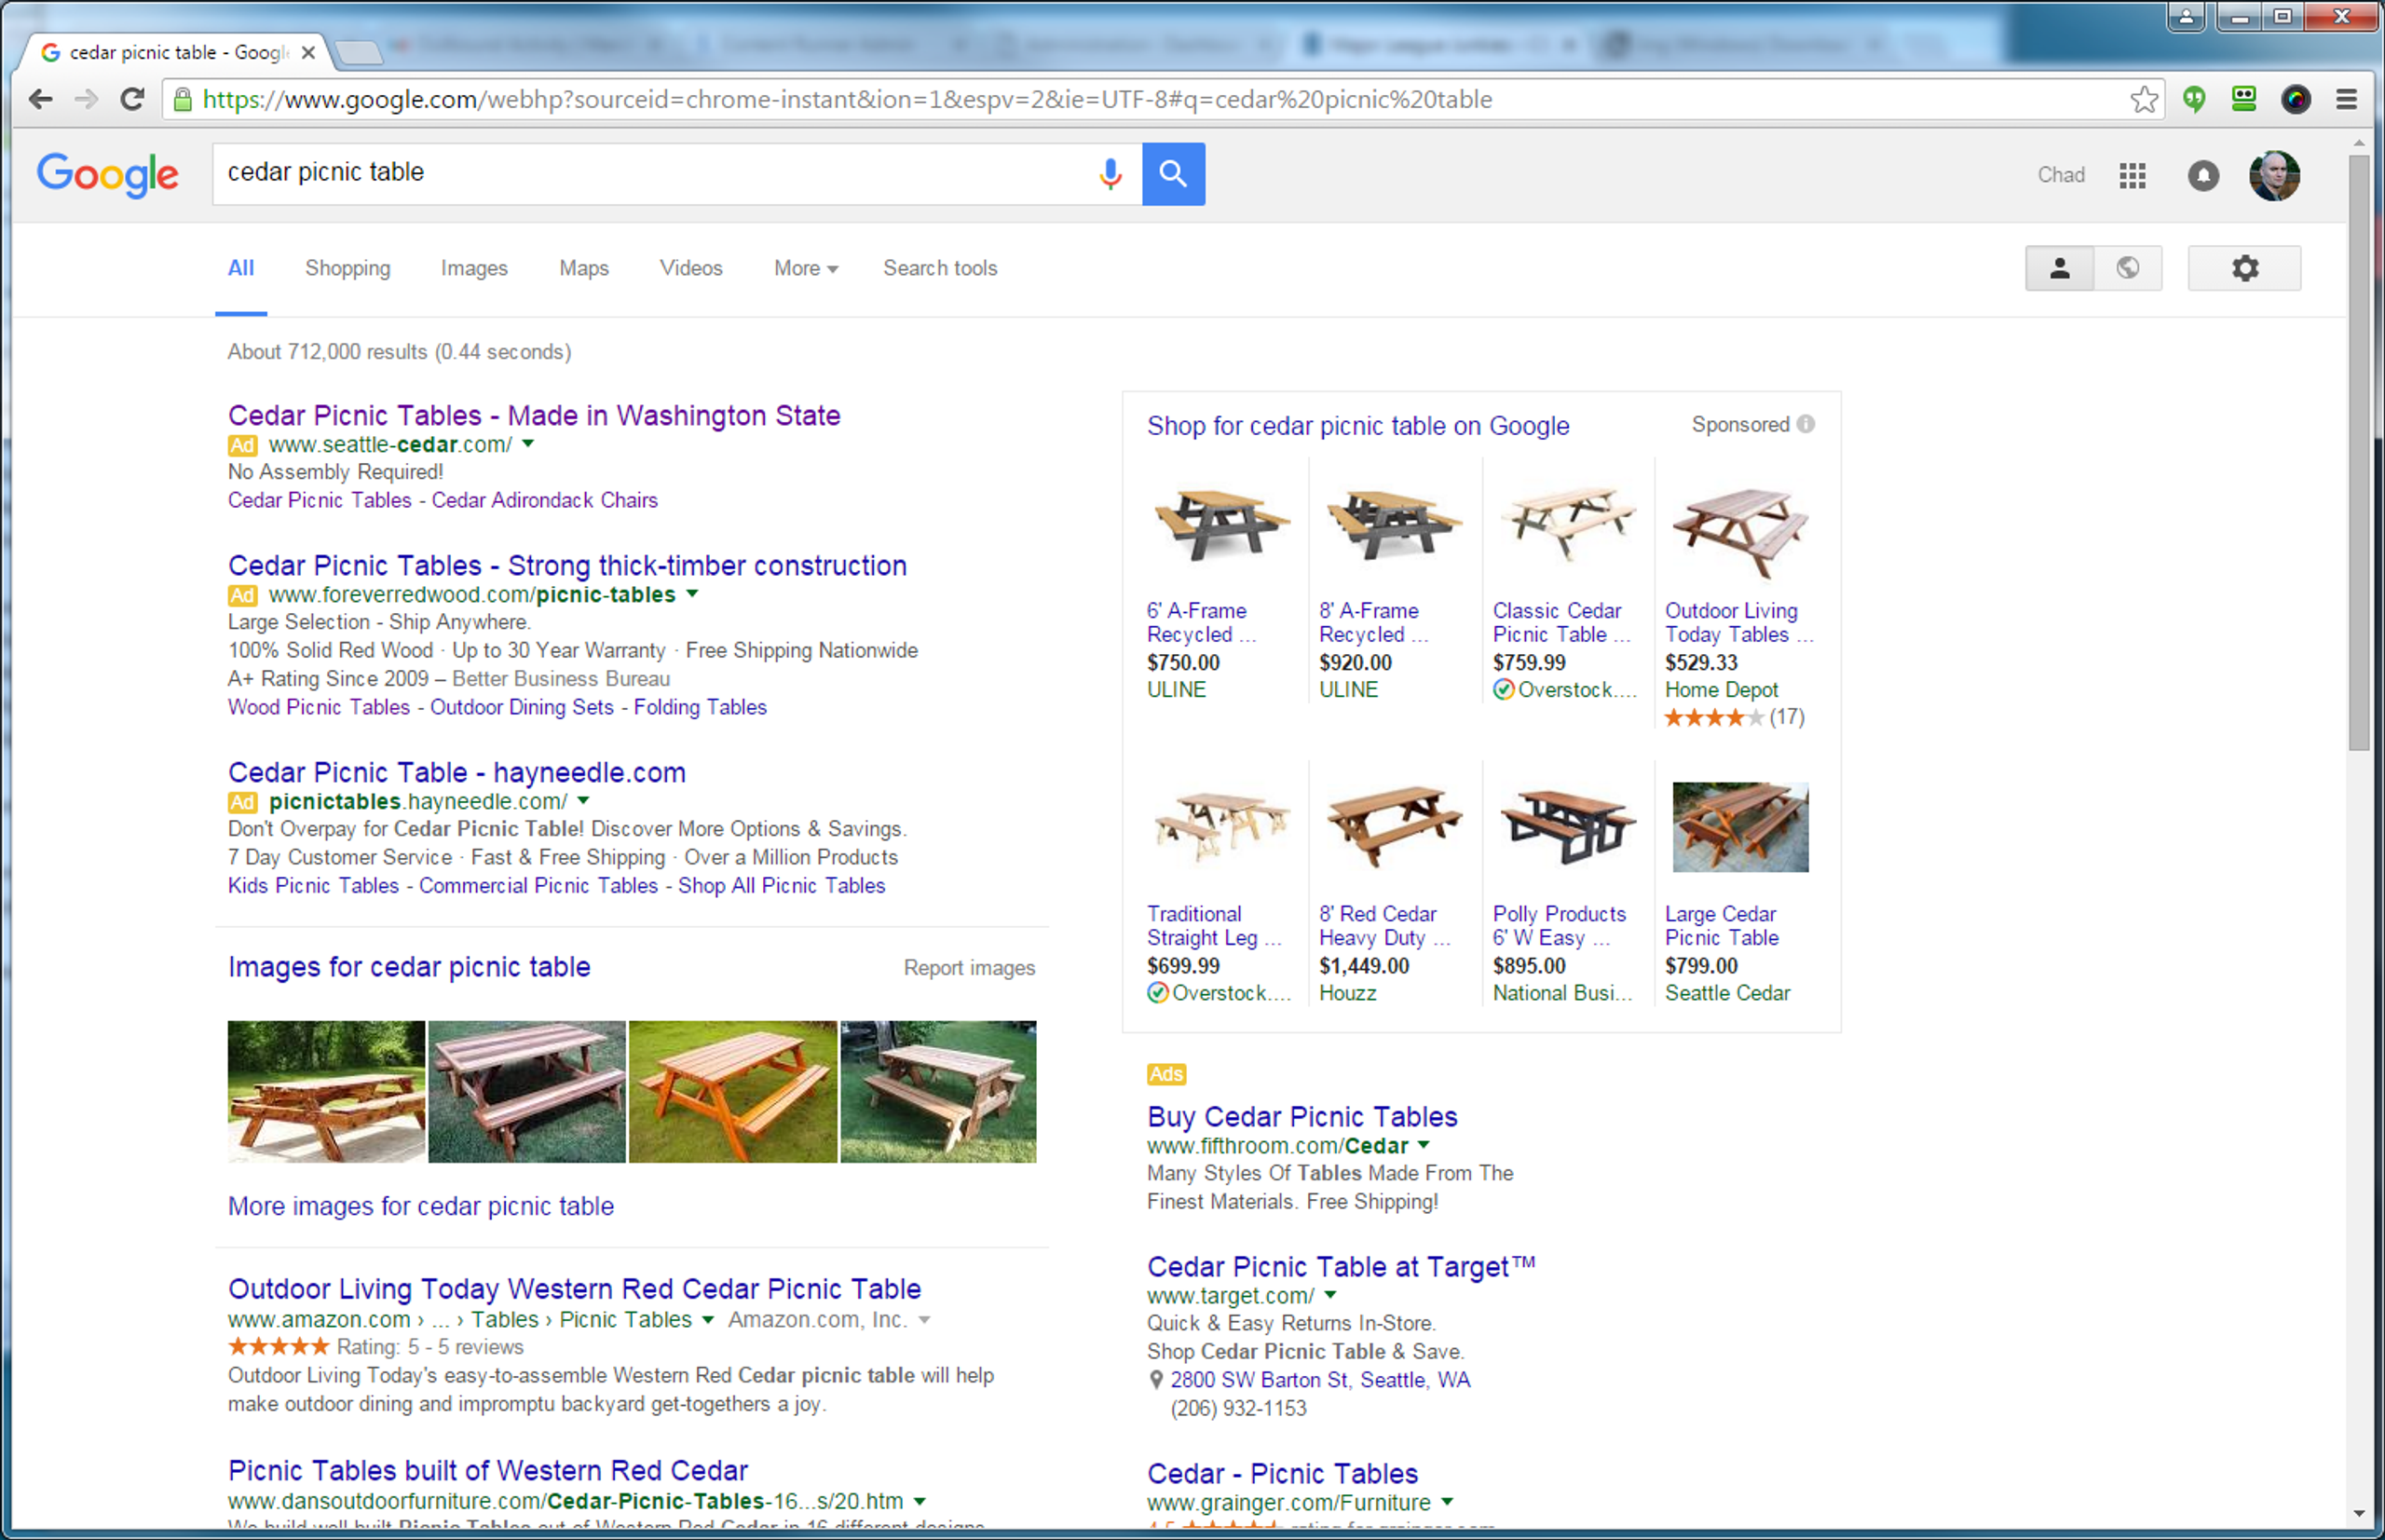
It helps to drive sales. You can reach hundreds of millions of people seeking to purchase the products you offer through Search, Shopping Campaigns, YouTube, and the web. Google connects you with the right customers and shows products both for free with the Free Listings Option and via paid ads.
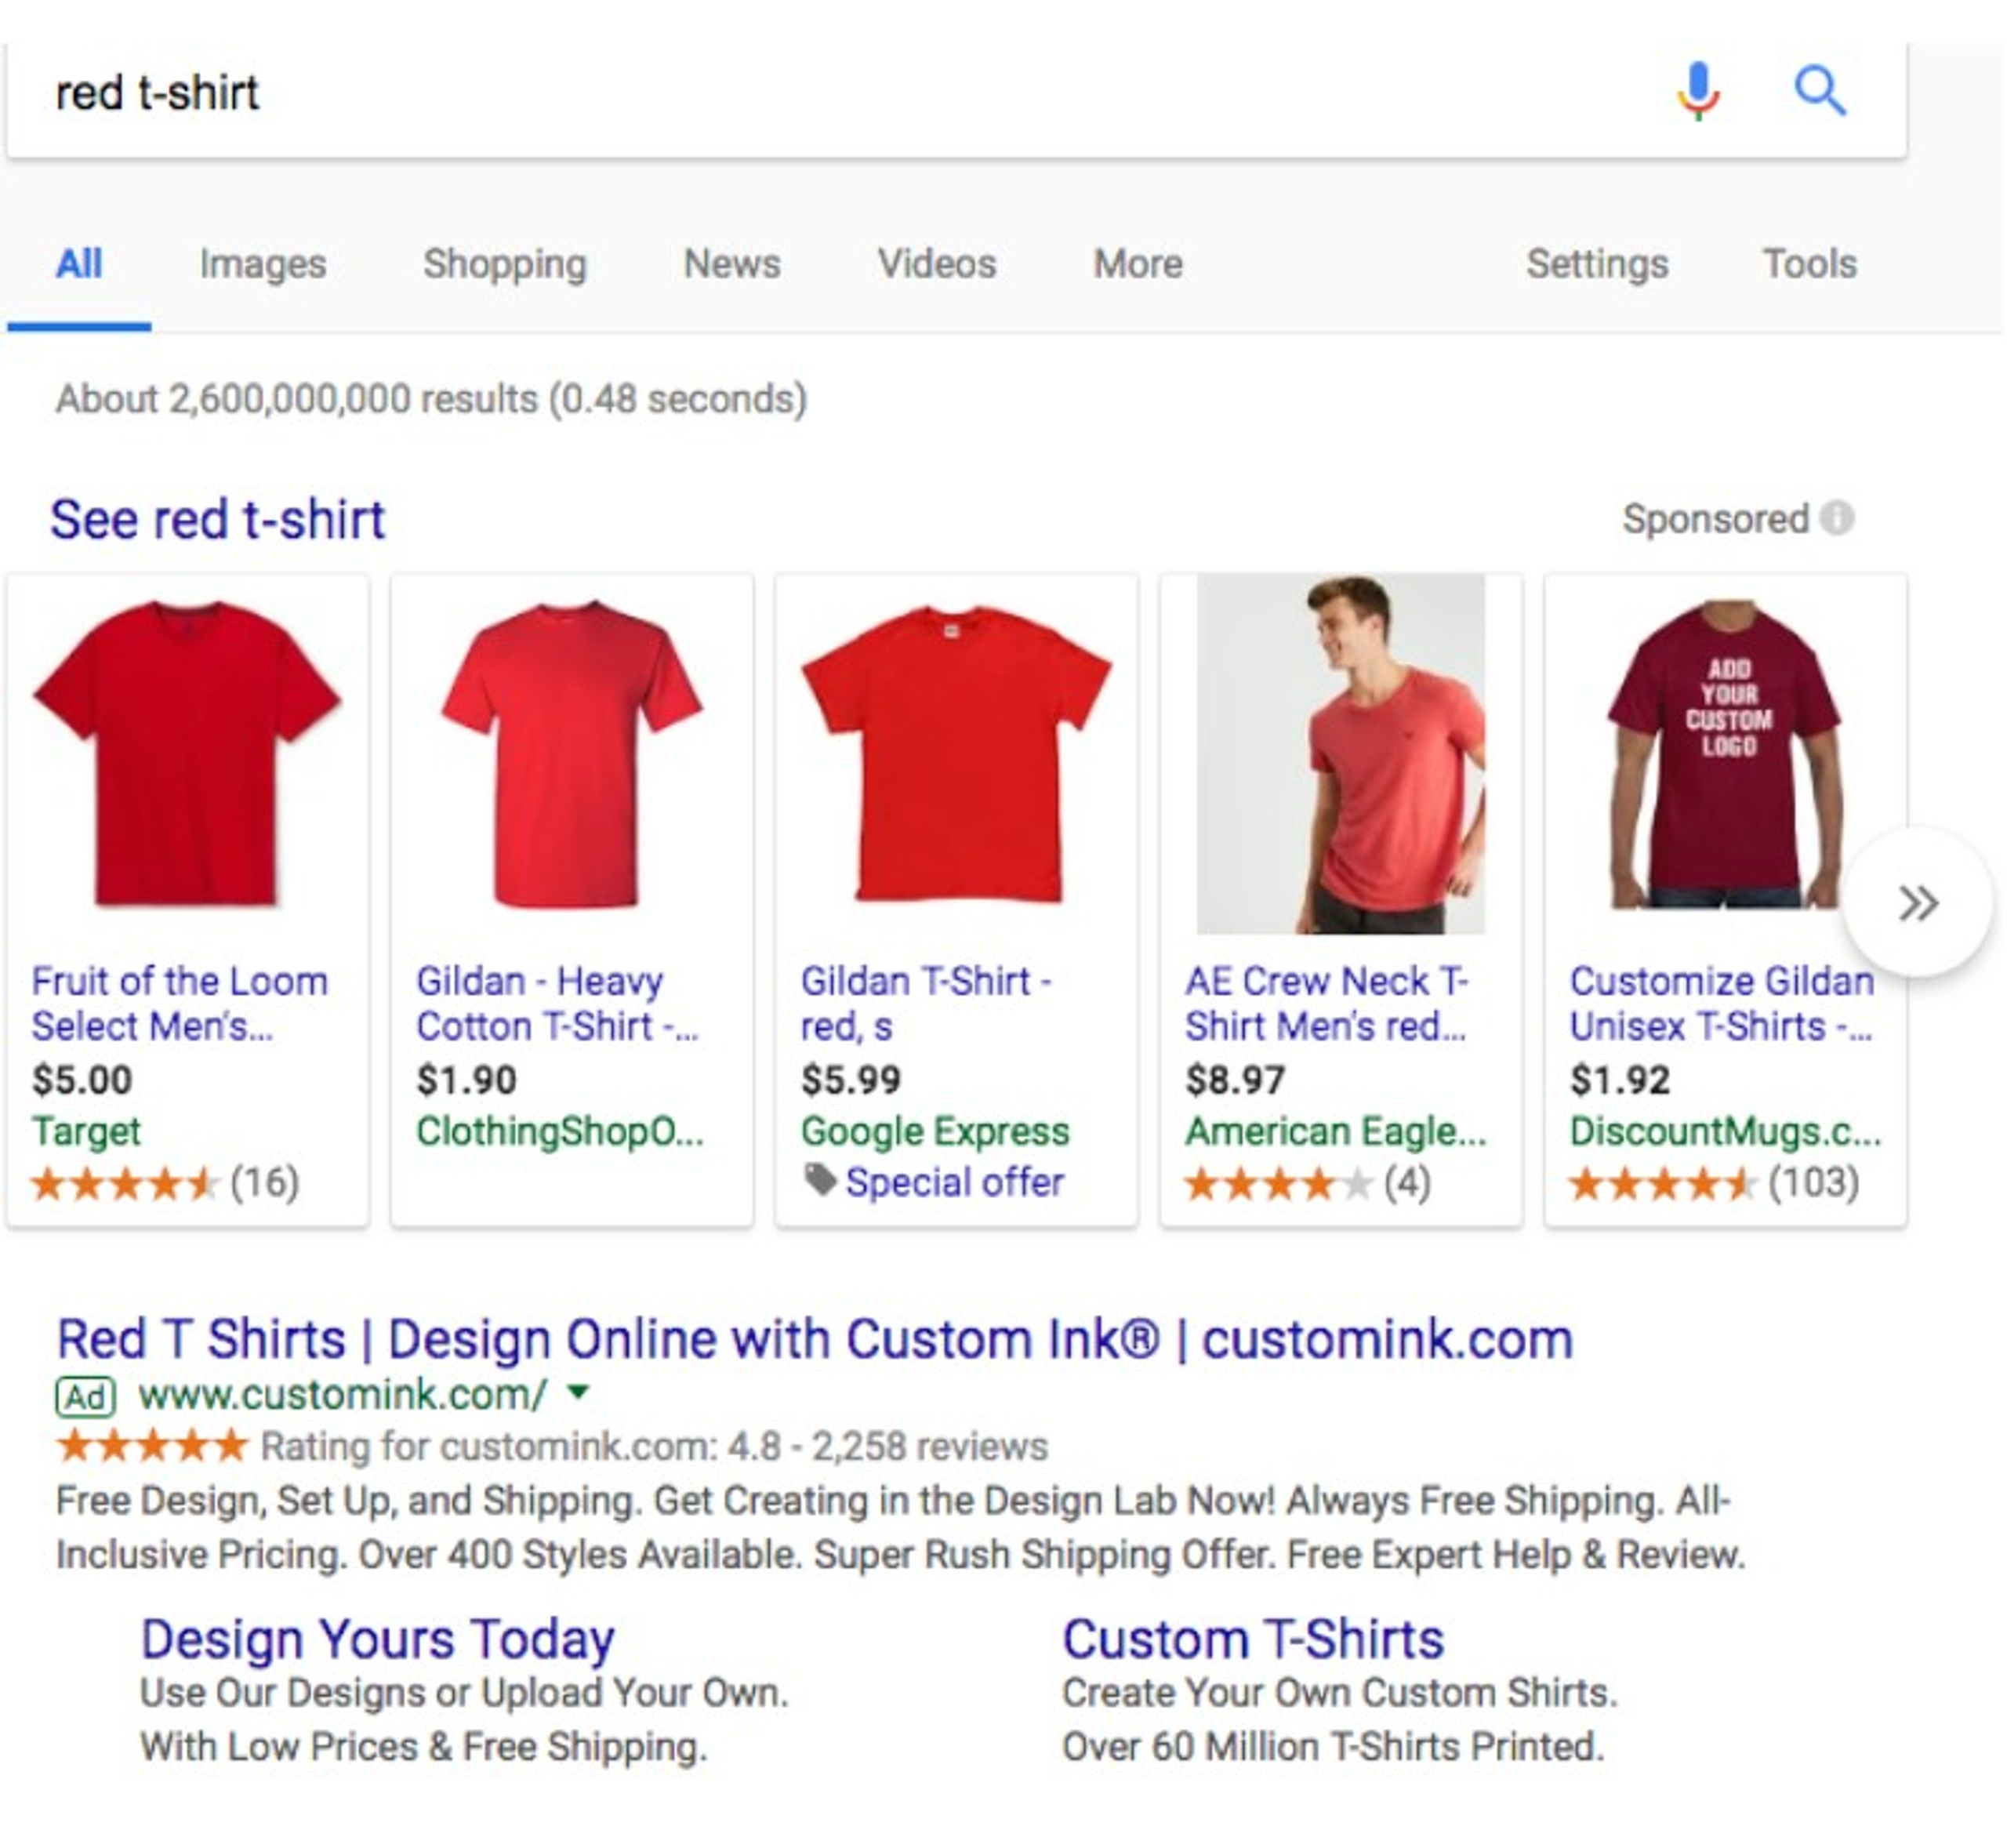
Google Merchant Center Features
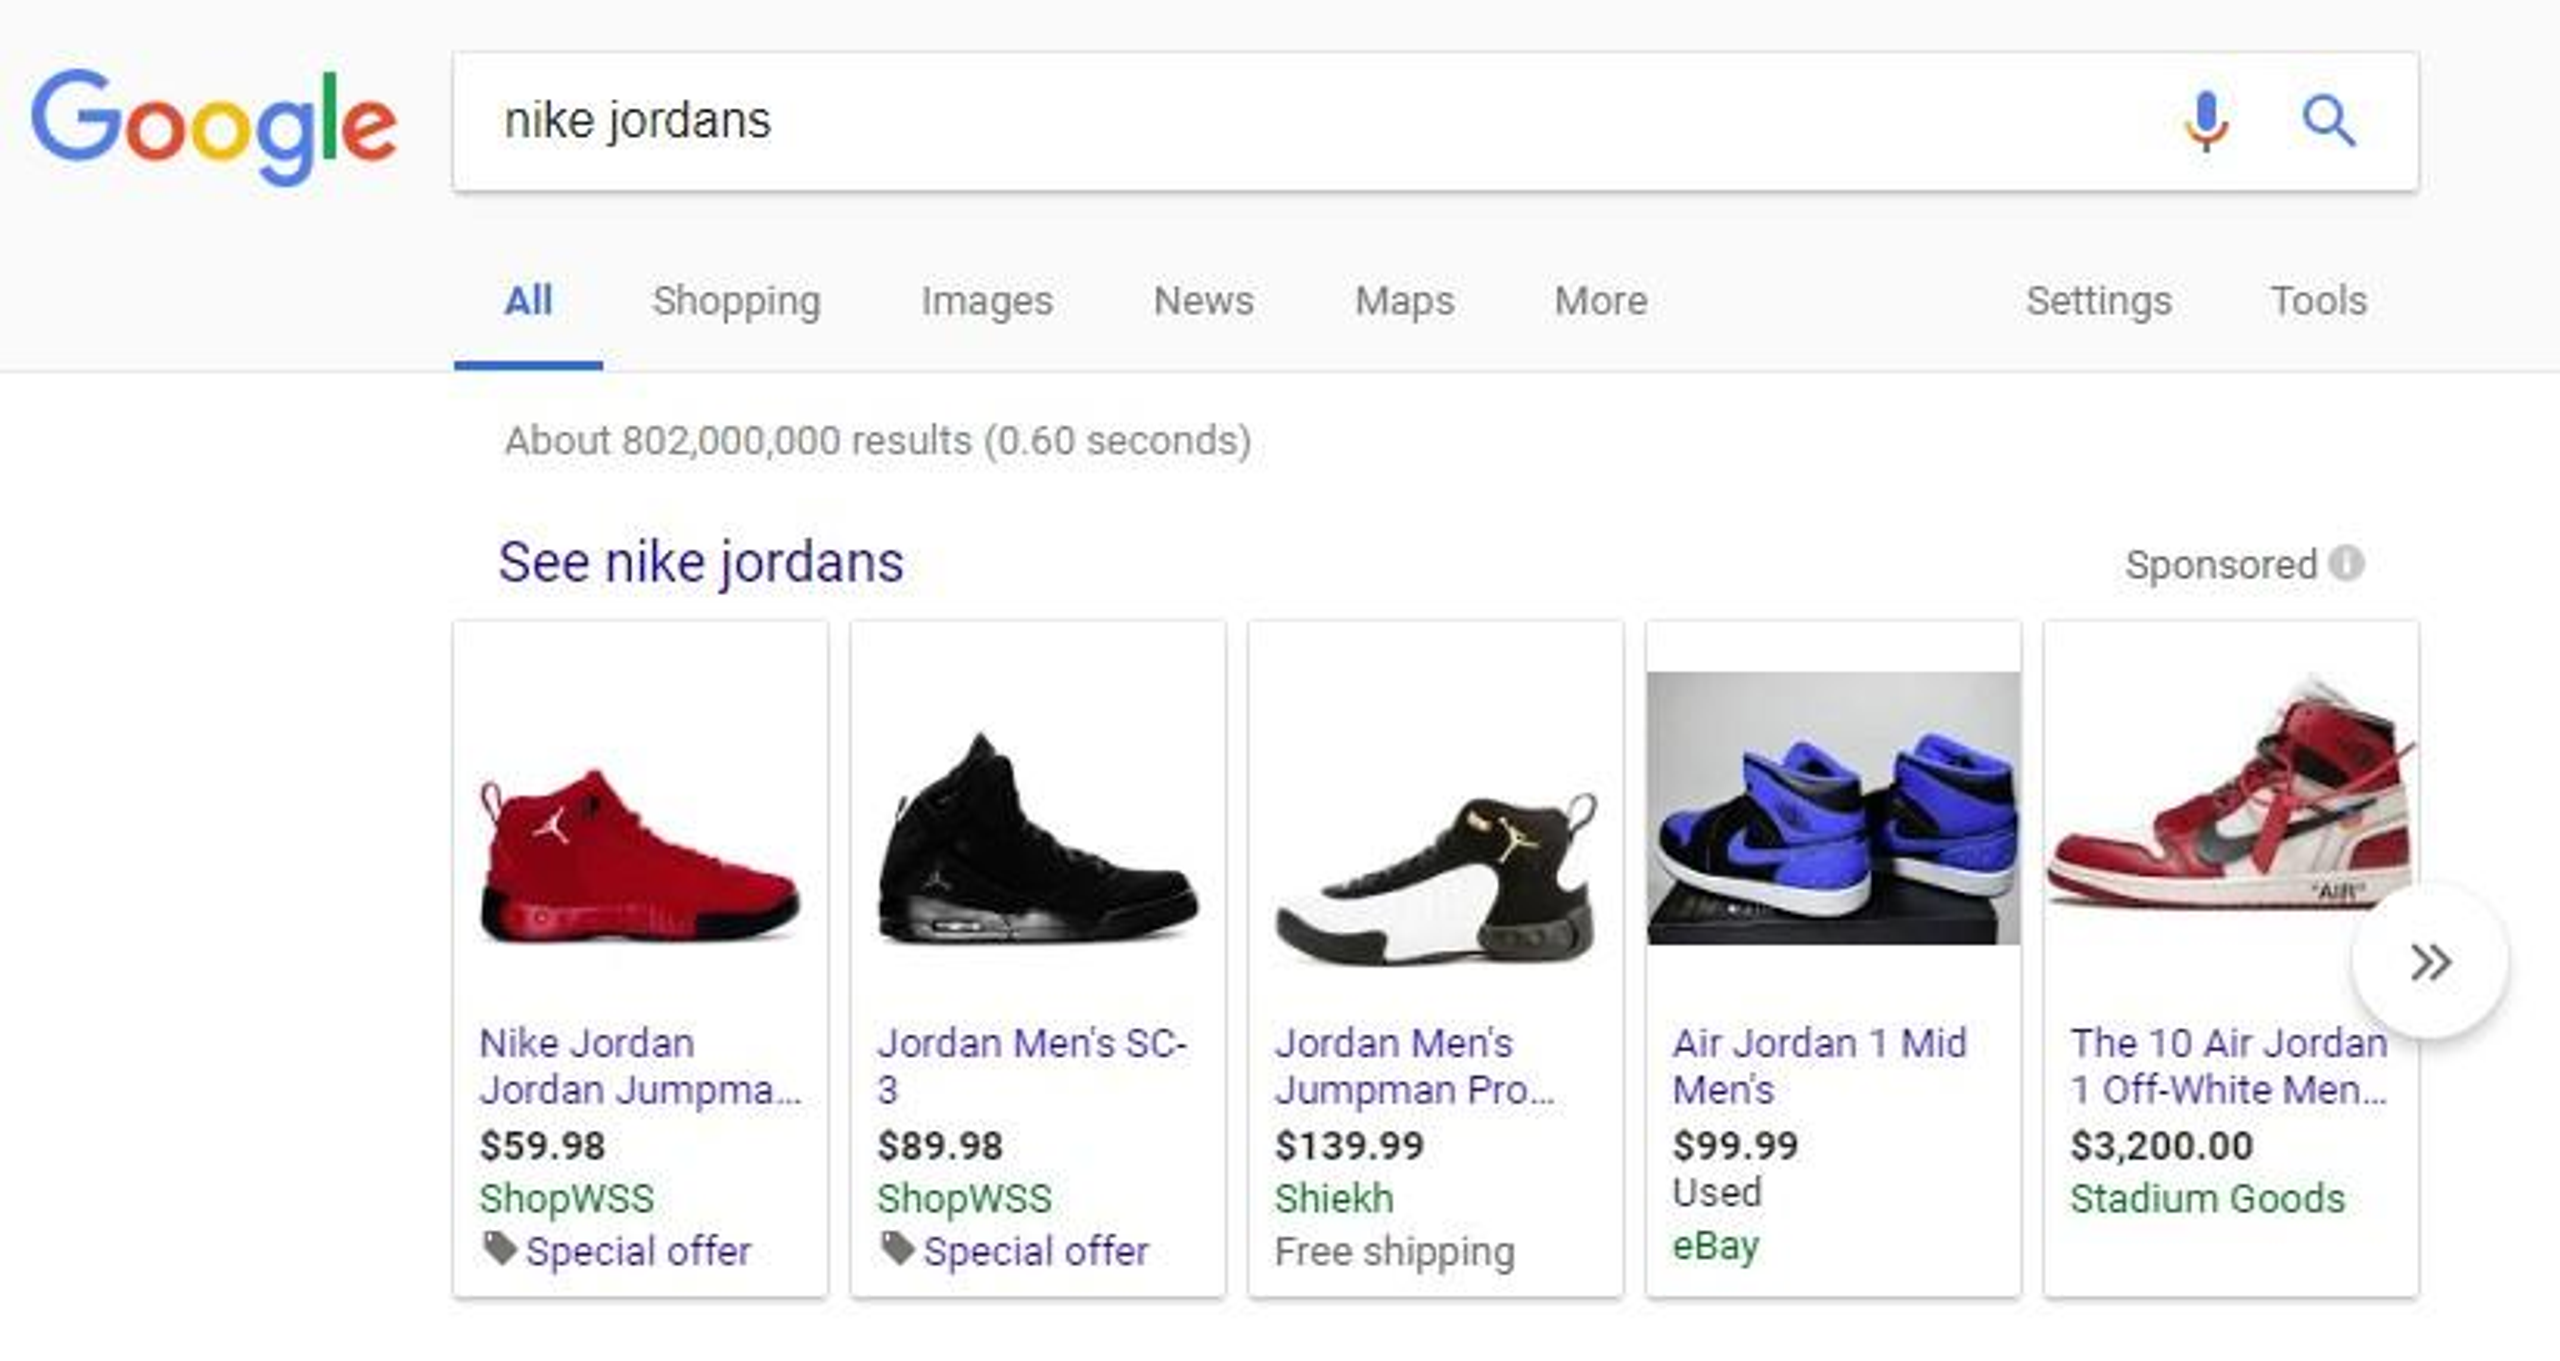
- Shopping listings: Businesses can increase their visibility by allowing Google to display their products in a catalog-like format on Google Shopping search results pages.
- Google Ads integration: Every product in the Google Merchant Center can be quickly and easily tied to specific Google ads.
- Public product reviews are integrated into product listings, with star ratings visible as part of the listings.
Preference is given to products with 4.5 and 5 stars.
Setting up a Google Merchant Center account
Google Merchant Center setup begins with creating a Merchant Center account at merchants.google.com.
Post basic information, including contact information and location, then accept the Terms of Service.
Important note: You need a Google Ads Account before registering for a Merchant Center account. If you don’t already have a Google account, create one.
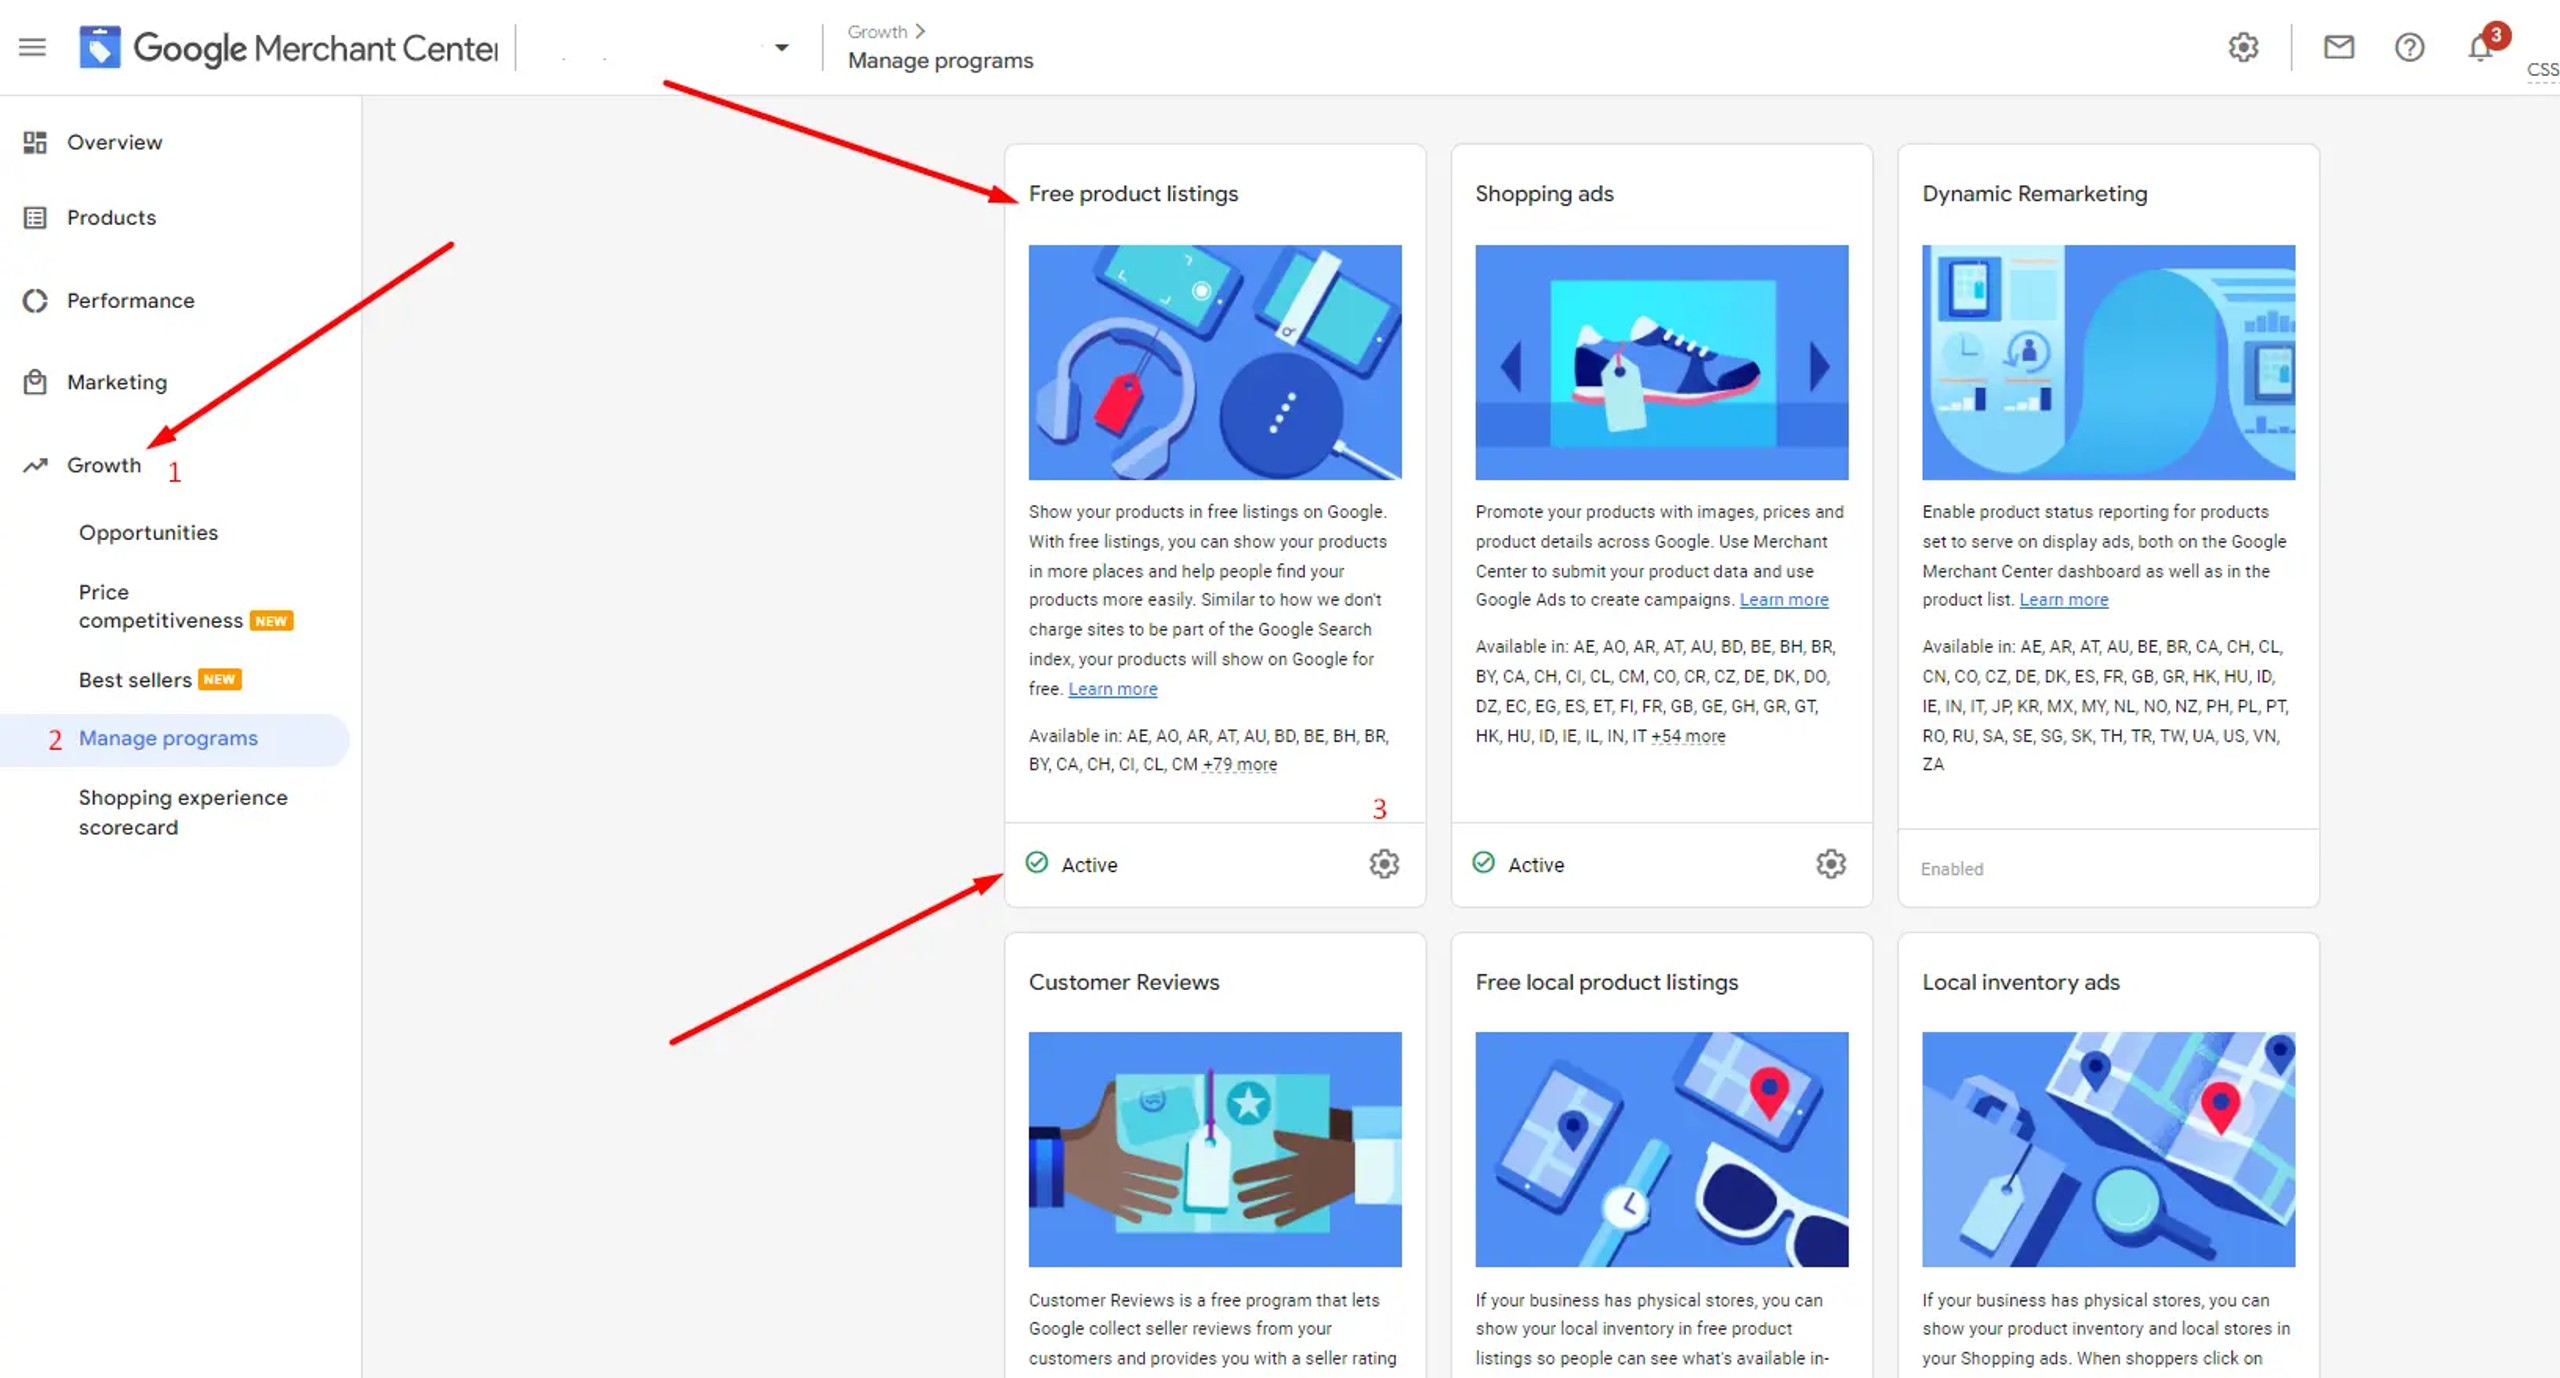
You can set the following account settings in your Merchant Center 👉👉👉
Click the Tools icon (the settings drop-down menu will appear) and click business information.
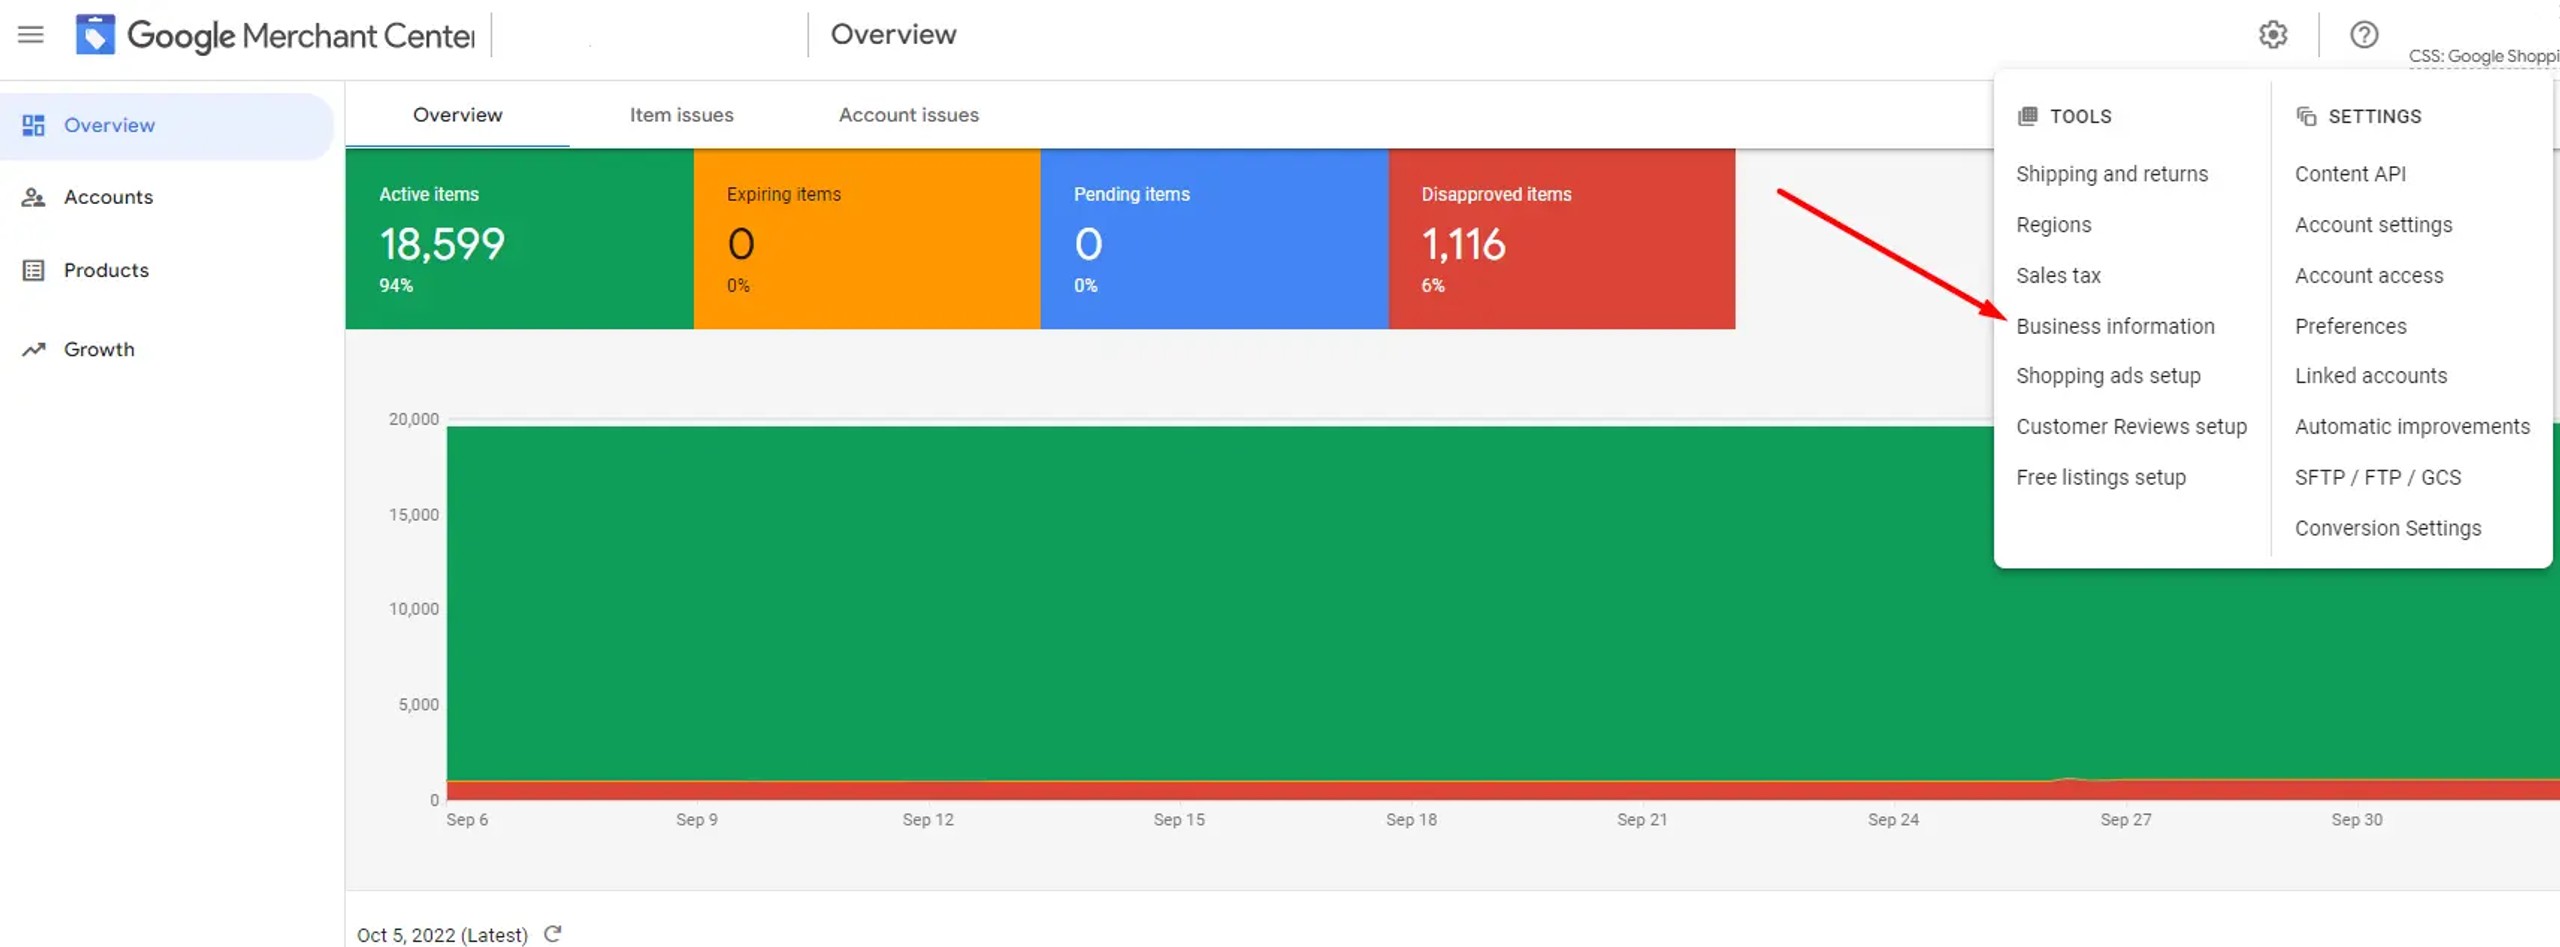
Enter your Store name: It is important to enter the correct Store name. This will be displayed in all advertisement placements.
Ensure that your store name works correctly by following these guidelines:
✔ Provide a brief description of your business name. You may elect to use your business name or the name of your website. If your store name is lengthy, we will provide your website URL instead. You need to provide specific information in the Merchant Center.
✔ Don’t include additional text or suffixes like “Inc.”, “Co.”, or “GmbH.”
✔ Don’t include promotional text, marketing messages, phone numbers, or other non-essential content.
✔ Avoid excessive and superfluous punctuation, capitalization, and symbols. For example, do not use ALL CAPS, emoji, copyright symbols ™, ©, etc.
✔ Don’t include any personally identifiable information (PII).
✔ Avoid including full names or email addresses in your content.
✔ Use clear and professional language.
✔ Don’t use offensive or inappropriate language.
✔ Fill in the “About your business” tab with the relevant information.
Important: the information that you add as “Business name” will also be visible in your Google Shopping Ads.
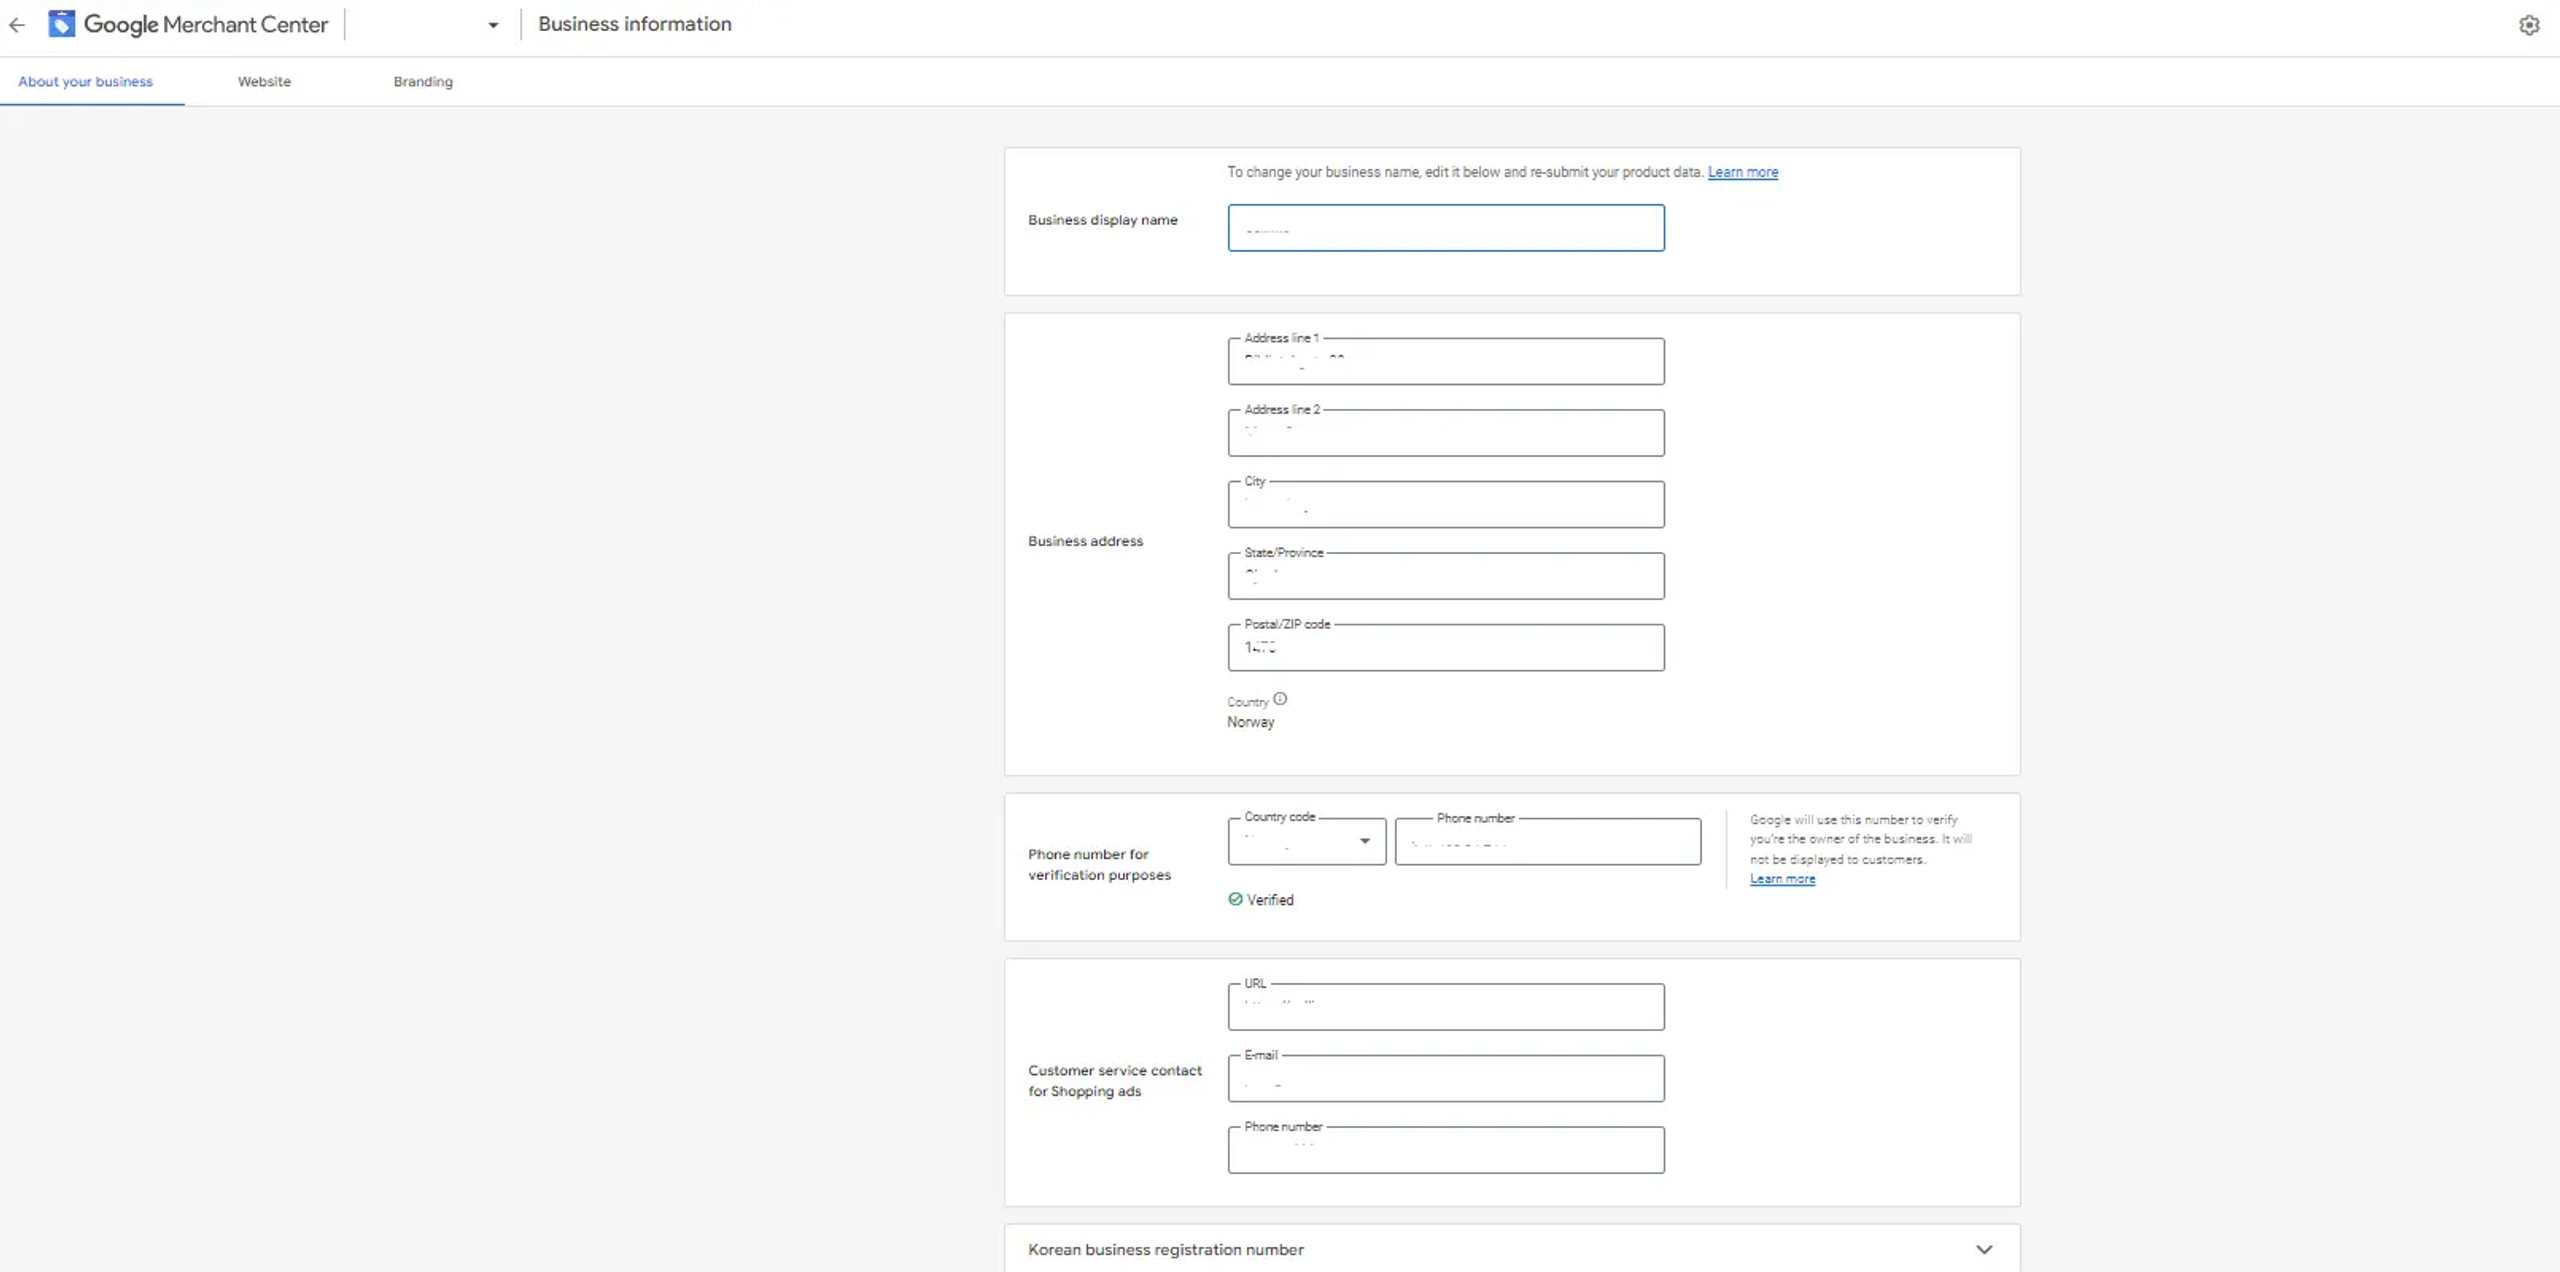
Verify and claim your business’ website URL.
Make sure your URL begins with “http://” or “https://” and is not a port, fragment, or IP address.
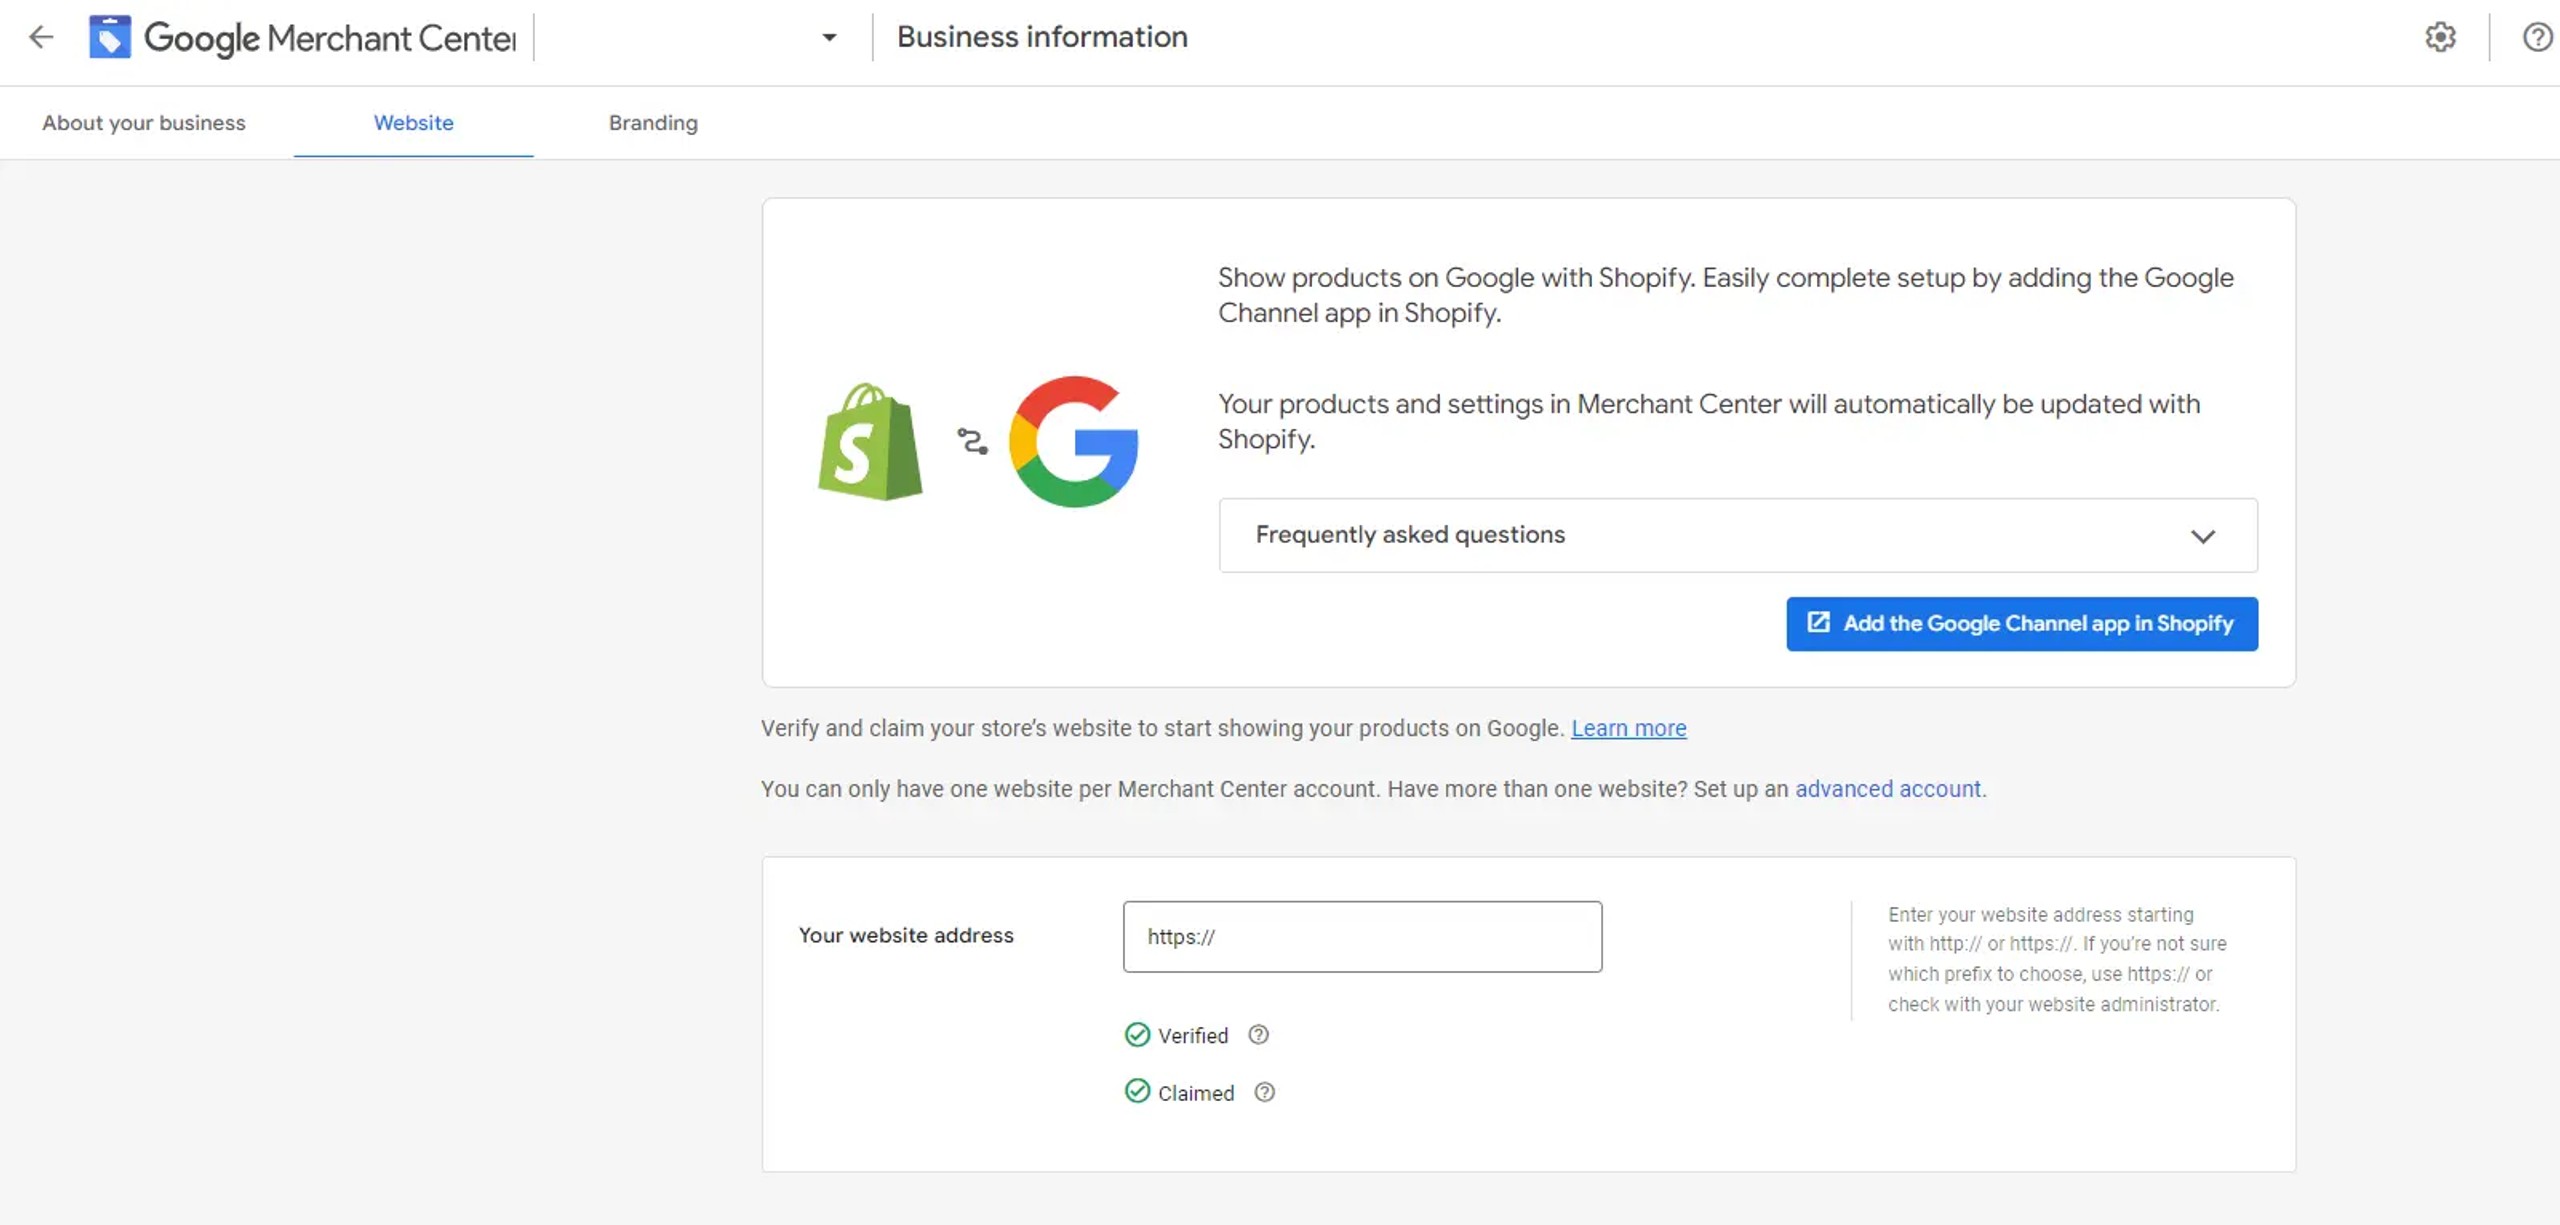
There are four methods to verify your website for the Google Merchant Center account:
1) add HTML code
2) upload an HTML file
3) use Google Tag Manager
4) use Google Analytics

Set up your shipping settings.
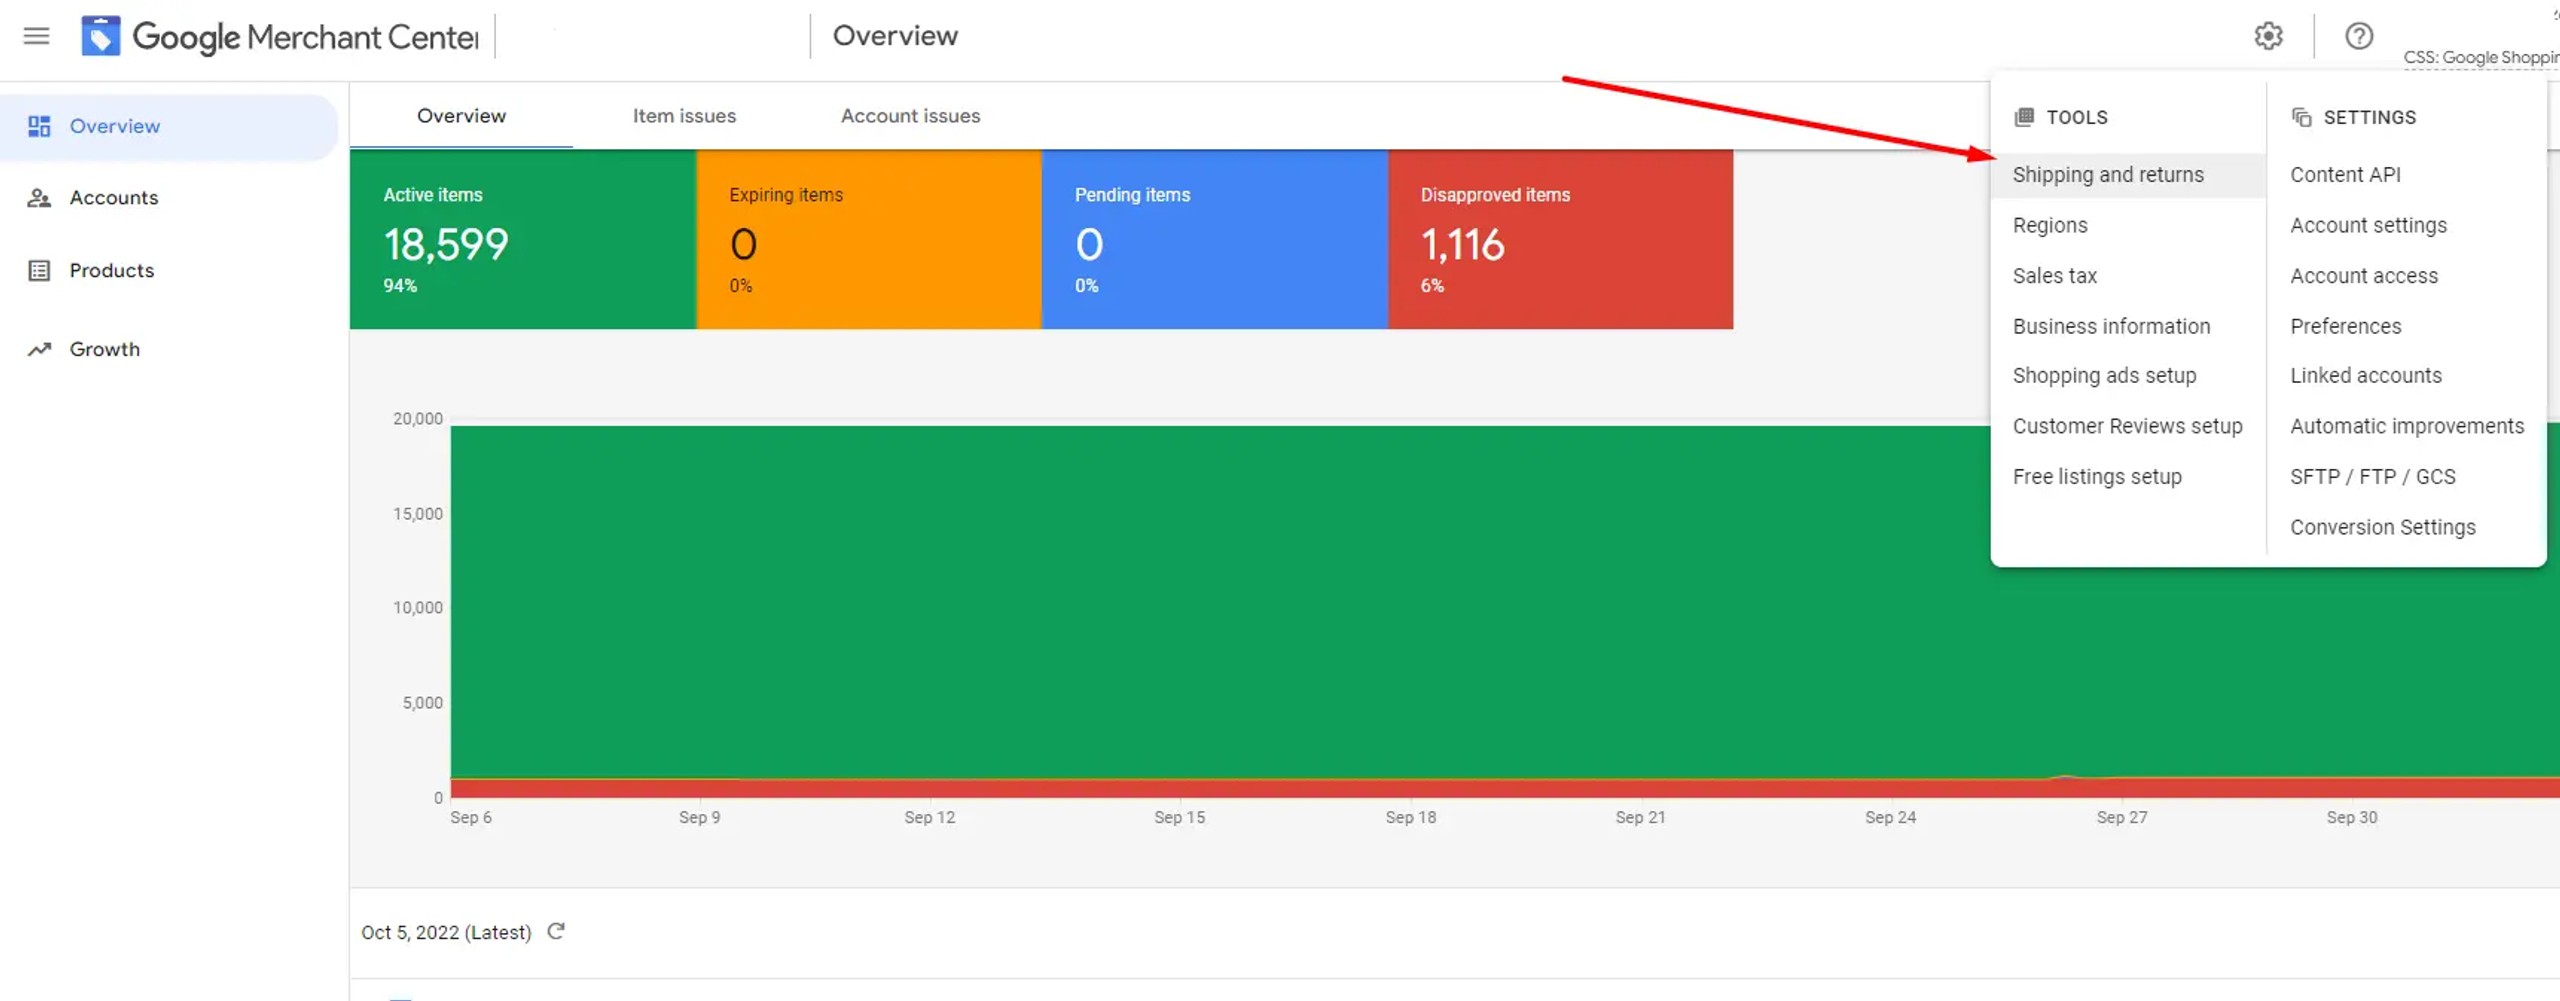
Setting up shipping settings may require a bit of work based on the complexity of your shipping rules.
In order to set up account-level shipping settings, you must set up shipping service in your Merchant Center or through the Shipping Settings API. Products or groups of products may be linked to a shipping service [shipping_label] through the shipping label.
You may specify up to five shipping services for each product. You may specify various shipping service settings, such as shipping charges and delivery times.
We’ll find the lowest shipping rate and offer it to customers if you provide multiple shipping services for the same product in the same country.
For example:
If you offer one service that includes free shipping on all products over $150 USD and another that includes a carrier-calculated charge, then free shipping will be offered for all products over $150 USD.
Example:
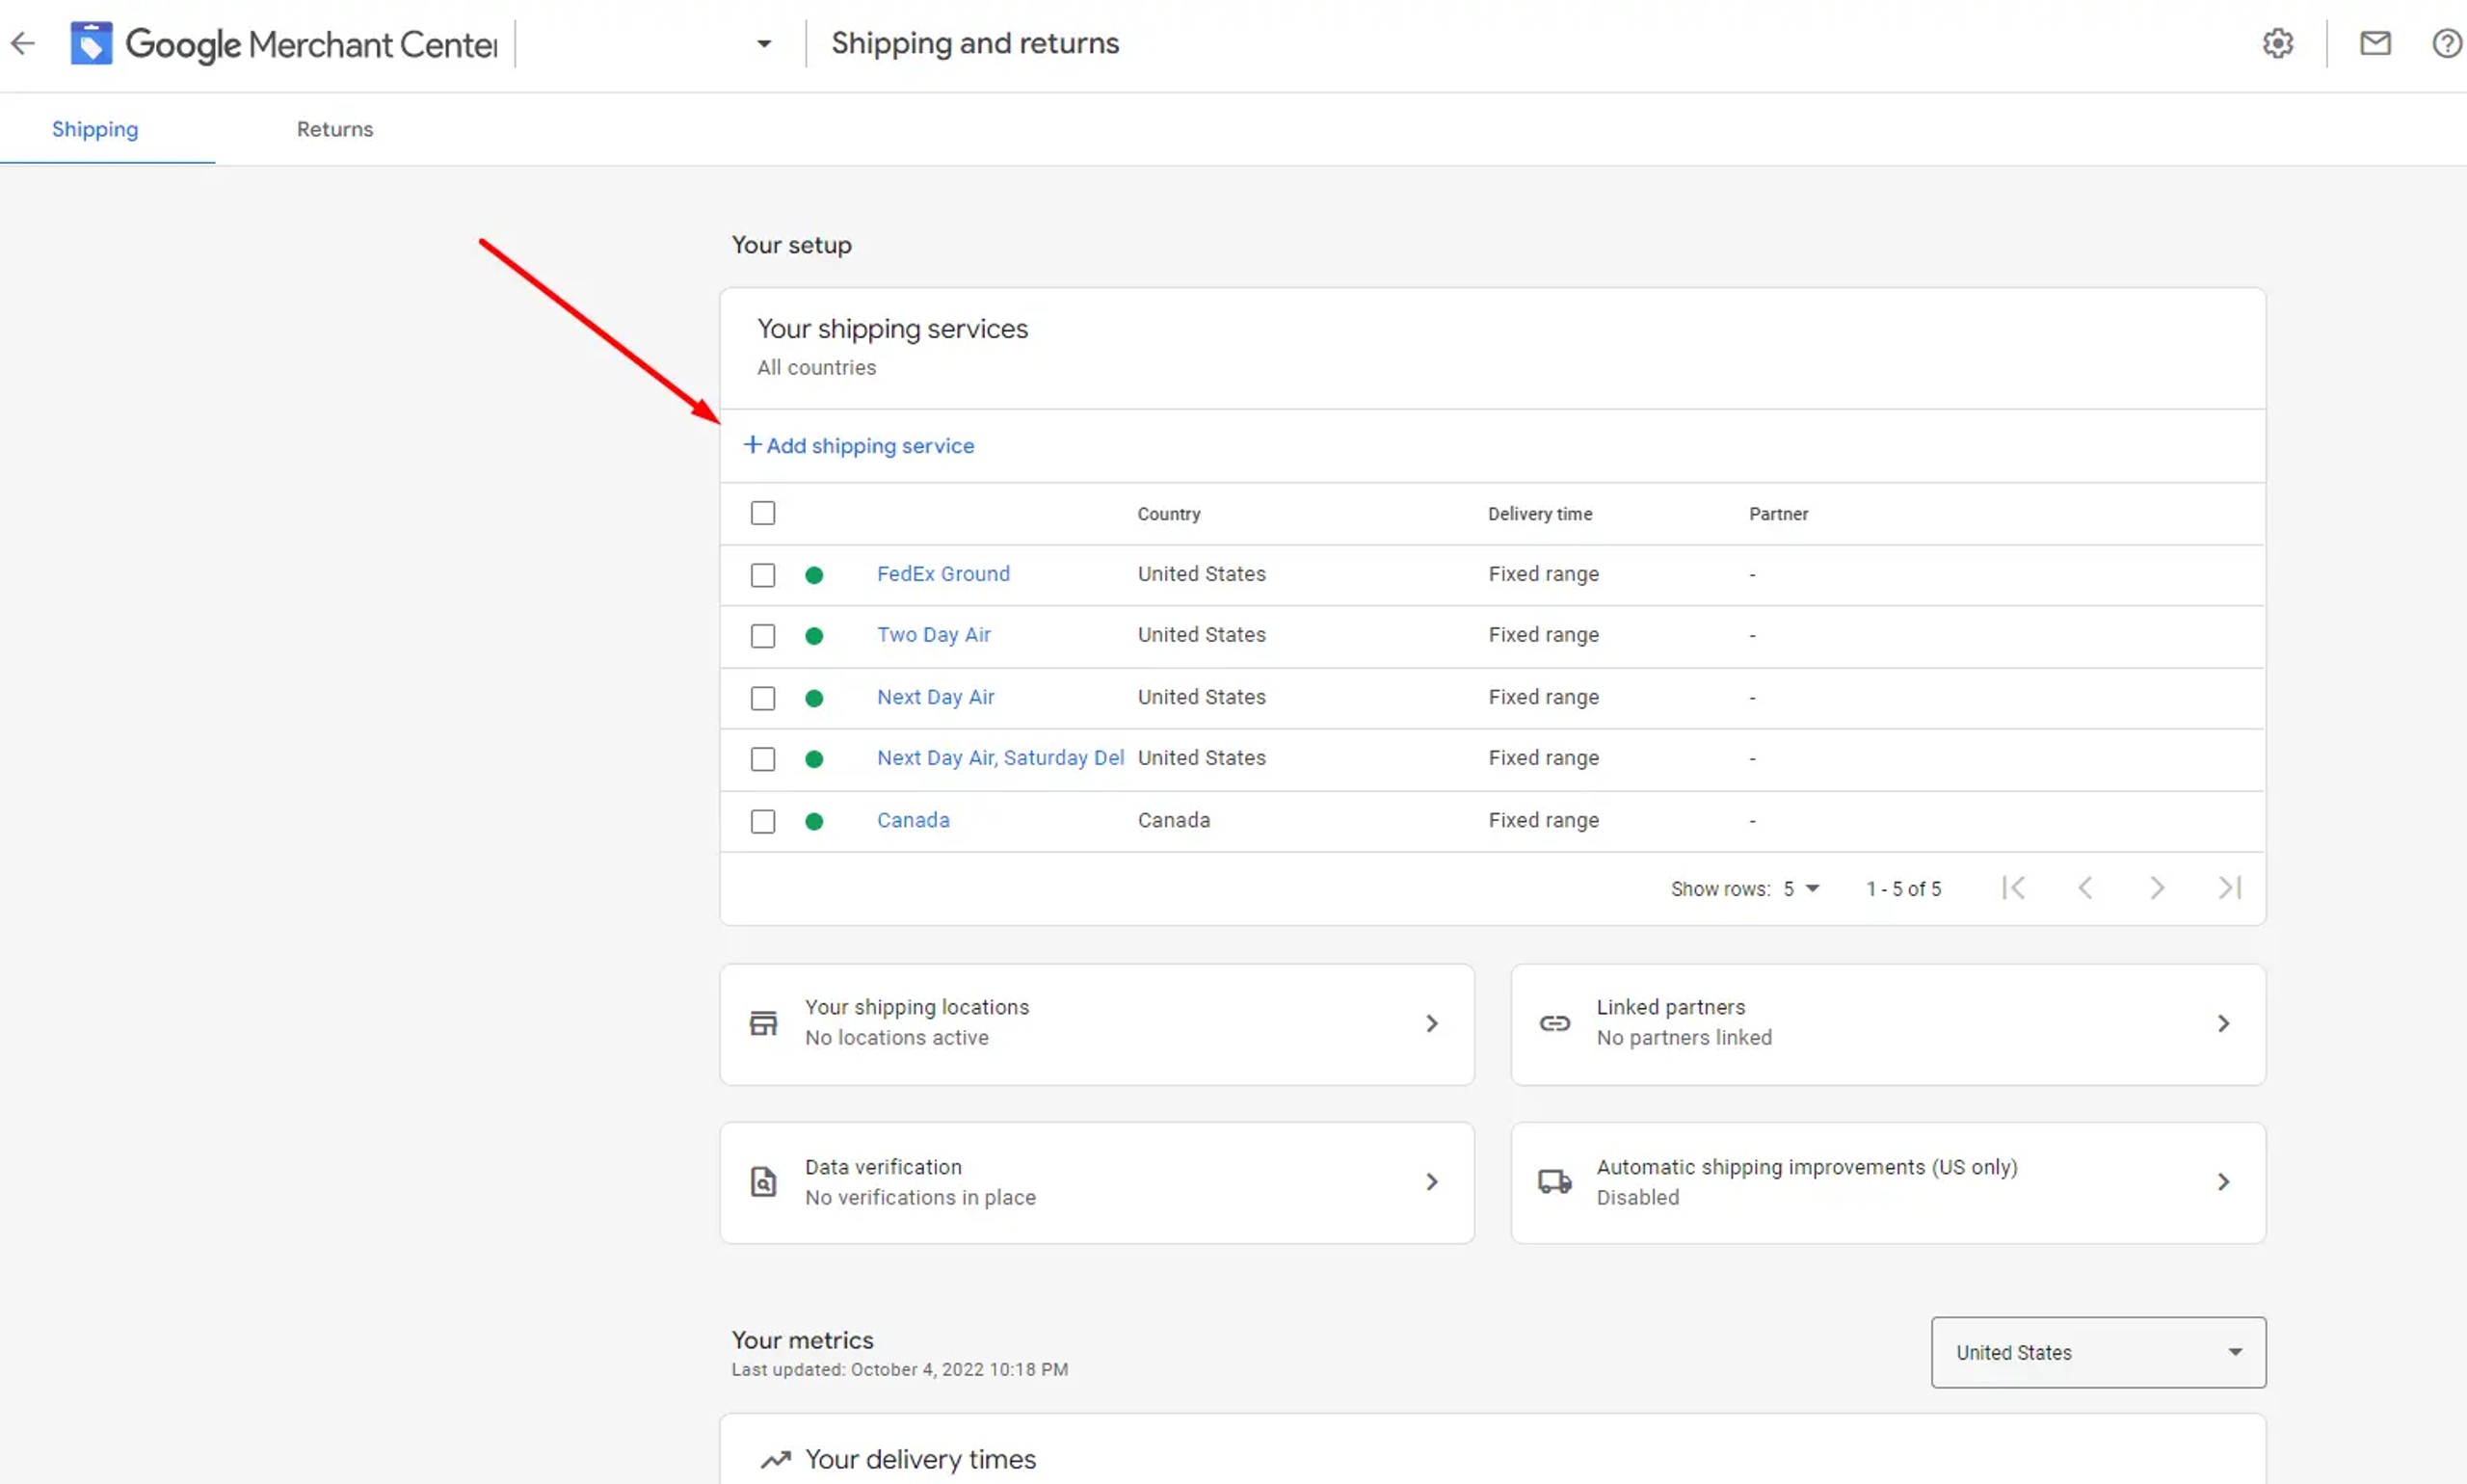
Set up sales tax settings.
Customers must know the amount they will pay for a product before making a purchase. You may collect taxes and submit them to ensure that customers understand the total price of a product.
Taxation can be a complex subject, so there are several ways to report it.

You must follow the correct procedures for submitting tax information, depending on your target country.
More information regarding tax settings can be found here.
Example:
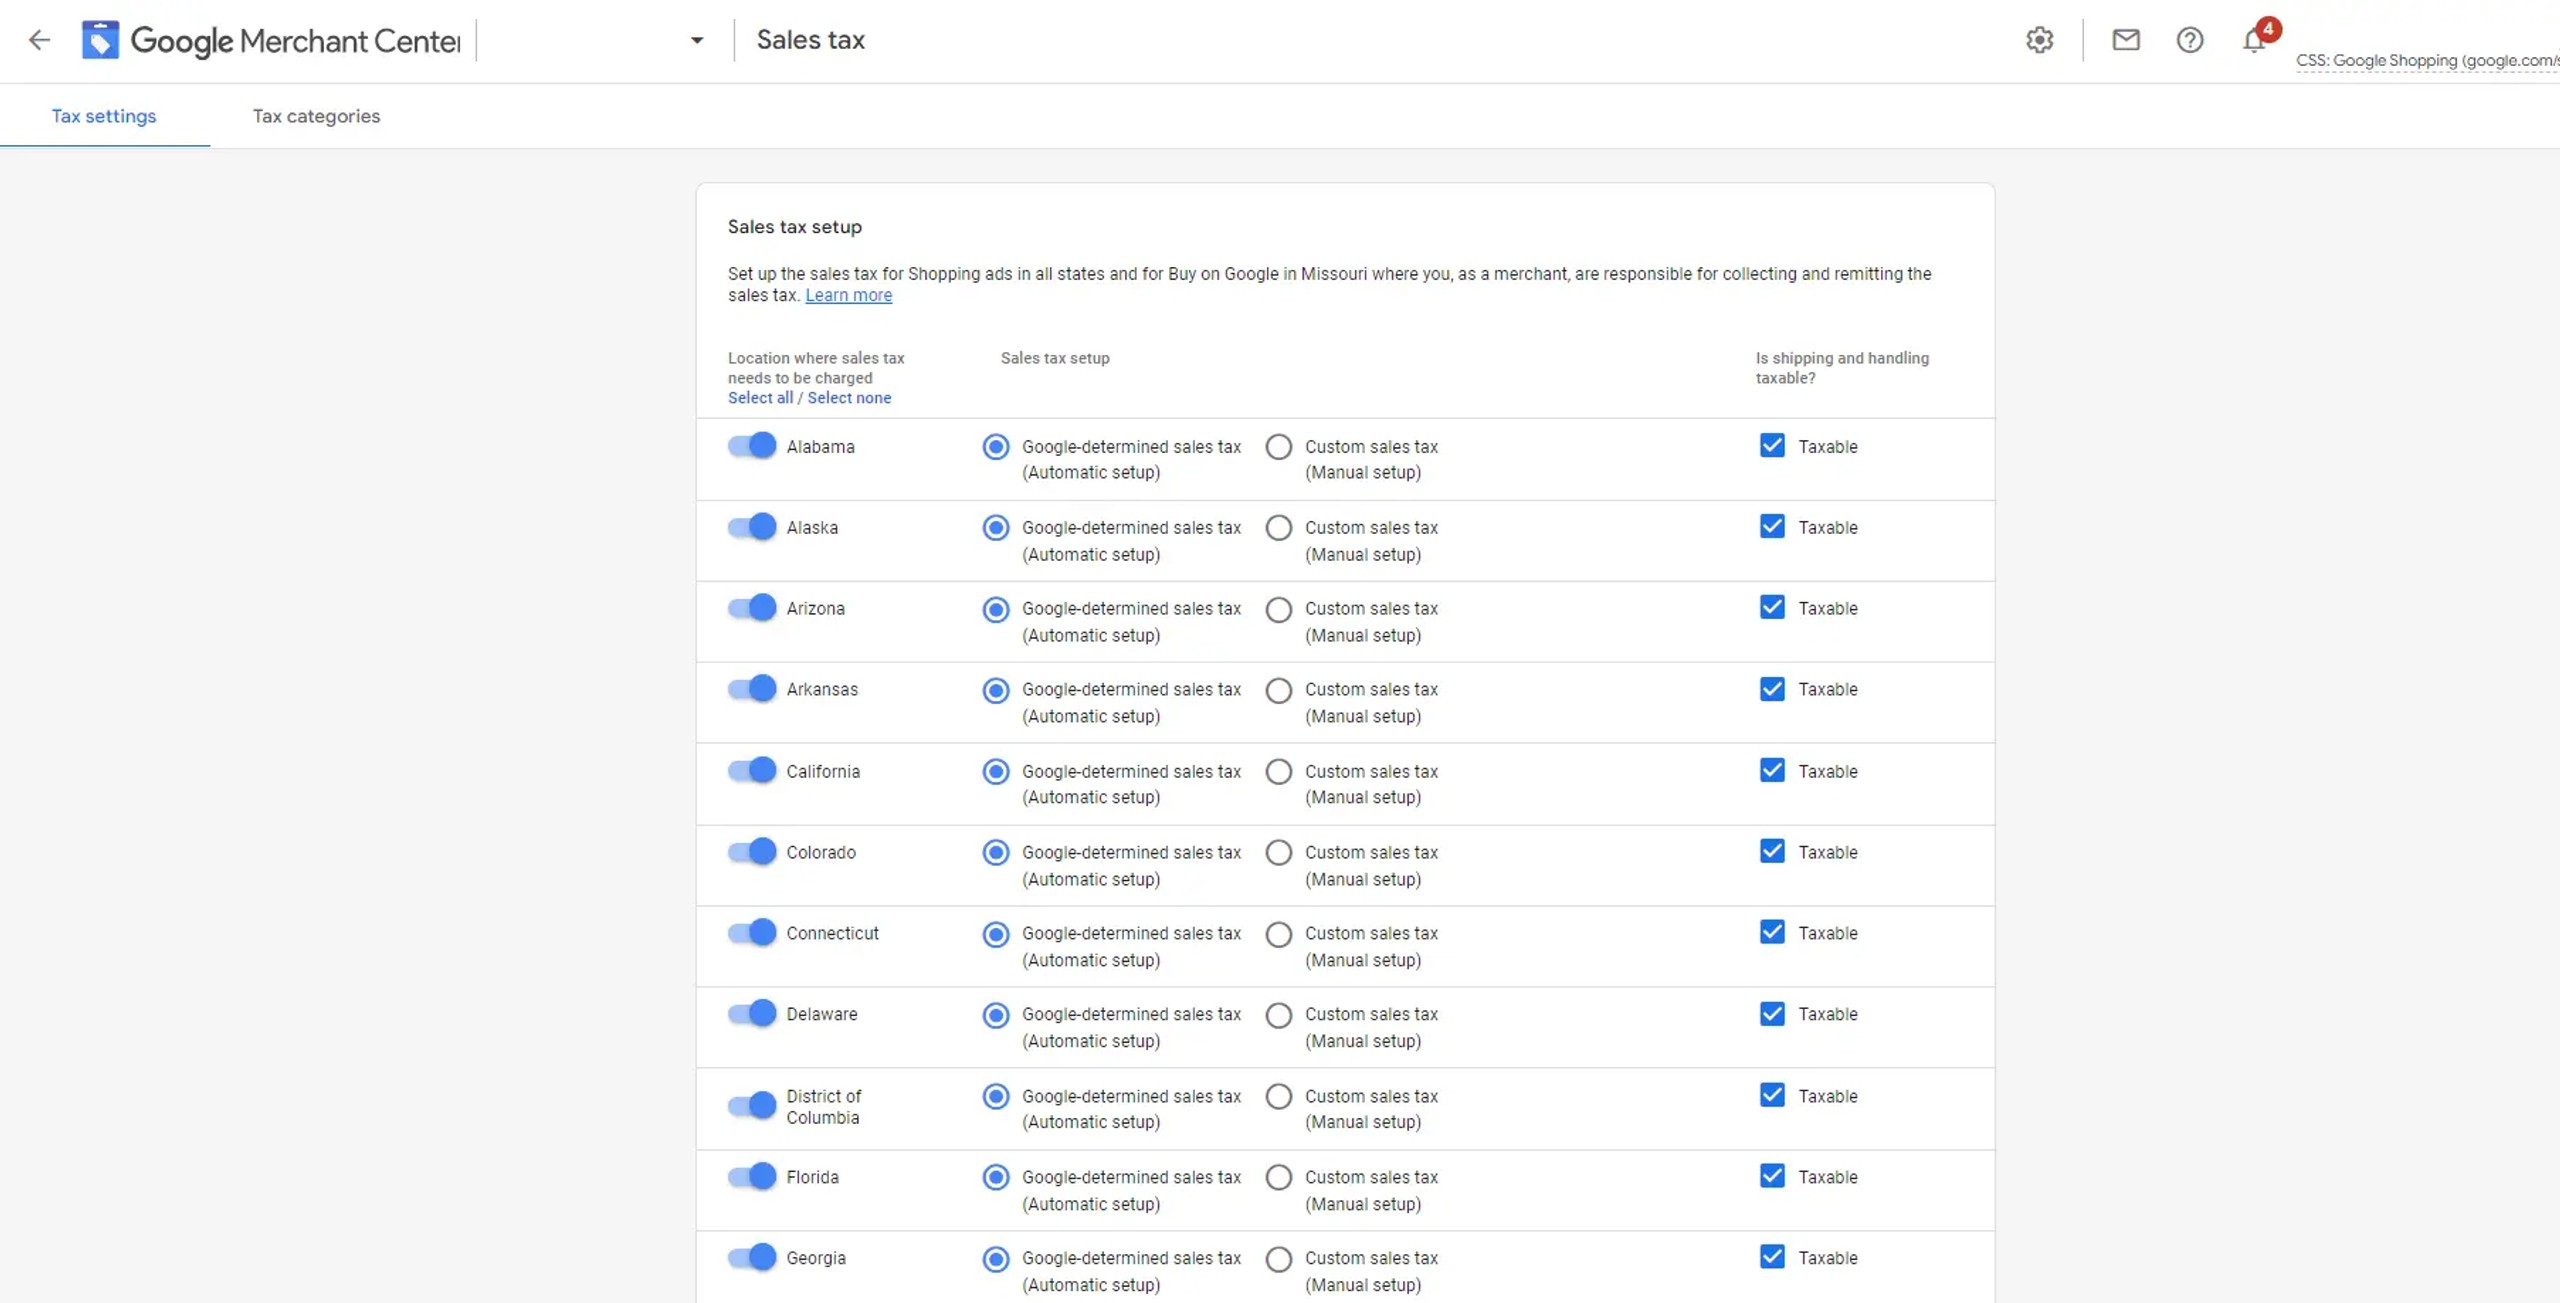
Add Product Feed.
A product feed is a file that lists the products you want to advertise through your Merchant Center in your Performance Max or Google Shopping Campaigns. You will have to assign attributes to each product as you create your product feeds. You can add more than one feed. Here, you may find more information on this part: https://uawc.agency/google-ads-management/google-shopping-advertising/
Once you’ve created a product feed, you can reuse it as many times as you want across any Merchant Center features.
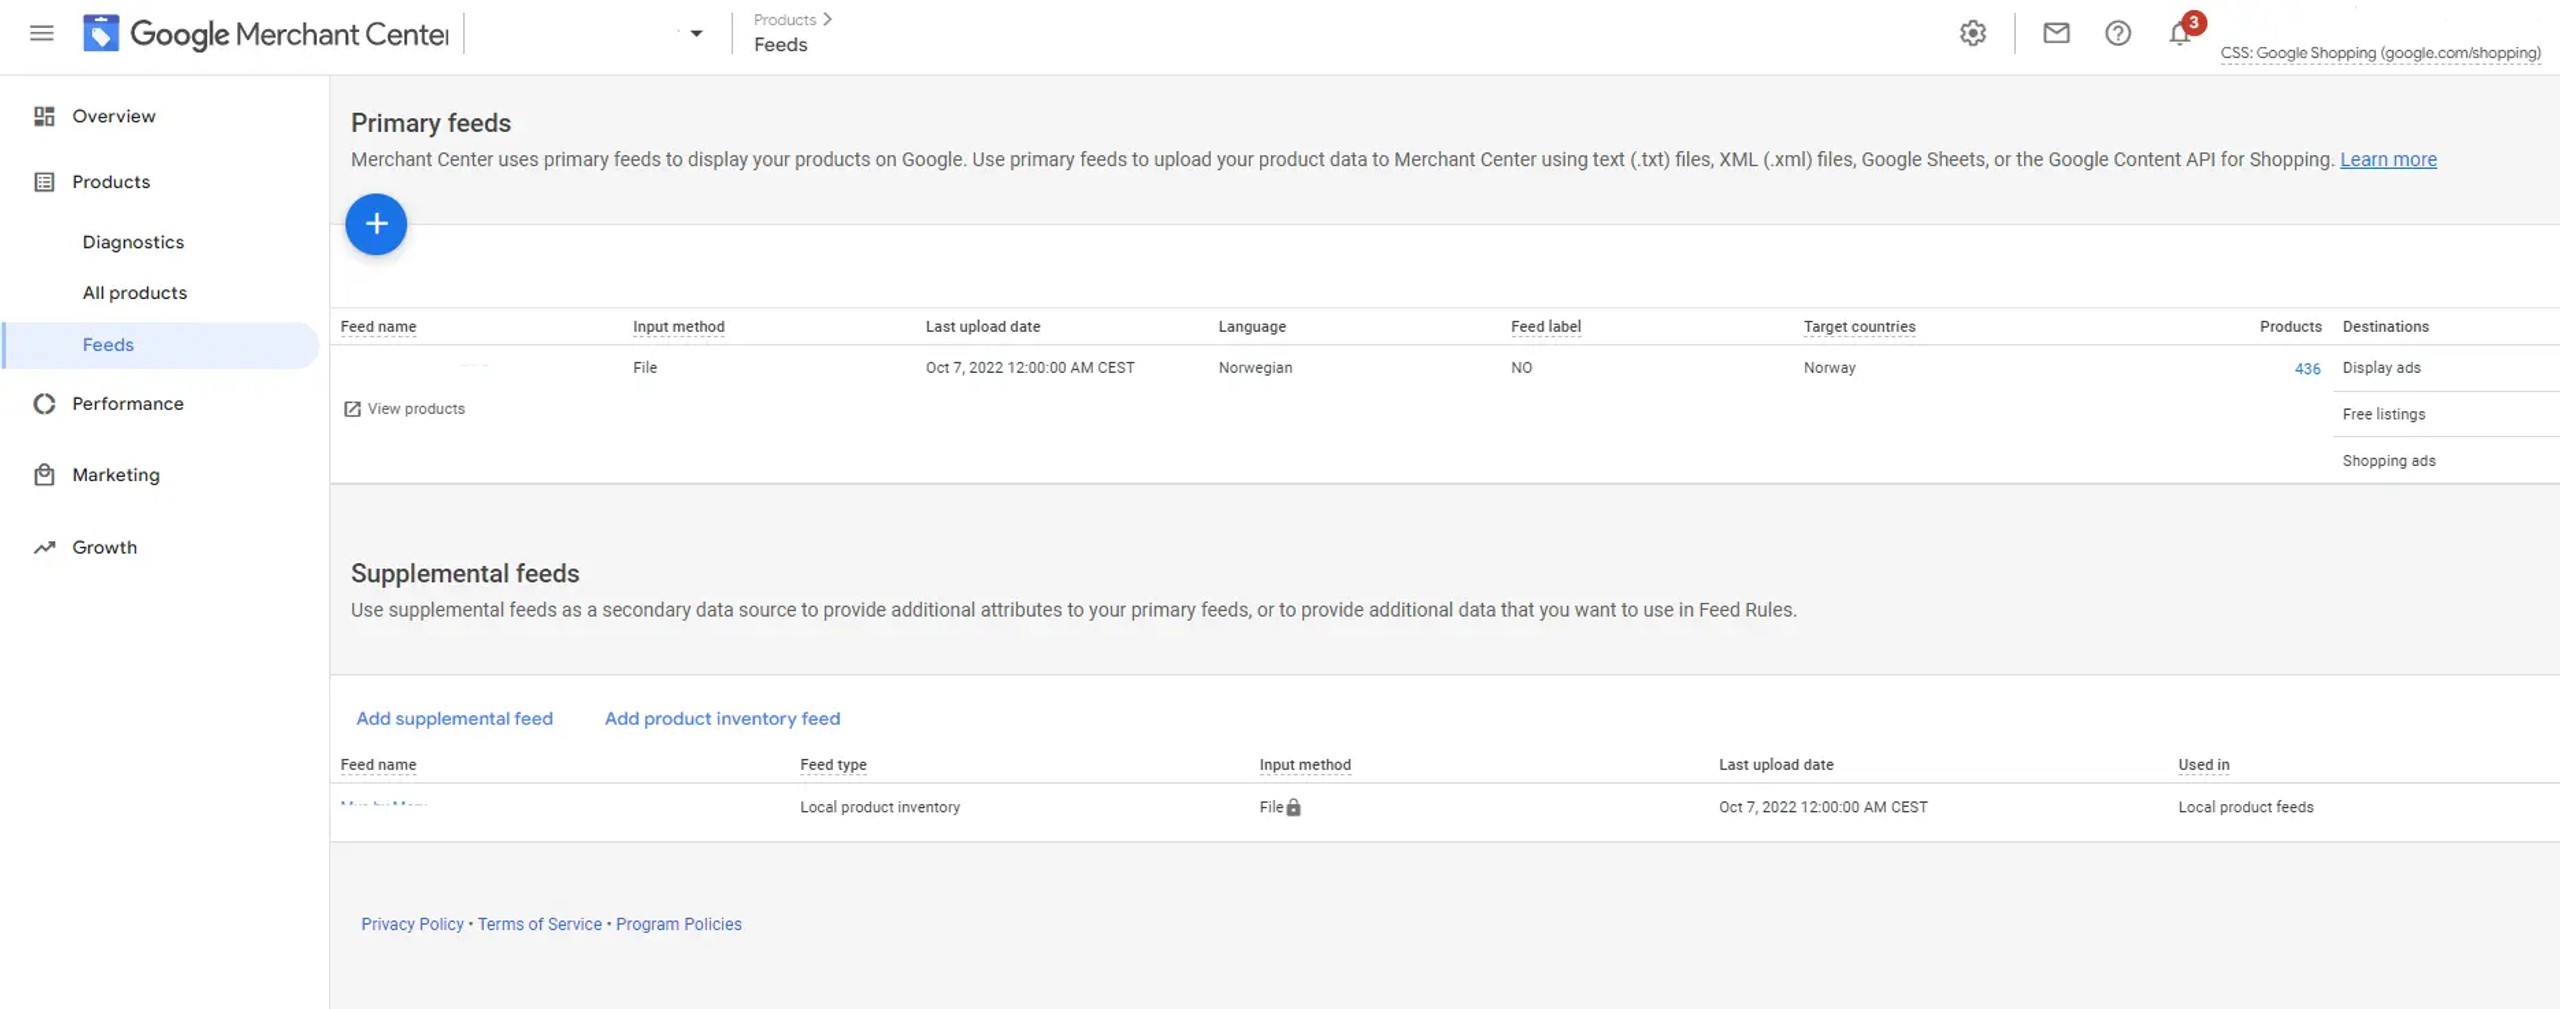
The primary feed
The primary feed is the primary data source of your Google Merchant Center inventory.
If every product you add to your primary feed conforms to Merchant Center account data and eligibility requirements, you won’t need to create any more feeds. Google recommends that you post all of your inventory on one primary feed.
Supplementary feed
Supplementary feeds provide missing data from your primary feed.
Only data already present in one or more primary feeds are updated via supplemental feeds. You may create as many supplemental feeds as you like, and they may contribute to as many primary feeds as you like.
Creating Feeds by using plugins
If you are using WooCommerce, Shopify store, Wix, BigCommerce, or any other top-rated eCommerce platforms for your online store, there are several plugins you can use to create and regularly update the product feed to your Merchant Center account.
Plugins will help you make sure that the feed is updated in regular intervals to avoid any mismatches between your store and product feed, and this will also simplify setup.
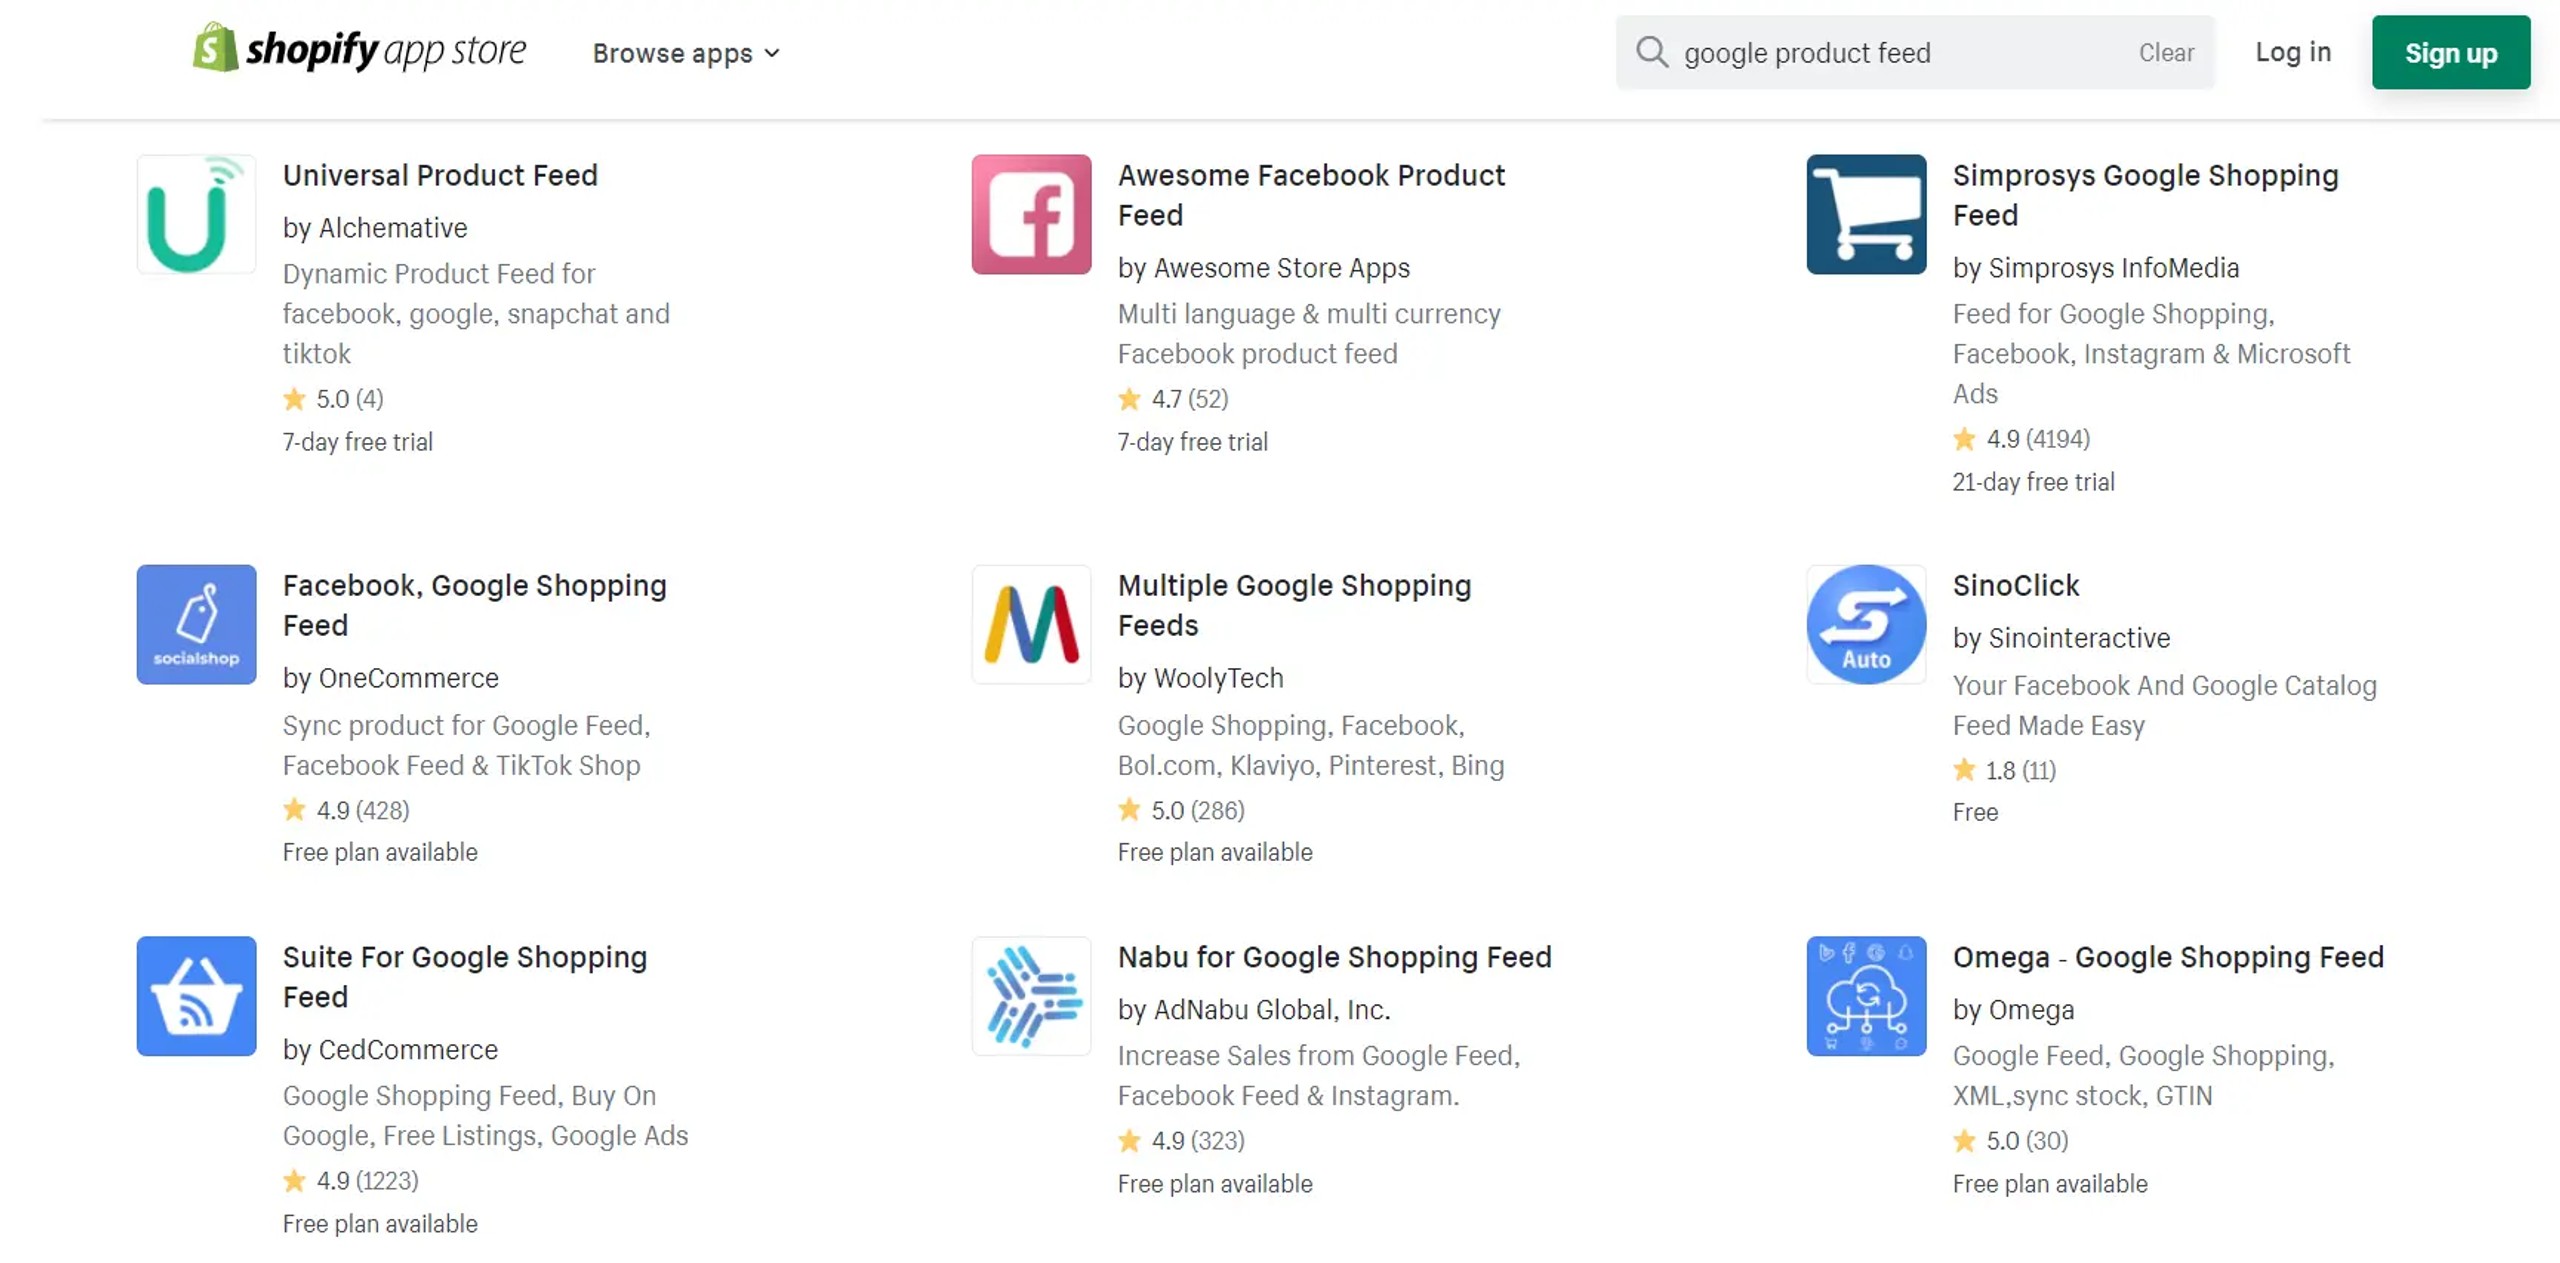
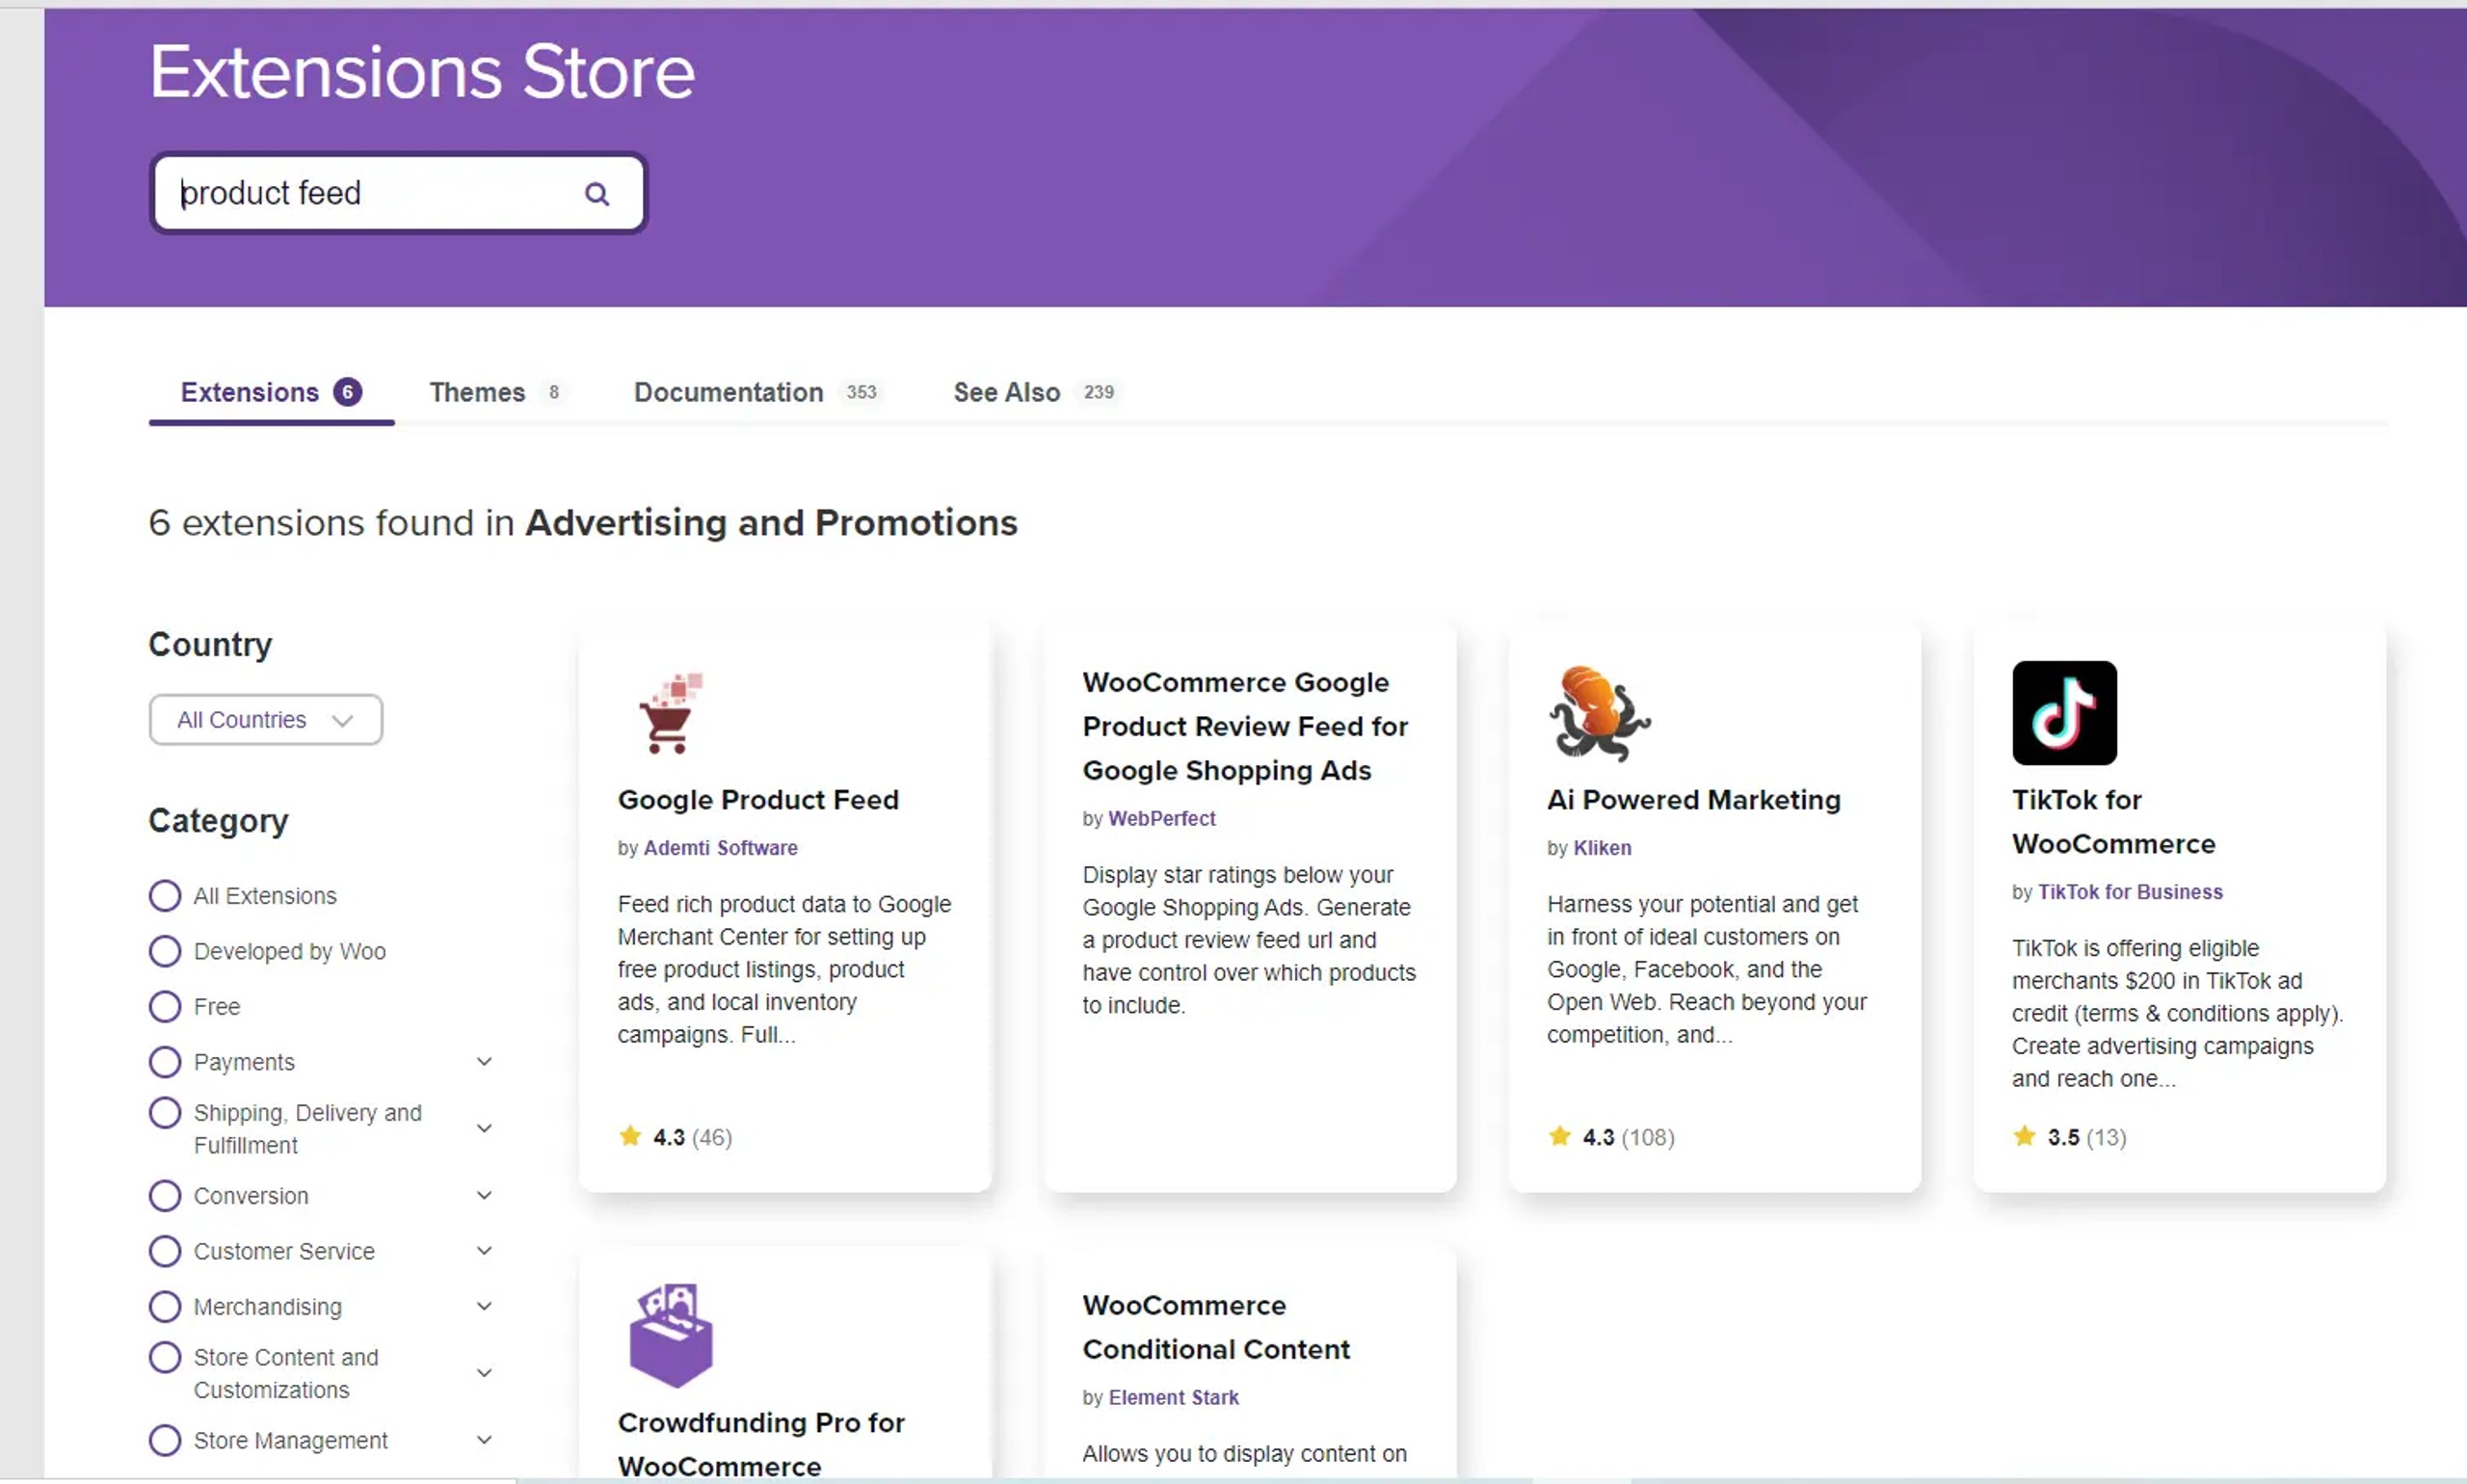
You can find more information on how to effectively work and set up product feed here.
Start the review process – Go to Overview.
Check your applied settings. Make sure you accept the terms and click save.
Link your Google Merchant account with your Google Ads account.
With both a Merchant Center and Google Ads account, you can take advantage of the retail-focused tools of your Google Ads campaigns and the data-centric capabilities of your Google Merchant Center to grow your web presence.
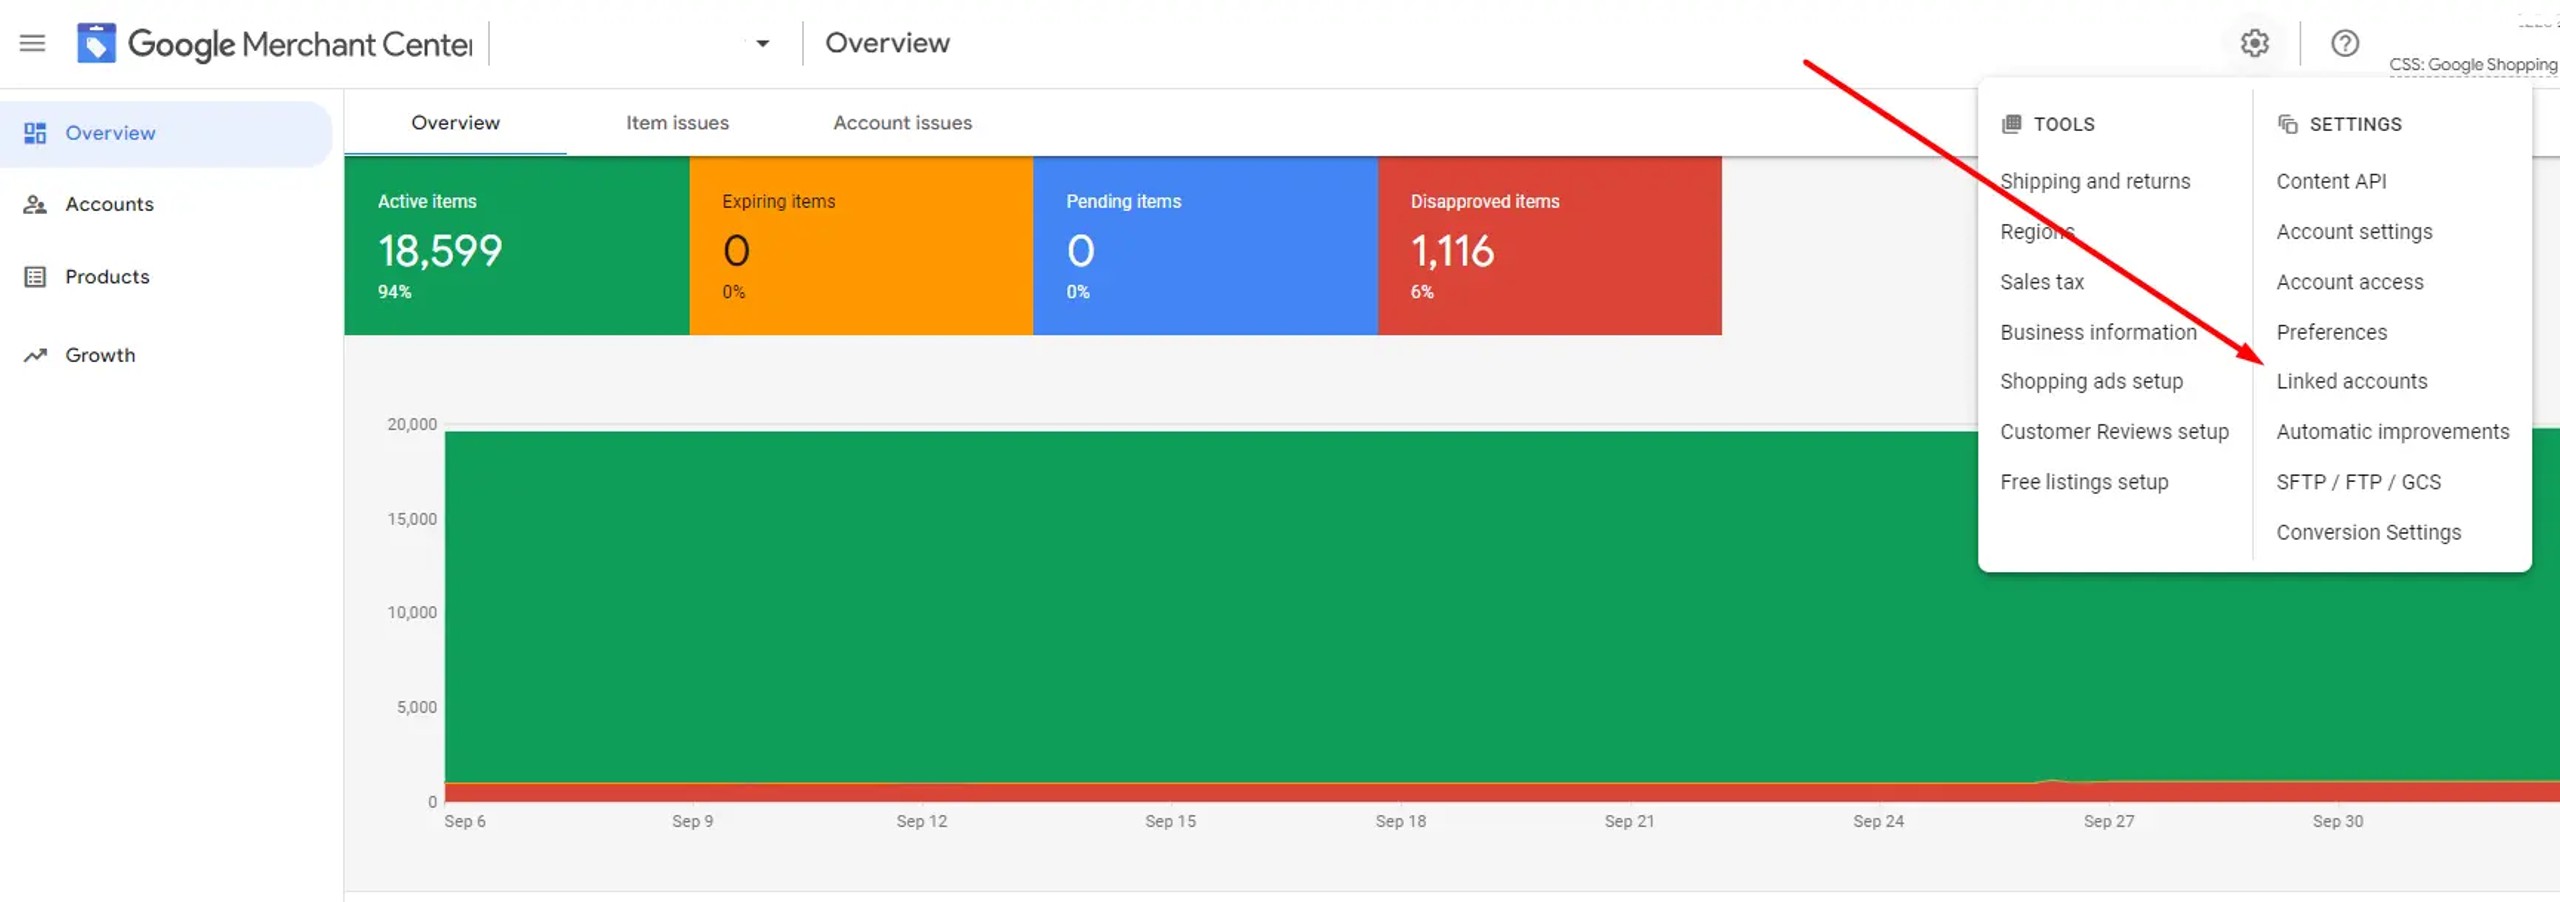
Once you’ve integrated your Google Ads account with your Google Merchant Center, you can access the product information from your Google Merchant Center.
The Google Ads channel automatically syncs your products and relevant information about your store with the Google Merchant Center.
You can then use these items in your Google Ads account, namely in such Campaigns as Shopping ads or Dynamic Remarketing, and new well-known Performance campaigns. Conversely, Google Merchant Centre will provide information regarding items you advertise, such as views or clicks. You may use this data to enhance your campaign or correct your stock.
One more note: your Google ads account should be active, with a payment method added.
Turn on auto-tagging and Link the Google Analytics account Property.
When you turn on auto-tagging, Google adds an identifier to your product page URLs to track each click from your free listings to your online store.
Use auto-tagging to view the performance of free listings in web analytic tools like your Google Analytics account.

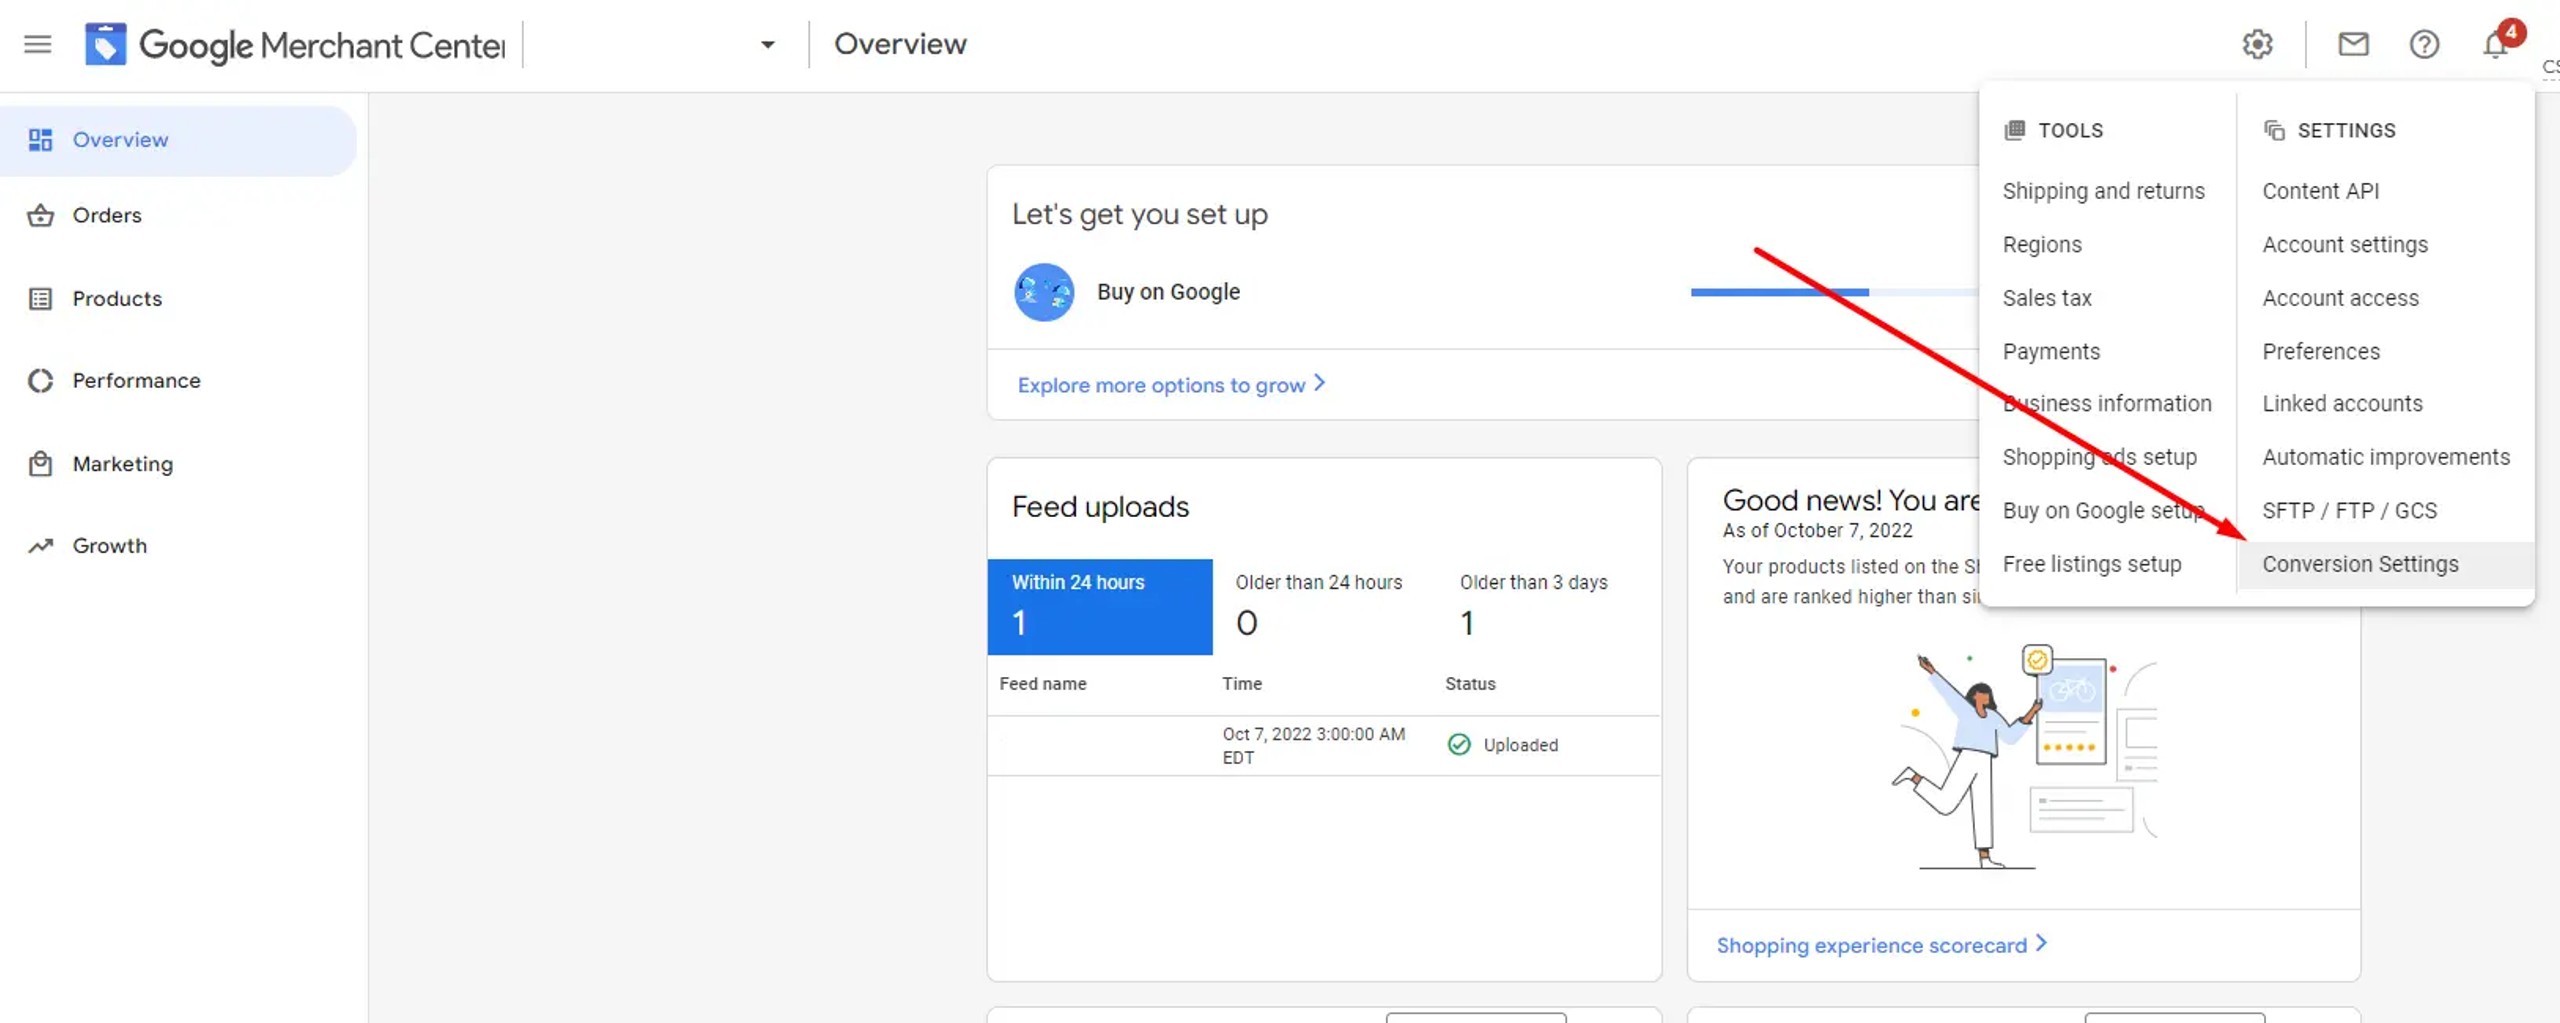
Set up automatic image improvements.
Image improvements: Automatically upgrade your uploaded images, ensure they meet requirements, and enhance overall user experience with automatic image enhancements.
If a promotional overlay is detected on the main image, that product will be disapproved because it doesn’t meet the image requirements.
If you enable the auto-delete tool, Google will attempt to automatically correct those images by removing promotional overlays.
If removed successfully, the image will be replaced, and the product will be re-approved.

Example:
Automatic updates can keep your data more accurate and up-to-date by using automatic item updates. Google can automatically update your products on Google Shopping ads, Buy on Google, and Free Product Listings.
For example:
If your current data feed contains a product that costs $4, but your product landing page shows it as $3, the product price will be adjusted to $3.
This feature is currently available for the attributes [price], [availability], and [condition].
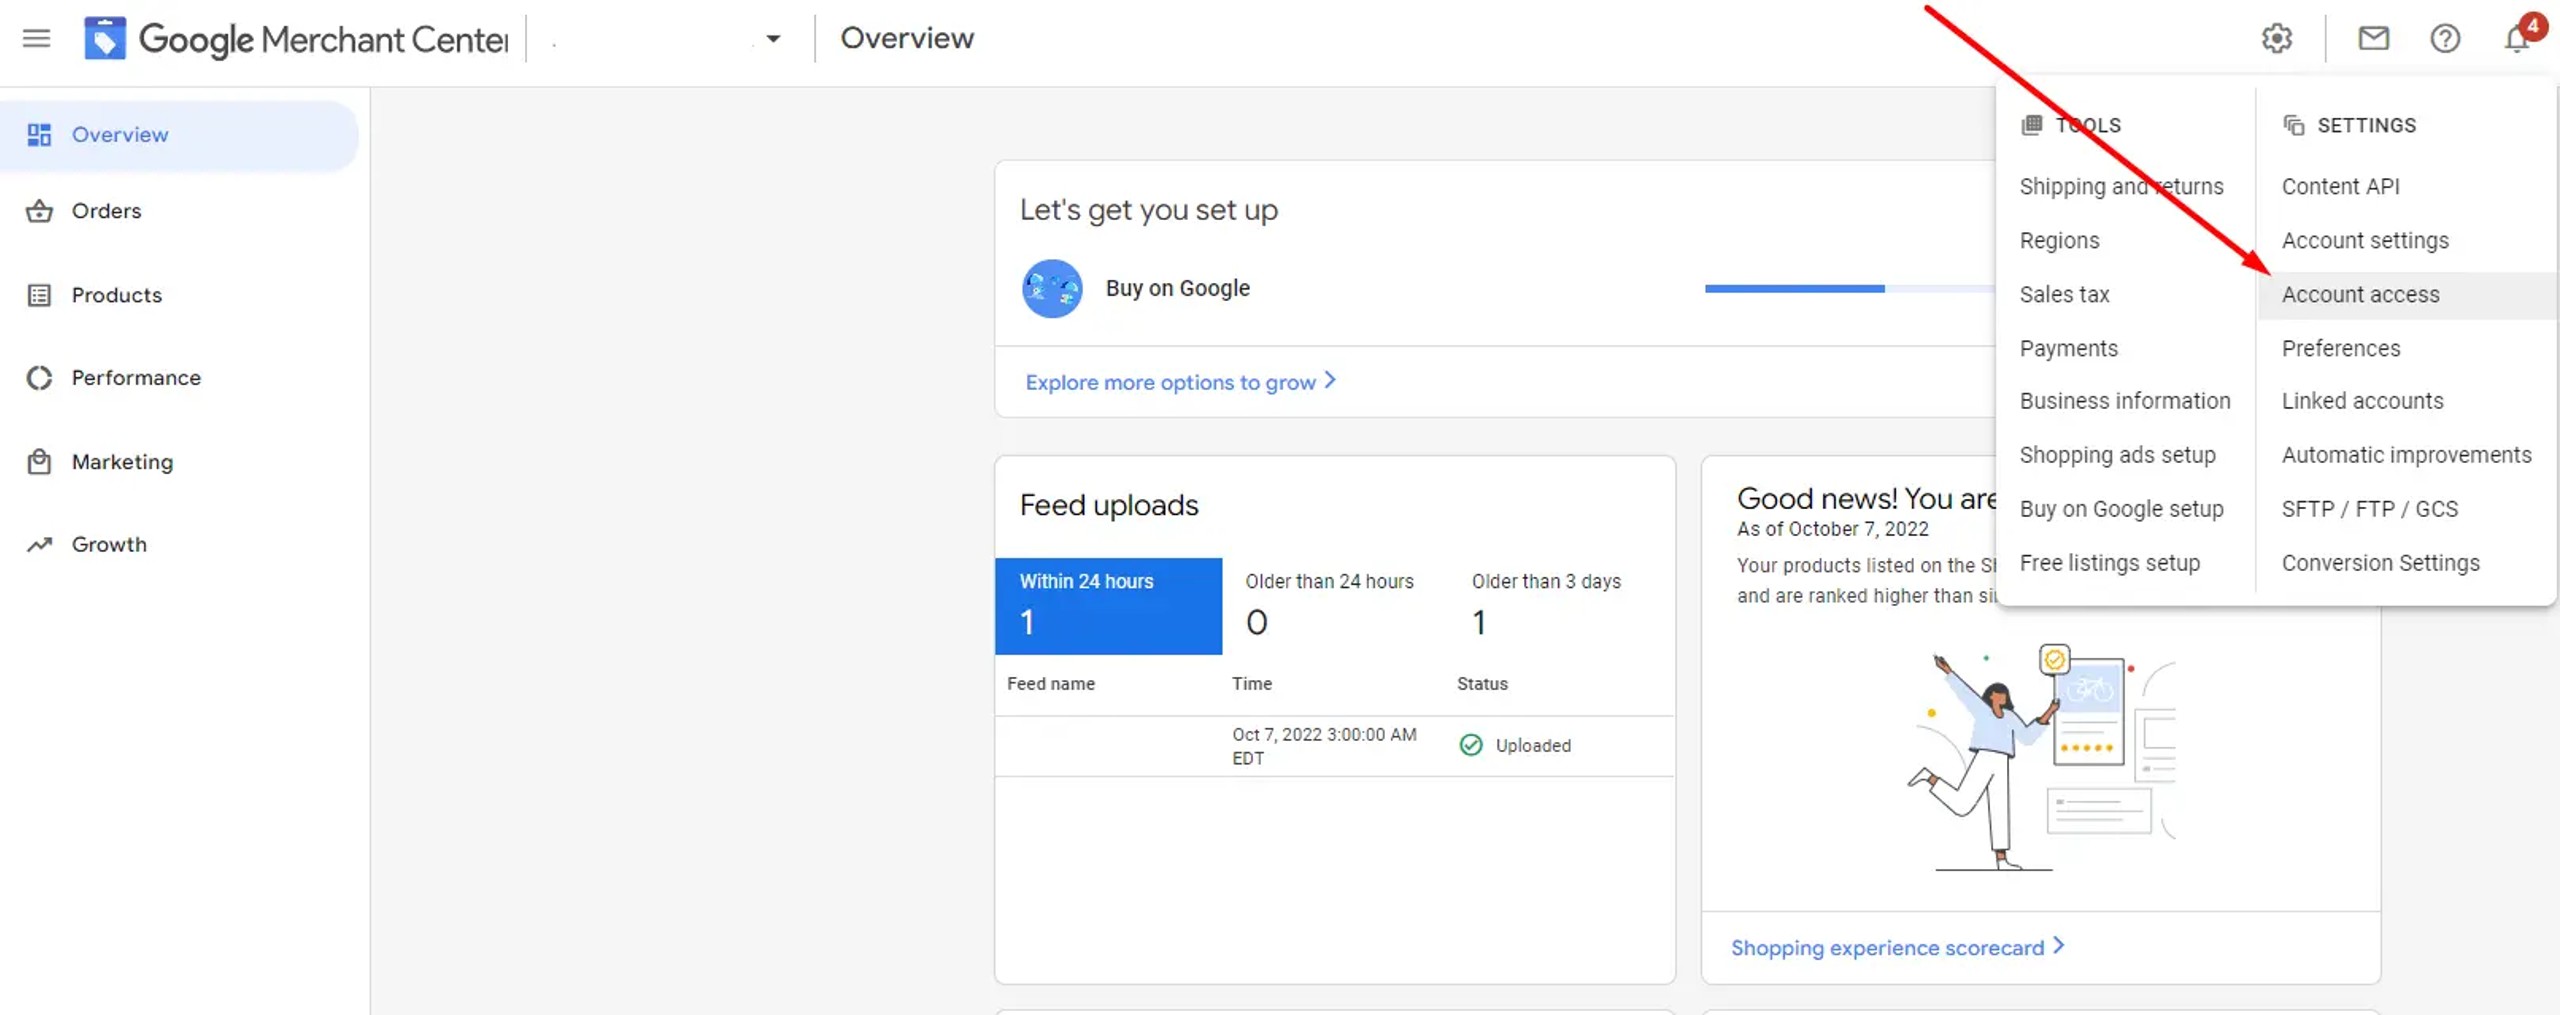
Check account access.
Make sure that only you/your team have access. Set up user roles in your Merchant Center account.
Admin.
An account admin may assign different access levels to different users and have full control over the account.
Standard access.
Except for the “Merchant Center programs” tab and dashboards or reports, you can sign in to your Google Merchant Center and access everything in the account.
In addition to standard account access, the “Users” page enables you to add, delete, or edit user roles.
Reporting manager.
The reporting manager access level allows users to see and edit all reports and dashboards in the account.
Reporting managers may give other users various levels of access to reports and dashboards, providing them with either restricted or unrestricted access.
Email contracts.
You will receive emails based on preferences, but you will not have account access.
Be sure that you set up a free listing option.
Customers can see products from your store from your Google ads campaigns with a free listing option.
If your products are eligible for free listings, they may appear in different places across Google: Google Images, the shopping tab, Google search ads, and YouTube.
Available in the following countries:
Sweden, Finland, Austria, Italy, Vietnam, Russia, New Zealand, Ukraine, Romania, Saudi Arabia, Australia, Germany, UK, Portugal, Indonesia, UAE, Spain, Hong Kong, Mexico, USA, Chile, Malaysia, Turkey, the Netherlands, Singapore, Taiwan, Colombia, Canada, Argentina, the Czech Republic, Hungary, Brazil, Philippines, Israel, Thailand, South Africa, Ireland, Belgium, Japan, Norway, the Republic of Korea, France, Denmark, Greece, Switzerland, India, Poland, and Slovakia.
Before creating a Google Merchant Center account and entering your product data, make sure your company adheres to the Merchant Center account guidelines:
- Promote only products available for direct purchase.
- Use official language.
- Inform customers of your return and refund policy.
- Collect user information responsibly and securely.
- Follow relevant policies.
- Verify that your data meets the product data specification.
- Log in to your Google Merchant Center account regularly.
